Surveillance Hard Drive Selection Basics for Nvr and Dvr
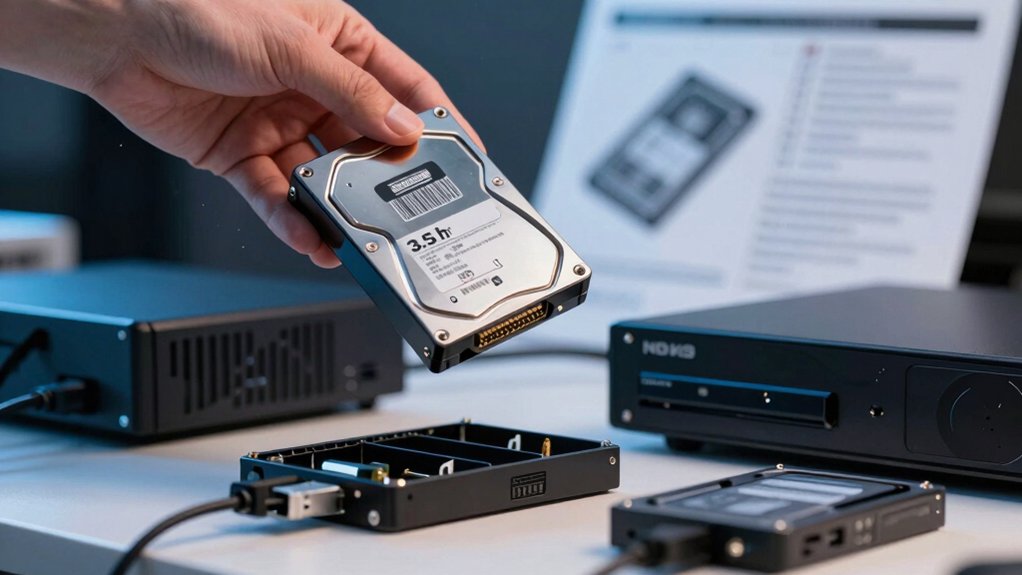
You should pick 3.5″ surveillance-class SATA drives (e.g., SkyHawk/WD Purple) rated for 24/7 sustained writes and match your recorder’s per-bay max capacity and RAID support.
Calculate storage from per-camera Mbps × retention days; add 20–40% headroom and choose a RAID level balancing usable capacity and fault tolerance.
Check workload rating (TB/yr), MTBF, vibration and thermal specs, form factor, and warranty. Follow maintenance and compatibility procedures to preserve continuous recording.
Learn sizing and install steps next.
Surveillance Hard Drive Selection Basics for Nvr and Dvr: You should pick 3.5″ surveillance-class SATA drives (e.g., SkyHawk/WD Purple) rated for 24/7 sustained writes and match your recorder’s per-bay max capacity and RAID support . Calculate storage from per-camera Mbps × retention days; add 20–40% headroom and choose a RAID level balancing usable capacity and fault tolerance.
Quick Overview
- Use 3.5″ internal SATA surveillance-rated drives (e.g., SkyHawk, WD Purple) designed for 24/7 continuous recording.
- Calculate per-camera bitrate from resolution, FPS, and codec to size total storage and retention requirements.
- Choose RAID level that balances usable capacity, write performance, and fault tolerance for continuous sequential writes.
- Overprovision 20–40% headroom and add 10–25% overhead for peaks, indexing, and future growth.
- Verify recorder compatibility: capacity limits, interface, mounting. Check warranty and workload (TB/year) ratings.
Quick Buy Guide: Which Surveillance Drive to Choose
Which drive should you buy for an NVR/DVR? Choose a 3.5” internal SATA drive labeled for surveillance: Seagate SkyHawk or WD Purple are preferred models with firmware tuned for 24/7 workloads and higher MTBF. First, confirm your recorder’s maximum supported capacity. Capacities span 1–12TB and often include a 5-year warranty.
Next, apply a budget strategy: match capacity to required retention while prioritizing surveillance-specific drives over cheaper desktop options to avoid premature failures. Then verify physical and firmware compatibility, RAID support if used, and warranty transfer conditions.
Also, account for noise considerations. Surveillance drives are optimized for continuous operation and typically emit consistent, lower-frequency noise than desktop drives; however, mounting and enclosure ventilation affect perceived noise. Finally, procure from authorized suppliers, document serial numbers, and label drives on installation. Follow manufacturer installation procedures and initiate a burn-in or parity check before integrating live camera streams.
Calculate Storage: Cameras, Retention, Resolution & FPS
How much storage will your system actually need? You’ll calculate storage by first determining per-camera data rate based on resolution, FPS, codec, and scene activity. Use manufacturer or measured Mbps for that camera at your chosen quality. Multiply per-camera Mbps by camera density (number of cameras per NVR/DVR) to get aggregate throughput.
Convert Mbps to MB/hour, then to GB/day. Next, apply your data retention requirement: multiply GB/day by the retention period (days) to get total capacity. Example benchmarks help: 10 cameras at 1080p/30fps with medium-quality H.264 can consume ~19 TB for 30 days; dropping to 18 fps can reduce that to ~11 TB.
Remember scene activity and compression efficiency will vary actual consumption, so add overhead (10–25%) for peaks and indexing. Document assumptions (resolution, FPS, codec, activity) and recalculate when changing camera density or retention to maintain predictable data retention.
Pick Capacity and RAID for Your Retention Goals
Want predictable retention and reliable playback? First, define your retention scope (e.g., 30 days). Calculate per-camera data rates from resolution, FPS, and compression. Sum to get total daily storage, then multiply by retention days to determine raw capacity needs.
Next, apply RAID considerations. Select a RAID level that balances usable capacity, write performance, and fault tolerance: RAID 5 or RAID 6 are common for surveillance. Convert raw capacity into usable capacity based on chosen RAID and drive count. Then, over-provision 20–40% headroom for growth and to avoid full arrays under 24/7 recording.
Document drive counts, usable TB, and rebuild scenarios so recovery time fits your retention plan. Implement monitoring to regularly review storage utilization and adjust capacity, retention windows, or camera additions as needed.
Finally, validate that the RAID write performance meets sustained sequential writes from all cameras to ensure reliable playback throughout the retention scope.
Choose Drives by Workload Rating, MTBF, and Durability
With capacity and RAID defined, pick drives rated for continuous surveillance workloads so your array meets sustained write demands without latency spikes or premature failures. First, verify the workload rating matches 24/7 surveillance: manufacturers specify TB/year or IOPS targets; select drives whose rating exceeds your calculated camera count and stream bitrate.
Next, check MTBF figures to confirm long-term reliability under nonstop operation. Prefer models with higher MTBF and documented field performance. Evaluate durability features: vibration resistance, shock tolerance, and thermal handling reduce failure risk in multi-bay enclosures. Confirm compatibility with your NVR/DVR platform and RAID controller; incompatibility can cause drops or rebuild issues.
Review warranty terms for surveillance use: look for multi-year coverage that explicitly supports continuous-write scenarios. Finally, document drive selection against system load and recording profile. Then test under expected load to validate sustained write stability before deployment.
Optimize Recording Settings to Reduce Storage Needs
Why not pare recording to only what matters: adjust motion detection, schedules, FPS, resolution, and encoding to cut storage without compromising required evidence quality. You’ll treat settings as tools: enable motion triggers to record events, set schedules to cover peak hours, and disable continuous capture during idle periods.
Apply fps reduction where scene dynamics allow to shrink bitrates without losing usable frames. Configure motion triggers with sensitivity zones and debounce time to avoid false saves. Create time-based schedules aligned with shifts and known activity windows. Reduce fps to the minimum that preserves identification; for example, 10–15 fps for slow scenes. Lower resolution and tighten encoder presets incrementally, validating identification at each step.
Follow a procedural test: change one parameter, run a 48–72 hour trial, measure storage delta and evidence quality, then commit or revert. Combine adjustments—motion triggers, fps reduction, resolution, and encoding—for multiplicative storage savings while retaining forensic value.
Verify Compatibility: Interfaces, Form Factor, and Recorder Limits
How do you confirm a drive will work reliably in your recorder? Start with compatibility verification: match the drive interface to the recorder (SATA or SAS) and confirm interface compatibility at the version level (e.g., SATA2 3Gb/s vs SATA3 6Gb/s). Check the recorder’s documentation for supported interfaces and firmware notes before purchase.
Next, verify form factor and mounting fit. Confirm the recorder’s allowable drive size (3.5″ vs 2.5″), depth, and screw locations so the drive physically fits the chassis and trays.
Confirm capacity and recorder limits. Verify the maximum usable capacity per drive and the total supported array size to avoid unsupported larger drives. Cross-check the recorder’s maximum number of drives and any per-bay capacity recommendations.
Finally, validate manufacturer compatibility lists and surveillance workload support. Only install drives listed for your DVR/NVR model and follow recommended per-drive capacity and drive-count limits to maintain performance and reliability.
Warranty, Support, and Maintenance Checklist
After you’ve confirmed compatibility and fit, verify warranty, support, and maintenance terms before installing drives in your NVR/DVR. Check warranty considerations: most surveillance drives offer a 5-year warranty across 1TB–12TB SKUs. Confirm replacement policy specifics for continuous-operation enterprise drives so you can plan on-site swaps with minimal downtime.
Validate support scope: ensure manufacturer-backed customer support and Recovery services cover drive failures and data-retrieval assistance for your deployment. Establish a maintenance cadence: schedule firmware updates and health monitoring to detect degraded sectors and preempt failures in 24/7 environments. Preserve documentation: keep installation guides and troubleshooting resources accessible to technicians.
- Confirm 5-year warranty coverage and RMA turnaround times.
- Verify manufacturer support hours, contact methods, and Recovery services included.
- Define firmware update frequency and automated health-check procedures.
- Document replacement steps, drive labeling, and failure logging for audits.
Follow this checklist to reduce downtime, simplify on-site replacements, and maintain continuous recording integrity.
Frequently Asked Questions
Are Surveillance Drives Compatible With Nas/Raid-Specific Drives?
Yes, you can often use surveillance drives in NAS/RAID setups, but you’ll want to verify NAS compatibility. Check drive firmware, sustained write performance, vibration tolerance, and RAID error recovery features.
Configure firmware settings and RAID array parameters to match the drive’s behavior. Monitor SMART metrics and use compatible RAID controllers. If you need continuous multi-stream recording and high reliability, prefer drives explicitly rated for NAS or surveillance to avoid unexpected failures.
Can Drives Be Used Interchangeably Between NVR and PC Storage?
Yes, drives interchangeability is possible, but you’ll verify firmware, interface, and duty-cycle specs first. Install the drive, confirm BIOS/UEFI recognition, and format to the target filesystem.
Monitor ambient temperature impact. Ensure cooling and drive placement meet rated operating ranges. Run SMART and sustained-write tests to validate reliability under expected load. If specs differ (RAID vs surveillance firmware), swap only after confirming compatibility and backup.
What Is the Impact of Ambient Temperature on Drive Lifespan?
Higher ambient temperature shortens drive lifespan. You’ll see accelerated wear, increased read/write errors, and higher failure rates in surveillance drives. Maintain recommended enclosure temps, ensure proper airflow, and use temperature monitoring to prevent sustained heat above spec.
If temperatures rise, reduce duty cycles, relocate drives, or add cooling. Log temperature trends and replace drives proactively when they approach elevated operating thresholds to preserve overall system reliability and data integrity.
How Often Should I Replace Surveillance Drives Proactively?
You should replace surveillance drives proactively every 3–5 years depending on duty cycle, ambient conditions, and error trends. Implement a replacement schedule tied to SMART alerts, read/write hours, and temperature logs.
Maintain fault tolerance by using RAID or spare units so you can swap drives without data loss. Test replacements during low-activity windows, verify rebuilds, and document serial numbers and installation dates for future audits and lifecycle planning.
Are Refurbished Surveillance Drives Safe for Critical Systems?
Refurbished drives can be used, but you shouldn’t assume they’re safe for critical systems. Verify refurbishment source, test SMART attributes, run full surface scans, and confirm warranty and return policies.
Use only drives graded for enterprise or surveillance use; track reallocated sectors and power-on hours. Implement redundancy (RAID, hot spares) and frequent backups. If risk tolerance is low, avoid refurbished drives to minimize critical system risk.
Conclusion
You’ve learned how to match drive capacity and RAID to camera count, retention, resolution, and FPS. You have also learned how workload rating, MTBF, and durability affect long-term reliability.
Now, verify recorder compatibility (form factor, interface, channel limits). Size drives to meet retention with margin, and configure recording settings (bitrate, GOP, motion) to cut storage.
Finally, choose drives with proper warranty/support and schedule maintenance and periodic integrity checks to ensure continuous surveillance.
Related reading: Micro SD Cards — a closer look at this topic.