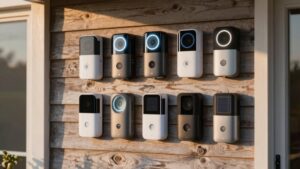
Installing a Battery Video Doorbell and Setting Motion Zones
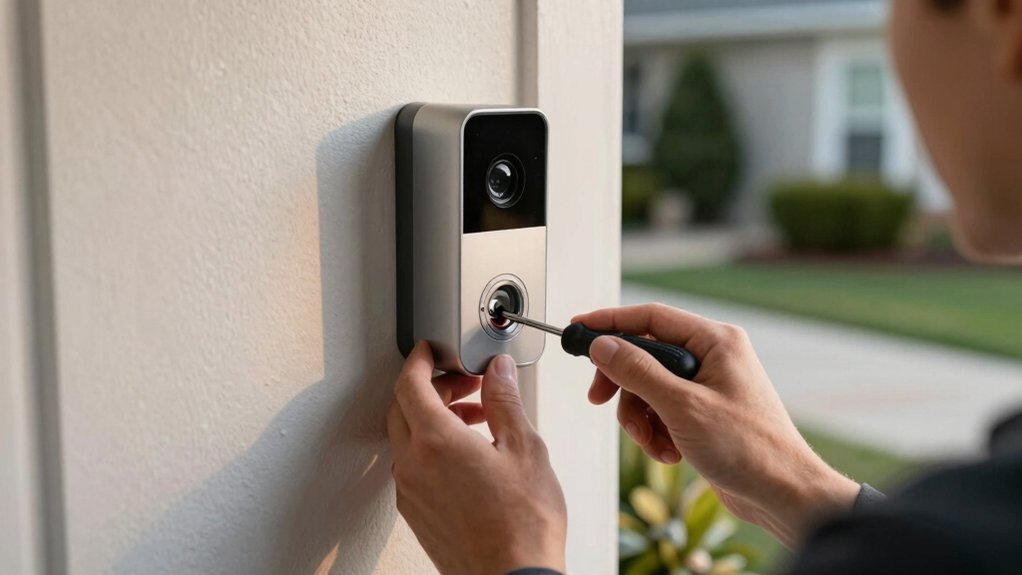
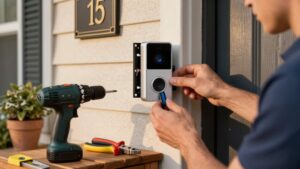
You’ll charge the doorbell (removable or built-in) fully. Pick a sheltered spot about 42–48 inches high facing approach paths. Mount using the supplied wedge, corner kit, or standard bracket with appropriate anchors for your surface.
Install battery or hook up power, secure the faceplate, then run the in-app setup: scan the QR, join Wi-Fi, name the device. Finally, configure motion zones and sensitivity to limit alerts. Keep going to get step-by-step mounting and tuning tips.
Installing a Battery Video Doorbell and Setting Motion Zones: You’ll charge the doorbell (removable or built-in) fully. Pick a sheltered spot about 42–48 inches high facing approach paths. Mount using the supplied wedge, corner kit, or standard bracket with appropriate anchors for your surface. Install battery or hook up power, secure the faceplate , then run the in-app setup: scan the QR , join Wi-Fi, name the device.
Quick Overview
- Mount the doorbell about 42–48 inches (1.2 m) high for optimal face framing and reliable motion triggers.
- Fully charge removable or built-in battery via USB until the LED shows green before final mounting.
- Use the included wedge, corner kit, or correct anchors (no anchors for wood; 1/4″ pilot and anchors for masonry) to securely mount.
- Complete in-app setup: Set Up a Device → Doorbell, scan QR, press back button for setup mode, then connect to Wi‑Fi.
- Configure motion zones and sensitivity in the app. Test with Live View and refine zones to reduce false alerts.
Who This Guide Is For and What You’ll Learn
Who should use this guide and what will you get out of it? You’ll use this if you’re a beginner installing a battery video doorbell who wants clear, practical steps for choosing hardware, mounting it correctly, and configuring motion zones. You’ll learn the differences between removable and built-in batteries, how to read charging indicators, and basic setup steps so you can decide which model fits your needs.
This guide covers mounting basics: recommended height (about 4 feet / 1.2 meters), when to use Wedge, Corner, or standard brackets. It also shows how to connect a single power source without harming components. You’ll get concise instructions for installing and securing the unit. Then you can configure motion zones in the app, adjust alerts, and verify live view and recordings.
It also highlights two-word discussion ideas you should track during planning: power considerations and privacy concerns. This will help you plan placement, permissions, and notifications with confidence.
Quick Install: Charge, Mount, Set Up
Ready to get your doorbell working? Start by charging: if yours has a removable battery, remove the faceplate and charge the pack until the green light stays lit. If it’s a built-in model, charge via USB and wait for the LED circle to show full.
While charging, pick a mounting spot about 4 feet (1.2 m) above the ground for optimal face capture. Use a wedge or corner kit if included to adjust angle. For wood surfaces you won’t need anchors or a drill; align the bracket and screw directly.
After mounting, open the Ring app and follow the setup flow: choose a location, give the device a name, connect to Wi‑Fi, and complete the pairing. Don’t proceed to motion configuration until the app confirms “setup successful.”
This sequence—charge, position, mount, app setup—gets your doorbell online quickly and reliably while leveraging removable battery convenience or built in features as designed.
Choose: Removable vs Built‑In Battery Doorbells (Pros & Cons)
Wondering which battery type fits your routine? You’ll weigh easy swaps against lower maintenance. Removable battery models let you pull the cell by removing the faceplate and security screw, charge it with a USB cable until the green light stays lit, then reinsert and reattach after mounting. Built-in options charge through the provided USB cable; the LED circle shows full charge and the unit mounts on a bracket that clicks into place.
- Replace a removable battery without replacing the whole doorbell. This is useful if you want spare batteries on hand.
- Choose built-in options if you prefer fewer routine swaps and a cleaner exterior.
- Both types charge via USB; follow the same indicator lights for full charge.
- Mounting differs: removable models reassemble after battery insertion; built-in models attach to a bracket with four screws.
- Use only one power source (Solar Charger, Plug-In Adapter, or existing doorbell wiring) regardless of battery type to prevent conflicts.
Charge and Prepare Your Doorbell Before Setup
Now that you’ve picked between removable and built‑in batteries, get the unit fully powered and your app set up before you mount. For removable batteries, unscrew the bottom security screw, remove the faceplate, plug the charging cable into the battery port, and charge until the amber then green lights show; only green means full. For built‑in models, use the provided USB cable to a USB power source and wait for the LED circle to fully light. Charge fully to support capacity optimization and preserve battery health before first use.
While charging, download the Ring app, create or log in to your account, and open “Set up a device” > “Doorbell.” In the app, scan the QR code on the back of the doorbell to begin pairing. Confirm top tabs are engaged before you secure the unit. Ensure the doorbell reports charged or connected power in the app; power status affects setup flow and initial connection. This way, you won’t have to remove it later.
Choose the Ideal Mounting Location for Your Doorbell
Where should you place the doorbell for the best view and reliable detection? You’ll want a mounting location that balances facial recognition and a broad field of view. Aim for the 42–48 inch height guidance (about 4 feet/1.2 m) to consistently capture faces without steep angles.
Pick a flat, sheltered spot that avoids glare and heavy rain. Make sure your chosen power source is connected before mounting: use only one (solar charger, plug-in adapter, or existing doorbell wiring).
- Mount at 42–48 inches for optimal facial framing and consistent motion triggers.
- Avoid direct sunlight and reflective surfaces that wash out the image.
- Choose a sheltered, level area to keep the lens clear and stable.
- For wood surfaces, you can install without drilling anchors; masonry needs 1/4″ pilot holes and wall anchors.
- Verify the field of view covers approach paths, porch, and common standing spots.
Prepare the Mounting Surface and Hardware
Before you mount the doorbell, prepare the surface and all hardware so installation goes smoothly: confirm which power source you’ll use and connect it. Remove the battery if the unit is removable, and fit any wedge, corner kit, or bracket you’re using.
Check the home surface type: wood needs no anchors; masonry requires 1/4″ (6 mm) pilot holes and included anchors. Set the bracket or kit in place first, at about 4 ft (1.2 m) height. Verify wiring or adapter is the only power source connected. Remove the removable battery before fastening the unit so you don’t trap it inside.
| Item | Action |
|---|---|
| Surface type | Wood: no anchors; Masonry: drill 1/4″ pilot |
| Height | Position ~4 ft (1.2 m) above ground |
| Power source | Connect only one before mounting |
| Battery | Remove if removable before securing |
| Kits/bracket | Install wedge/corner/bracket before mounting |
Confirm hardware selection matches screw length and wall anchors for a secure, flush installation.
How to Mount a Removable‑Battery Doorbell
With your mounting surface prepared and the bracket or kit secured at about 4 ft (1.2 m), remove the security screw from the bottom of the faceplate. Press in the sides and pull the plate away to access the battery compartment. If the battery needs charging, connect the charging cable and watch the amber/green indicators until only green remains.
Use bag A screws for a standard wall or the short bracket screws from bag C for a Corner Kit, matching fasteners to your surface. Slide the removable battery back into its compartment, align the faceplate, and snap it closed. Reinsert the security screw and confirm the unit is firmly secured with no wiggle. Check operation in the app and test motion detection after mounting.
- Confirm bracket level and secure fasteners for long-term stability.
- Match screw length to wall material to avoid shearing.
- Charge removable battery fully before final install.
- Tighten but don’t over-torque the security screw.
- Verify there are no loose components after testing.
Mount Built‑In Battery Doorbells & Accessory Options
Ready to mount a built-in battery doorbell? Charge it fully first: plug the provided USB cable into a power source and wait until the LED circle fully lights. Confirm full charge before proceeding to avoid interruptions that shorten battery life during setup.
Secure the mounting bracket with the four screws from bag A. Hook the doorbell on the bracket’s top tab, press down until flush, and fasten the faceplate. If you’ll add accessories, connect any external power sources or modules before final mounting to prevent conflicting power feeds. Built-in models rely on internal battery and USB charging; so mix power sources cautiously.
Check accessory compatibility. Install only supported chimes, extenders, or mounts to avoid performance issues. After mounting, open the Ring app, tap Set Up a Device, and follow prompts to verify Live View and camera quality. Leave motion zone adjustments and Wi-Fi steps for the next section.
In‑App Setup, Wi‑Fi Connection, and Motion Zones
Want to get your doorbell online and tune motion alerts? Begin the in-app setup by choosing Set Up a Device → Doorbell and scan the QR on the back. Press and release the back button to enter setup mode; a spinning white light confirms it. In the app, select your wifi connection, enter the password, and wait for the “setup successful” message. Finish remaining prompts to name the device and set basic preferences.
- Verify setup mode light before attempting wifi connection.
- Scan QR code cleanly to avoid registration errors.
- Use the live view to confirm camera framing and audio.
Configure motion zones to limit alerts to driveways, paths, or porches. Adjust motion sensitivity and review event history to refine detections.
After setup, access Settings to tweak motion sensitivity, edit zones, and check event history so alerts stay useful and false alarms stay minimal.
Frequently Asked Questions
Will Extreme Cold Shorten Battery Life Significantly?
Yes, extreme cold will shorten battery life considerably. You’ll see reduced runtime as low temperatures slow chemical reactions, lowering capacity and increasing internal resistance. Expect faster discharge and shorter intervals between charges. There may be possible temporary shutdowns in severe cold.
To mitigate this, you’ll keep the battery insulated, store spares indoors, limit power-hungry features, and use weather-rated batteries. Regularly check charge levels during cold snaps to avoid surprises.
Can Doorbell Chimes Still Be Used With Battery Models?
Yes, you can still use chimes with battery doorbells. You’ll manage doorbell power by wiring a compatible chime connector or using a wireless chime adapter. Some models need a doorbell power supply or chime kit to signal the indoor chime.
Check your camera’s manual for chime integration steps, required voltage, and whether a mechanical or digital chime is supported. Follow installation instructions carefully to avoid draining the battery or damaging the chime.
Is Professional Installation Recommended for Old Doorbell Wiring?
Yes, you should consider professional installation if your old wiring is questionable. You’ll avoid surprises like frayed wires, improper grounding, or incompatible transformers. A pro can test voltage, install a compatible transformer or chime adapter, and ensure safe connections so your doorbell and chime work reliably.
If you’re comfortable with basic electrical work and the wiring looks solid, you can DIY. Otherwise, hire a licensed technician for safety and reliability.
Do Privacy Laws Restrict Where Motion Zones Can Record?
Yes, privacy laws can restrict where you place motion zones and what motion recording you keep. You’re responsible for avoiding areas with a reasonable expectation of privacy (bathrooms, bedrooms, neighbor’s windows).
Check local statutes and signage requirements, and limit footage retention and sharing to lawful purposes. Configure motion zones to exclude private spaces; record only necessary fields of view. Document your compliance steps in case a dispute arises.
Will Firmware Updates Change Motion Zone Behavior?
Yes, firmware updates can change motion zones. You’ll get refined detection algorithms, new zone shapes or sizes, sensitivity adjustments, or UI changes that affect how you draw and save zones.
You should review release notes, back up custom settings if possible, and recheck zones after updates. If behavior shifts, recalibrate zones and sensitivity; contact support for persistent issues. Regular updates often improve performance but may alter presets.
Conclusion
You’ve got everything you need to install and optimize your battery doorbell: charge it, pick the best mounting location, prep the surface, and choose removable or built-in power based on convenience vs. permanence.
Mount securely; complete the in-app Wi-Fi setup. Then fine-tune motion zones to cut false alerts and capture arrivals. Test the system, tweak sensitivity and angles, and keep the battery topped up.
Follow these steps, and your doorbell will work reliably.
Related reading: Battery Video Doorbells with Head-to-Toe View in — a closer look at this topic.