
Security Siren Not Triggering Troubleshooting
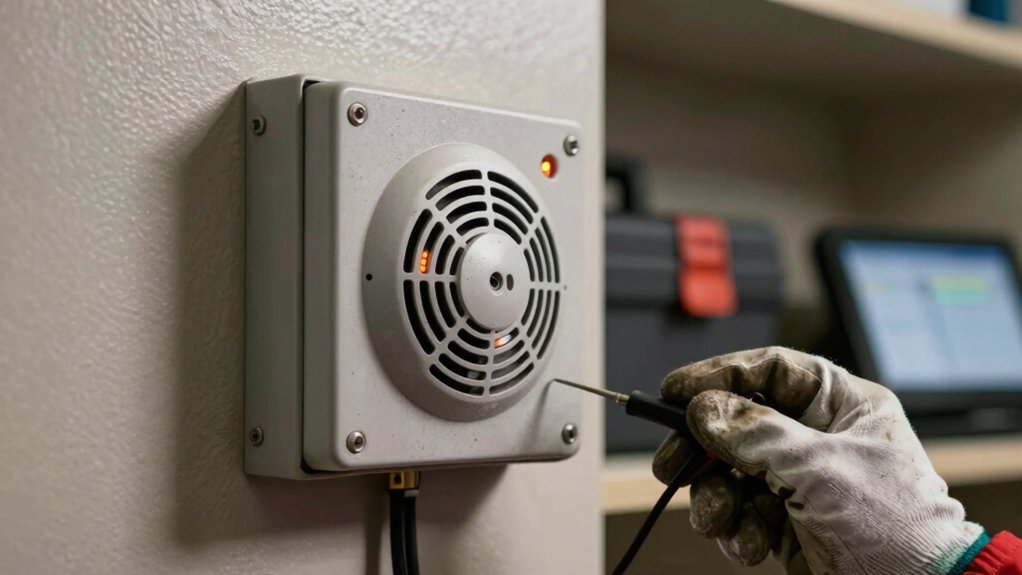
Start by checking power and service mode: confirm the siren LED shows 12V and that the panel isn’t in service/test mode. Verify siren wiring: Alarm +/− to red/black; isolate the yellow if unused, and measure 12V at the siren connector.
Run a forced siren test from the keypad and watch panel Alarm Out voltage. If you get a single dud tone, swap in a known‑good 12V siren or use a driver to isolate panel output or siren failure. Continue for step‑by‑step fixes.
Security Siren Not Triggering Troubleshooting: Start by checking power and service mode : confirm the siren LED shows 12V and that the panel isn’t in service/test mode. Verify siren wiring: Alarm +/− to red/black; isolate the yellow if unused, and measure 12V at the siren connector.
Quick Check : Power & Service Mode
Need to check power first: confirm the siren LED flashes to prove it has power. Then verify it isn’t in service mode by putting the panel into test mode with the deactivation button and triggering from the keypad. A correct test will play a melody.
You’ll treat this as a two-step diagnostic: power mode verification, then service mode clearance. First, observe the LED: flashing confirms 12V presence and basic power mode operation; steady off means no supply or connection fault.
Next, enter test mode via the deactivation button and trigger from the keypad. If you hear the melody, the siren is operational and linked. If there’s no sound, attempt to exit service mode using the deactivation button or select option 9 in test mode to force normal operation.
Remove the battery cover to access dip-switches and confirm switch 5 is OFF for proper programming. If needed, re-link the siren in programming by holding the learning button five seconds, then activating from the keypad within 30 seconds.
Verify Siren Wiring (Alarm +/−, 12V, Yellow/Red/Black)
Now that you’ve confirmed power and service-mode behavior, check the siren wiring itself: Verify the siren’s red and black leads are connected to the panel’s Alarm + and Alarm − terminals (or the designated Alarm Out). Confirm the 12V feed is present on the board or auxiliary terminal. Inspect any yellow lead to see whether your model requires it to be connected or capped.
Start by visually tracing the red/black pair to ensure they land on the alarm outputs; polarity must match the panel labeling. Measure for 12V DC at the siren connector with the system powered. If you see no 12V, trace back to the auxiliary terminal or main board regulator.
Check the yellow wire for manufacturer notes. Some models use it for tamper or test functions; it must be isolated if unused. Finally, ensure siren power and control conductors are routed separately from other peripherals to prevent cross-connections that can mute or disable the siren.
Run a Forced Siren Test From the Keypad
Want to confirm the panel can drive the siren directly from the keypad? Enter test mode by pressing the deactivation button. The keypad will play a melody indicating test mode is active. Once in test mode, press 8 to initiate the forced test sequence. If nothing happens, press 9 to exit or retry; the siren may be in service mode.
If the keypad still doesn’t trigger the siren during the forced test, verify physical connections: the siren must be on the Alarm Out zone and wired to Alarm +/− with correct polarity and output type. Check the siren isn’t in programming or learning modes that suppress sound. Also eliminate simple operator error: confirm you used the deactivation button, pressed 8 (not another key), and followed prompts to start the test.
After validating wiring and modes, rerun the forced test. When finished, exit test mode using the deactivation button or keypad prompts to restore normal operation.
Confirm Panel Alarm Out Settings (Siren/Strobe)
How are your panel’s Alarm Out settings configured? Confirm the Alarm Out is assigned to a siren/strobe output in system programming, not to an incompatible relay or auxiliary device. Verify panel voltages meet the siren’s spec and that the output type matches the physical device: standard siren vs strobe.
- Check the Alarm +/- terminal connections for correct wiring polarity; reversed polarity can prevent operation.
- Inspect wiring continuity from panel to siren, including fuses and connectors that could isolate the circuit.
- Ensure the panel isn’t in test or service mode and that the Alarm Out zone is enabled during alarm events.
- Match the panel’s output mode to the siren’s drive requirements; incorrect mode selection will leave you silent.
Execute these checks methodically: measure panel voltages at the Alarm Out under load, confirm polarity at the siren, and re-test. Document settings and repairs for future troubleshooting.
Single “Dud” Beep vs Full Tone : Diagnosis
After you’ve verified the panel’s Alarm Out assignment, wiring polarity, and voltages, address the single “dud” beep symptom as a distinct indicator of improper drive rather than a simple speaker failure. Treat an isolated empty pulse as a symptom set: Intermittent beeping or a single short tone usually means the panel isn’t providing the correct Alert Out waveform or sustained drive current.
Check Alarm +/− continuity and connector seating for a Wiring misfire first. Verify the siren isn’t in service mode and that dip switches/programming state match the panel’s expected alert configuration. Note test-programming patterns: a long beep then two short beeps indicates internal status reporting, not normal full alarm tone.
If wiring and mode are correct but you still get only a dud, the issue is likely drive timing or panel output mode rather than speaker impedance. Document findings, then proceed to swap-testing in the next step only after ruling out wiring, programming, and mode errors.
Swap Test : Known‑Good 12V or Replacement Siren
Ready to confirm whether the siren itself is at fault? Swap in a known-good 12V or inexpensive replacement siren (~$8 can work) and wire it to the Alarm Out, ensuring Alarm +/– match the siren’s power/ground. For indoor Wave2-style units, check voltage, connector type, and any required interface before installing.
After the swap, trigger via sensors or keypad programming to verify the alarm output and integrations receive alerts. If the replacement sounds, the original unit likely has an internal fault. If it stays silent, shift focus to wiring, control output, or programming; don’t confuse this with an irrelevant topic or an unrelated concept like panel driver design here.
- You’ll procure a known-good 12V siren.
- You’ll confirm terminal polarity and connector fit.
- You’ll install and trigger the system methodically.
- You’ll observe results and document pass/fail.
Proceed only after safe power handling and panel isolation.
Test Siren Driver / Output Transistor on the Panel
Want to confirm whether the panel’s output stage is the culprit? You’ll test the siren driver/output transistor directly. Put the panel into a test or alarm state. Then measure voltage at the siren output terminals with a multimeter to see if the panel output is sourcing current. If you read no voltage while LEDs indicate activity, the driver transistor may be open or shorted.
Use this quick reference:
| Condition checked | Interpretation |
|---|---|
| Voltage present at Alarm Out | Panel output is driving; suspect wiring or siren |
| No voltage at Alarm Out | Siren driver or output transistor fault |
As a temporary workaround, activate an external siren driver or relay module from Alarm Out to bypass the faulty transistor. Confirm siren operation. If tests show no drive signal, replace or repair the panel’s output transistor circuit or install an approved external driver. Follow safety procedures and manufacturer service guidelines when working on the panel.
SmartThings and Integration Troubleshooting Tips
How do you confirm whether the issue is in SmartThings or the alarm hardware? You’ll isolate variables methodically: reboot SmartThings, then run a controlled test. Remember, reboot can momentarily disrupt phone alerts; so verify siren sound after services restore. First, perform a physical trigger at the main panel to confirm hardware and wiring (Alarm +/− and siren output).
Then, exercise SmartThings/SmartHome Monitor mappings, ensuring the siren is linked to the correct Alarm Out/zone and alarm-out path is active.
- Trigger panel sensor physically — does siren sound?
- Trigger via SmartThings — does SmartThings map to the same Alarm Out?
- Monitor logs for missed commands or reboot-related gaps.
- If silent, test wiring and consider a compatible replacement (Honeywell example).
Avoid pursuing an irrelevant topic or an unrelated method. Follow these technical steps to determine whether integration or hardware causes the failure.
Repair vs Driver vs Replace: Quick Decision Guide
After you’ve isolated whether SmartThings or the alarm panel is at fault, decide quickly whether to repair, add a driver, or replace the siren by following a short tests-and-failures checklist. First, verify wiring: red/black to Alarm +/Alarm – and confirm the yellow lead is model-specific or unused. Misconfigured power or wrong terminal mapping commonly prevents sound.
Next, trigger Alarm Out directly; if the panel outputs voltage but the siren stays silent, suspect siren hardware failure. Swap in a known-good Honeywell unit (low-cost, widely validated) to confirm; community reports show replacement resolves most dud-sound cases. If the panel output fails, test with a dedicated siren driver. A driver can restore function without full replacement.
If the driver restores sound, repair or replace the panel output circuit. If the driver and known-good siren both work, replace the original siren. Log each step and measurement for a fast, evidence-based decision.
Frequently Asked Questions
Will Firmware Updates on the Panel Affect Siren Behavior?
Yes, firmware updates can change siren behavior. You’ll see alterations to alarm timing, volume control, and interactions with environmental sensors as manufacturers refine logic.
You’ll want to review release notes, test siren responses after updates, and verify settings to avoid unexpected triggers. If behavior shifts increase nuisance activations, you could incur false alarm fees. Therefore, document tests and roll back or adjust config promptly to maintain compliance.
Can Environmental Sensors (Heat/Flood) Block Siren Triggering?
Yes, environmental sensors like heat or flood sensors can prevent the siren from sounding if the control panel is configured to suppress audible alarms for those zones. You should verify siren installation and alarm wiring for correct zone type, supervision, and priority settings.
Check the panel’s sensor-to-alarm mapping, firmware alarm-class rules, and any conditional bypasses. Reconfigure zone types or wiring and test to restore expected siren behavior.
How Long Is a Typical Siren Activation Warranty Period?
You’ll typically get a one- to three-year warranty for siren activations, depending on manufacturer and contract terms. Read the warranty for coverage limits, failure modes, and replacement procedures.
Keep maintenance logs and activation tests to support claims. Note exclusions like physical damage or improper installation. Use two word discussion ideas1 and two word discussion ideas2 as checklist headers when comparing policies and documenting incidents for faster claim resolution.
Do Siren Triggers Count Against False Alarm Fees With My Provider?
Usually, siren triggers do count as false alarms if they prompt a dispatched response and no verified emergency exists. You should review your provider’s terms: they’ll define false alarms, charge thresholds, and appeal procedures.
Log timestamps, sensor IDs, and event cause to contest fees. Configure dwell times, alarm verification, and installer-calibrated thresholds to reduce unintended siren triggers. Regular maintenance and documented testing help demonstrate non-liability during disputes.
Can Wireless Sirens Lose Sync After a Power Outage?
Yes, wireless sirens can lose sync after a power outage. You’ll need to verify radio link and battery state. Then, perform a manual re-pairing or force a network resync.
Check alarm panel logs for silent alarm events during power restoration and confirm firmware versions. If automatic recovery fails, replace weak batteries. Reboot the panel in a controlled sequence, and run a diagnostic to restore reliable timing and signal authentication.
Conclusion
You’re troubleshooting a silent security siren methodically: confirm power and service mode, verify wiring (alarm ±, 12V, yellow/red/black), and run a forced siren test from the keypad. Also, check panel alarm-out settings (siren/strobe). Differentiate a single “dud” beep from full-tone failure; then swap with a known-good 12V or replacement siren.
If it still fails, test the panel’s driver/output transistor. For SmartThings/integration setups, isolate the hub. Decide quickly: repair connector, replace driver board, or replace the siren.
