Video Doorbell Wedge Mount Angle Guide
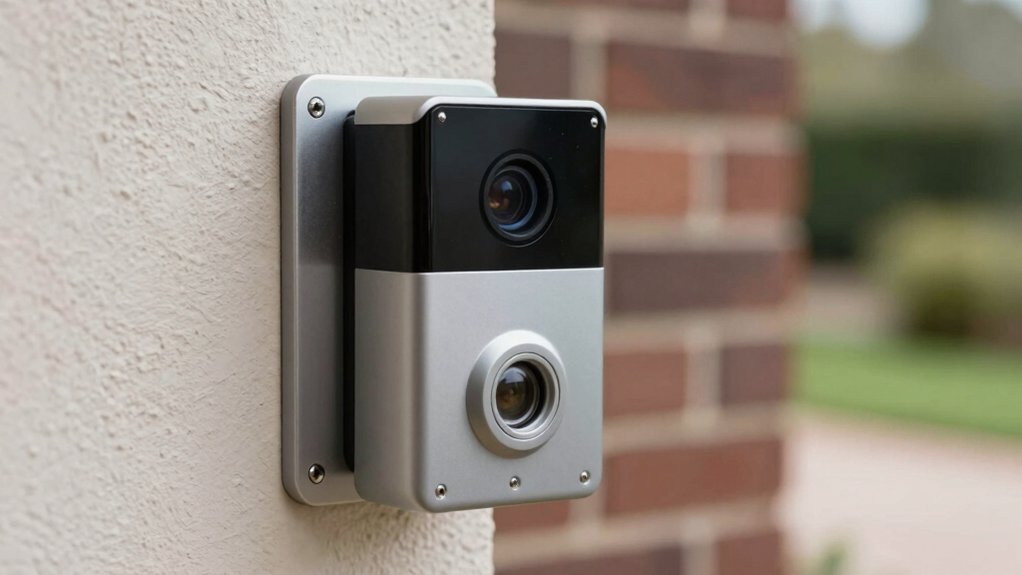
Pick a wedge for precise vertical tilt; each plate adds 5° up to 15° and a corner for horizontal correction; 15° plates up to 45°. You can stack wedge on corner for combined aiming.
Remove power, feed wires through the center hole, mark and pre-drill holes, then secure with model-appropriate screws and anchors (wood, siding, masonry). Wired models include specific mounts and limits; follow torque and sealing guidance for a flush, weatherproof install.
To learn setup and troubleshooting tips, refer to the provided documentation.
Video Doorbell Wedge Mount Angle Guide: Pick a wedge for precise vertical tilt ; each plate adds 5° up to 15° and a corner for horizontal correction; 15° plates up to 45°. You can stack wedge on corner for combined aiming. Remove power, feed wires through the center hole, mark and pre-drill holes, then secure with model-appropriate screws and anchors (wood, siding, masonry).
Quick Overview
- Each wedge plate adds 5° of vertical tilt; stack up to three for a maximum 15° adjustment.
- For horizontal correction, use corner plates (15° each) or stack a corner plus wedges for compound aiming.
- Wired Doorbell Pro and Video Doorbell Wired include a non-stackable 25° corner mount; adjust stacking accordingly.
- Remove the existing bracket. Feed wires through the center hole, mark screw holes, and tighten evenly for accurate angle.
- If using a Solar Charger, limit to one wedge or one corner. Do not stack both with the charger installed.
Pick the Right Mount: Wedge vs Corner
Wondering whether to use a wedge or a corner mount? You’ll choose based on needed axis adjustment and mounting compatibility. Use a wedge kit when you need vertical tilt: three 5° mounts give up to 15° total, ideal for Wired Doorbell Pro and Video Doorbell Wired vertical alignment.
Use a corner kit when you need horizontal correction: three 15° mounts provide up to 45° total for lateral framing. Note the Wired Doorbell Pro and Video Doorbell Wired ship with a single 25° corner mount that isn’t stackable; plan horizontal adjustments accordingly. You can combine wedge vs corner options: both kits are compatible with all Ring doorbells and can be stacked. Place the wedge on top of the corner kit for optimal compound tilt.
Both kits are paintable to match your exterior. If you’re using a Solar Charger, don’t stack multiple mounts; use only one wedge or corner mount to maintain mounting compatibility and reliable solar alignment.
Position Wedge or Corner Kit for Best Angle
Now that you’ve chosen between wedge and corner kits, position them to get the exact viewing angle you need. Use angle guidelines and mounting orientation to plan adjustments: wedges change vertical pitch (three 5° mounts, up to 15°). Corner kits change horizontal yaw (three 15° mounts, up to 45°). For Wired Doorbell Pro/Wired models, note two 10° wedge mounts and a pre-included 25° corner mount.
Stack one wedge on one corner kit for optimal performance; combination is recommended for all Ring doorbells.
| Adjustment Type | Typical Increment |
|---|---|
| Vertical (wedge) | 5° per plate |
| Max vertical tilt | 15° (or two 10° for wired) |
| Horizontal (corner) | 15° per plate |
| Max horizontal tilt | 45° (25° pre-included wired) |
Before final fastening, use the device guide to set the kit. Mark screw holes, feed wires through the large middle hole, and then secure to the surface in the desired mounting orientation.
Install a Wedge or Corner Kit: Step-by-Step
Ready to install? You’ll remove the doorbell, its existing bracket, and disconnect power first to work safely and follow the device guide. With power off and the doorbell set aside, extract the old mount so the new wedge or corner kit sits flush.
Position the kit using the device guide to achieve the desired tilt. Check wedge compatibility and corner impact on sightlines before marking. Hold the kit where it aligns with the guide and desired field of view.
Mark screw holes through the mount openings so alignment transfers precisely to the wall. Prepare the mounting surface; confirm anchors or plugs are ready for the substrate you’ll use. Feed the doorbell wires through the large middle hole in the kit, keeping them accessible for reconnection.
Finally, secure the kit with screws; tightening evenly to avoid stress. Reattach the doorbell to the kit, restore power, and verify angle and operation.
Mounting Tips: Wood, Siding & Masonry
How you mount the wedge depends on the surface: wood, siding, and masonry each need different prep and fasteners. Prepare surfaces, pick the right screws from the kit, and avoid irrelevant discussion or unrelated tips that distract from secure installation. Install the wedge before the doorbell. Feed wires through the large middle hole, and mark holes through the mount.
- Wood: Use A screws for Wired Doorbell Pro or medium/long screws from bag C for other models. Pre-drill pilot holes to prevent splitting.
- Siding: Ensure backing is solid. Fasten into studs or use long screws into sheathing. Seal around the wedge to prevent water intrusion.
- Masonry: Verify the substrate is solid. Use masonry anchors or appropriate screws per instructions. Drill correct-size holes.
- Finishing: Paint the wedge to match the exterior for discretion. Then, mount the doorbell onto the secured wedge, confirming wire routing and angle adjustment (up to 15° with included mounts).
Combine Wedge + Corner Kits and Solar Chargers (Model Notes)
Want the widest, most flexible view? You can combine Wedge and Corner Kits on all Ring doorbells; for optimal coverage use one of each. Stack the Wedge Kit on top of the Corner Kit to expand vertical and horizontal adjustment. Wedge compatibility gives up to 15° vertical (three 5° pieces) while Corner stacking provides up to 45° horizontal (three 15° pieces). This stacked arrangement yields broad field-of-view and precise aiming.
If you add a Solar Charger, limit mounts to one Wedge or one Corner. Do not use both with the solar accessory. Note model exceptions: Wired Doorbell Pro and Video Doorbell Wired have different available mounts and stacking rules. The 25° Corner/Mount for some models is not stackable with other kits. Before final installation, confirm your doorbell model’s mount options to avoid incompatible stacks and ensure secure screw alignment.
Which Screws & Holes for Your Doorbell Model
Stacking Wedge and Corner kits gives you more aiming options, but you still need the right screws and mounting holes for a secure install. Use bag A doorbell screws for the Wired Doorbell Pro; other models take medium or long screws from bag C. Always fasten the faceplate to the Wedge/Corner Kit with the short bag C screws supplied. Those secure trim to mount. Note the mount’s large center hole is for feeding wires; do not mistake it for a fastener point.
- If reinstalling Wired Doorbell Pro or Doorbell Wired, favor circular mounting holes for alignment and stability.
- For all other models, align with oblong mounting holes to allow minor adjustment after fastening.
- Feed wiring through the large middle hole before seating the unit to prevent strain.
- Use the specified screw lengths per model to avoid cracking the mount or stripping threads.
Follow model-specific screw and hole guidance for a reliable, vibration-free install.
Reattach, Test Angle, & Fix Common Problems
Ready to finish? Reattach the doorbell to the wedge or corner kit, then snap the camera into place to ensure a secure fit. While considering final alignment, hand-tighten screws; then snug them with the correct driver to avoid stripping.
Now test the angle from the front to confirm a slight upward tilt. View the live feed and test angle stability by nudging the mount gently. If the tilt shifts, loosen, re-position, and re-tighten. If the angle seems off, adjust using the adapter or relocate the mount before driving the final screws.
To fix common problems, first check for loose screws and re-torque to specification. If you see drift or misalignment, reseat the camera and verify the wedge is flush against the surface.
Perform a quick motion test to confirm reliable detection and that the intended upward view covers the area. Finalize by locking all fasteners and rechecking the feed.
Frequently Asked Questions
Can a Wedge Mount Affect My Doorbell’s Warranty?
Yes, a wedge mount can affect your doorbell’s warranty. You’ll need to check the manufacturer’s terms; warranty impact depends on whether the mount causes installation risks like damage, voided seals, or nonstandard modifications.
If the wedge is approved or installed per guidelines, you’re usually covered. If not, you might lose coverage for affected components. Document your installation and keep receipts or approval to support any warranty claim.
Will Extreme Weather Degrade the Wedge Material Over Time?
Yes, extreme weather can degrade the wedge material over time. You’ll see UV, temperature cycling, moisture, and freeze–thaw stresses cause embrittlement, cracking, or discoloration depending on the polymer or metal used.
Inspect mounts periodically. Use UV-resistant, marine-grade, or anodized materials, and apply sealants or protective coatings where appropriate. Replace compromised wedges to maintain alignment and water ingress protection; proactive maintenance prolongs service life and performance.
Can I Paint the Wedge to Match My House Color?
Yes, you can paint the wedge to match your house color, but weigh pros and cons.
Pros: improved aesthetics and camouflage.
Cons: paint may alter grip, fit, or weather resistance; it may also void warranty.
Prep by cleaning and sanding lightly. Choose flexible, outdoor-grade paint or spray, and avoid blocking mounting holes.
Installation tips: mask camera surfaces, cure paint fully before mounting, and test fit to confirm alignment and sensor clearance.
Are There Privacy Laws About Angling the Doorbell Camera?
Yes. You must follow privacy laws when adjusting camera angles; you can’t point a doorbell camera into neighbors’ private spaces. Check local statutes and regulations on wedge mounting legality and doorbell privacy. Rules vary by jurisdiction about recording expectations and permissible camera fields.
Use camera angles to focus on your property and public areas only. Document your setup and get consent if feeds capture shared or private neighbor spaces to reduce legal risk.
Can I Use Extension Cables With a Wedge-Mounted Doorbell?
Yes, you can use extension cables with a wedge-mounted doorbell if the cables match manufacturer specs and maintain mounting compatibility. You’ll need weather-rated extension cables and sealed connectors to mitigate weather effects and avoid signal loss.
Check local privacy laws for permitted camera placement and wiring visibility. Follow torque and strain-relief guidelines; test video/audio after installation and verify the extension doesn’t void warranty or exceed power/voltage limits.
Conclusion
You’ve picked the right mount, positioned it for the best field of view, and followed the step-by-step install for your surface (wood, siding, or masonry).
Now reattach the doorbell, use the correct screws and holes for your model, and test angle and motion coverage. If detection’s off, tweak tilt; combine wedge/corner kits or add a solar charger per model notes.
Recheck seals and wiring. Small adjustments usually fix common problems quickly.
Related reading: Installing a Battery Video Doorbell and Setting Motion — a closer look at this topic.