Setting up Mesh Wifi for Multiple Security Cameras

When you set up mesh Wi‑Fi for multiple security cameras, prioritize a wired backhaul and place the main node by the modem. That cuts wireless contention and stabilizes streams.
Put cameras on a dedicated VLAN with static IPs outside the DHCP pool. Enable QoS or DSCP for video and prefer 2.4 GHz for camera clients while keeping heavy traffic off camera links.
Test node placement and stream load locally to confirm reachability. Continue for step‑by‑step tuning and diagnostics.
Setting up Mesh Wifi for Multiple Security Cameras: When you set up mesh Wi‑Fi for multiple security cameras, prioritize a wired backhaul and place the main node by the modem. That cuts wireless contention and stabilizes streams. Put cameras on a dedicated VLAN with static IPs outside the DHCP pool.
Quick Overview
- Use wired Ethernet (or MoCA) backhaul for the main node and outdoor nodes to eliminate wireless contention and stabilize camera streams.
- Put cameras on a dedicated VLAN with static IPs outside the DHCP pool to isolate traffic and simplify routing and firewall rules.
- Place satellites around the perimeter so each outdoor camera is within one strong node hop. Test temporary mounting first.
- Estimate total camera bitrate and configure QoS (DSCP or vendor queues) to prioritize video and limit nonessential traffic during peaks.
- Limit active Wi-Fi cameras per node; disable camera mesh features if available. Run reachability and load tests while streaming to validate stability.
Quick Fixes to Stop Mesh Wi‑Fi Camera Dropouts
How can you stop frequent camera dropouts on a Deco mesh without overhauling your entire system? Start by limiting active Wi‑Fi cameras: the Deco shows complete device disappearance once six or more cameras are online. Therefore, reduce count below that threshold to restore stability.
Assign static IPs outside the DHCP pool and confirm they don’t collide with reservations; this prevents address churn but won’t alone fix the issue. Don’t assume mesh features on cameras are irrelevant: disable mesh on cameras if available, but recognize instability persists even when disabled. Treat mesh routing as an unrelated topic for root cause.
Test reachability: verify each camera remains locally accessible when NVR streams fluctuate. Trial runs with different NVRs, resolutions, and camera counts help identify streaming/traffic interaction limits.
Use these quick mitigations to isolate the instability source before pursuing deeper topology or hardware changes. Avoid solutions that are off topic to the observed behavior.
Choose Your Main Node and Backhaul (Wired Preferred)
Where should you place the main node and how will you link the satellites? Put the primary node near the modem with a direct wired LAN connection. Dedicate Ethernet (or MoCA) as the backhaul whenever possible to cut wireless contention and stabilize a multi-camera setup.
Position the main node in an open, ventilated spot with accessible power and the modem-facing WAN port for reliable gateway duties. Choose mesh hardware that documents per-node port speeds (1 Gbps or 2.5 Gbps) and supports Ethernet backhaul-capable nodes; this ensures aggregate throughput for a dozen cameras plus a 16-channel NVR.
Configure a common SSID across bands so clients roam seamlessly while backhaul traffic stays on the wired link. If wiring isn’t feasible, select systems with MoCA backhaul or dedicated wireless backhaul radios and compare their throughput specs.
Prioritize brands that list clear backhaul options and port counts to avoid bottlenecks and reduce camera dropouts under sustained NVR recording load.
Place Nodes to Cover Outdoor Cameras and Test Signal
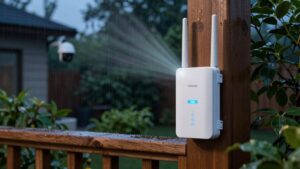
With the main node and wired backhaul in place, place the satellites around the exterior perimeter so each outdoor camera sits within one strong node hop (roughly two rooms or equivalent spacing) to avoid brick-wall and high-distance signal loss. Place nodes at key camera zones; prioritize wired backhaul for any outdoor node to optimize backhaul and reduce contention. Mount temporary or clamp-test positions before final installation.
Use in-app signal tests or node LEDs to confirm both client and backhaul strength at each camera mount point. Verify cameras join the 2.4 GHz network with WPA/WPA2. Keep the 2.4 GHz SSID distinct if supported. After each node placement, run signal tests while streaming live feeds to check stability, packet loss, and latency.
If feeds stutter or drop, shift the nearest node inward or add an intermediate satellite to maintain a single solid hop between camera and node. Repeat until all outdoor cameras show consistently strong client and backhaul metrics.
Give Cameras Static IPs and a Dedicated VLAN
Because cameras need stable, predictable addresses and isolation, assign each camera a static IP outside your DHCP pool. Place them on a dedicated VLAN so their streams stay separate from regular client traffic. For static IP planning, pick a contiguous block reserved solely for cameras; note the subnet and gateway. Register each camera’s MAC-to-IP mapping in your router.
Create a camera VLAN and apply consistent VLAN tagging on switches, access points, and controller profiles. This ensures that wired and wireless cameras carry the same tag. Configure routing rules and firewall policies to allow only required management and NVR/video-server traffic between VLANs. Set QoS or bandwidth limits on the VLAN to guarantee stream stability without overcommitting other services.
Maintain documentation: device name, model, MAC, static IP, VLAN ID, physical location, and installation date. Test reachability and management access after deployment. Update documentation when you change addresses or replace cameras to prevent conflicts and simplify troubleshooting.
Plan Bandwidth and QoS for Camera Streams
After you’ve assigned static IPs and isolated cameras on a dedicated VLAN, plan how much throughput they’ll consume and how you’ll prioritize that traffic. You’ll do bandwidth planning by estimating per-camera bitrate (common 0.5–4 Mbps), summing concurrent streams, and comparing to mesh backhaul capacity.
Keep cameras on 2.4 GHz with WPA/WPA2 for reliability and reserve a separate backhaul band where possible. Apply qos strategies to mark and prioritize camera traffic (DSCP or vendor QoS) so video stays ahead of web and bulk transfers. Monitor aggregate load across bands and limit nonessential traffic during peak recording.
| Cameras | Per‑camera Mbps | Total for 6 cameras |
|---|---|---|
| Low (0.5 Mbps) | 0.5 | 3 Mbps |
| Medium (1 Mbps) | 1 | 6 Mbps |
| High (4 Mbps) | 4 | 24 Mbps |
Verify static IPs are outside DHCP and reachable. Adjust QoS queues if streams drop under load.
Use Wired Backhaul/PoE Options and Step‑by‑Step Diagnostics
Why run wired backhaul when Wi-Fi looks fine? Because wired backhaul creates a dedicated Ethernet link between the main router and mesh satellites, eliminating contention and maximizing stability for multiple security cameras. You should connect nodes with Ethernet whenever possible and enable a dedicated backhaul band (separate 5 GHz/6 GHz) if the system supports it.
Consider PoE options on supported nodes to deliver power and data over one cable, simplifying placement for outdoor or remote cameras and removing separate power runs. Use static IPs for cameras and the NVR outside the DHCP range. Then run diagnostics: ping each device from the mesh router, confirm DNS resolution, and check port/service reachability.
For instability, temporarily remove cameras from the NVR to isolate load issues. After wiring, reintroduce cameras in small batches while logging throughput and latency to find the degradation threshold. Use those metrics to plan additional wired nodes or camera quantity limits.
Frequently Asked Questions
Can Mesh Wi‑Fi Cameras Work With Multiple ISPS or Dual-Wan Setups?
Yes, mesh network cameras can work with multiple ISPs or dual-WAN setups if your gateway supports dual WAN compatibility and proper routing. You will want ISP failover configured so traffic shifts seamlessly when one link drops.
Expect potential camera latency changes during failover. Prioritize video streams with QoS and bind camera VLANs to preferred WAN paths. Test failover timing and packet loss to ensure continuous, low-latency recording and remote access.
How Do Mesh Systems Handle Firmware Auto‑Updates and Rollback?
Mesh systems typically perform scheduled auto update timing with vendor-controlled windows. You can set maintenance windows and defer updates briefly. They download and stage firmware, verify signatures, and apply updates node by node to maintain mesh stability.
If an update fails or causes problems, many systems support firmware rollback to the previous signed image automatically or via the controller. You’ll still want backups, monitoring, and tested rollback procedures before wide deployment.
Can Cameras Keep Recording if the Mesh Controller/Cloud Goes Down?
Yes, many cameras keep recording locally if the mesh controller or cloud goes down. You’ll still face cameras downtime risks when cloud dependency exists for management, alerts, or offsite storage.
Devices with onboard storage (SD card/NVR) continue writing footage. Edge‑processing cameras can retain recordings and resume uploads when connectivity returns. Verify camera firmware, local storage capacity, and failover settings to ensure uninterrupted capture despite controller or cloud outages.
Are There Privacy Concerns Using Vendor Cloud Features With Cameras?
Yes, you should expect privacy concerns when using vendor cloud features. You’ll send video, metadata, and credentials to third-party servers, which increases exposure to breaches, subpoenas, and vendor misuse.
You’ll need strong encryption, strict access controls, and clear retention policies. Additionally, vendor transparency about storage locations and encryption at rest is essential. If you’re risk-averse, you may prefer local recording, self-hosted management, or vendors with zero-knowledge designs and auditable security practices.
How to Integrate Third‑Party NVRS With Mesh‑Managed Camera VLANS?
You integrate third‑party NVRs by ensuring VLAN segmentation between camera and management networks. Map camera VLANs to NVR ports, and enable necessary multicast/IGMP snooping and routing rules.
Expect integration challenges: NAT, VLAN trunking, and vendor protocol compatibility. Configure static routes or firewall rules so the NVR can reach camera subnets. Disable client isolation for allowed flows, and test RTSP/ONVIF streams. Log and monitor for packet drops and auth mismatches.
Conclusion
You’ve got the essentials to stop dropouts and keep your cameras reliable. Pick a central main node with a wired backhaul when possible. Place nodes to ensure strong outdoor signal, and assign static IPs on a dedicated VLAN.
Plan bandwidth and apply QoS so streams don’t collide. Prefer PoE and wired links for cameras. Troubleshoot methodically: check link rates, RSSI, switch logs, and isolate wireless hops to resolve remaining issues quickly.
Related reading: Improving Wifi Signal Strength — a closer look at this topic.