Smart Lock Calibration and Door Alignment Steps
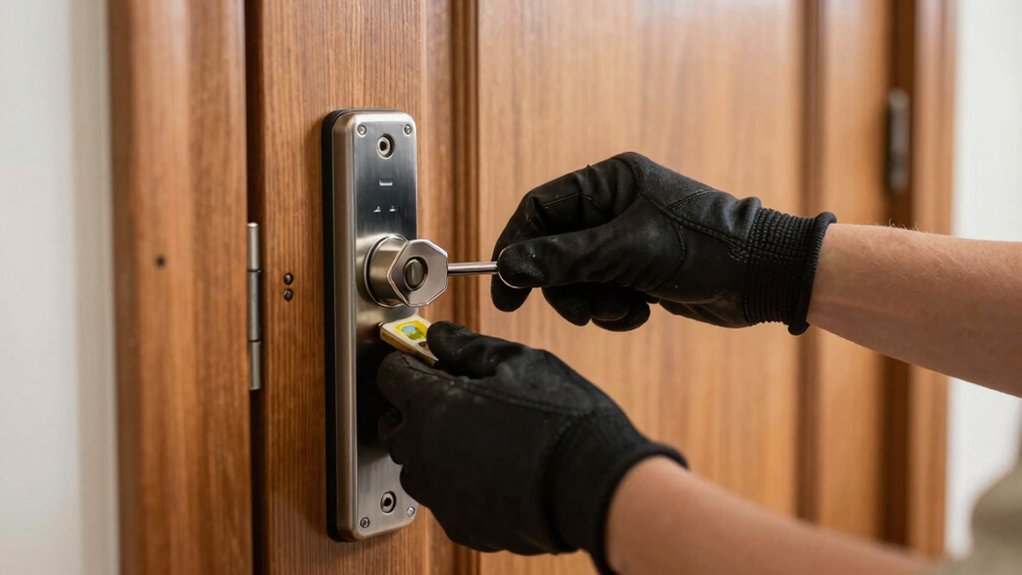
Start by updating your Base Station to firmware 2.14+. Update the keypad and mobile app, and confirm the lock batteries are fresh. Use the app or keypad to run calibration; follow prompts and keep clear of the motor.
If on-door calibration fails, inspect the door for binding and run a lipstick test on the deadbolt to locate strike plate misalignment. Shim hinges or adjust the strike plate as indicated. Then recalibrate; continue for step-by-step fixes and tips.
Smart Lock Calibration and Door Alignment Steps: Start by updating your Base Station to firmware 2.14+. Update the keypad and mobile app, and confirm the lock batteries are fresh. Use the app or keypad to run calibration ; follow prompts and keep clear of the motor. If on-door calibration fails, inspect the door for binding and run a lipstick test on the deadbolt to locate strike plate misalignment .
Quick Overview
- Update Base Station firmware to 2.14+ and the mobile app. Then verify Smart Lock batteries are fully charged.
- Run on-table calibration first. Then attempt on-door calibration using the app or keypad if firmware and batteries are good.
- If on-door calibration fails, inspect the door for binding, misalignment, or mounting hardware interference before retrying.
- Use the lipstick/grease-pencil test on the deadbolt to identify strike plate contact points and whether vertical or forward/backward adjustment is needed.
- Adjust the strike plate vertically or forward/backward (or reposition the door) based on lipstick marks. Then recalibrate until the lock operates smoothly.
Prep: Update Firmware, App, and Batteries
Ready to recalibrate? You’ll start by confirming firmware checks: ensure the Base Station is running version 2.14 or higher and update the Keypad if prompted. Open the SimpliSafe Mobile App on your phone or tablet and verify the app itself is the latest store release before proceeding.
Next, confirm battery status for the Smart Lock and any related devices. Check levels in the app, then run a physical battery test on the lock so you’re not troubleshooting power mid-process. If batteries are low, replace them now.
Perform firmware checks again after updates finish to ensure everything shows the current versions. If on-table calibration succeeds but on-door calibration fails, don’t start recalibration yet. Inspect door alignment and the mounting plate for binding or misalignment. Address mechanical issues first; then return to calibration with updated firmware, an up-to-date app, and confirmed battery status.
Calibrate Now With the Mobile App
Want to start recalibration? Open the SimpliSafe Mobile App, tap the “Recalibration Needed” tile or go to My System > Device Settings > Smart Lock, scroll to Calibration, and tap the arrow to begin. Ensure your Base Station is on firmware 2.14+ and the app is up to date before you start. Recalibration only proceeds with an updated Base Station.
The app runs a few-minute sequence that guides you with clear app prompts. Follow each prompt and respond when asked if the Smart Lock is unlocked (Yes/No). Calibration timing is short but variable depending on responses and device communication. When the sequence finishes, tap Done to exit; the flow ends on your phone or tablet.
If the on-table calibration succeeds but on-door calibration fails, inspect door alignment and mounting as the next step. You will then repeat the mobile recalibration after correcting alignment issues.
Calibrate Now With the Keypad
Prefer to recalibrate at the lock instead of the app? Bring the keypad close to the smart lock, press Menu, and enter your Primary PIN to begin. In the keypad menu, navigate to Devices > Lock, toggle Recalibrate, and follow the on‑screen prompts to calibrate now with the keypad.
If the system notes a pending firmware update, finish that update first; calibration works best on current firmware. When prompted to “Close your Door,” manually lock the door, then press Done to continue. The lock will run a calibration sequence and may turn up to three times automatically; stand clear and don’t interrupt the motor.
Wait for the final keypad screen to display “Congratulations,” then press OK to complete the procedure. You’ll have recalibrated now, with the keypad, ensuring the lock and strike align. If the keypad reports errors, recheck door closure and firmware status before retrying.
If Calibration Fails: Run the Lipstick Test
Not sure where the bolt’s catching? Run a lipstick test to pinpoint contact points and guide corrections. Apply lipstick, a grease pencil, or a Sharpie to the deadbolt, close the door, then open it and inspect the deadbolt marks on the strike plate and jamb. The pattern tells you what to adjust.
- If marks are high or low on the strike plate, the strike needs vertical shifting.
- If marks are toward the inside or outside face of the strike, you need forward/backward adjustment.
- If marks align centrally but the lock binds, the door itself may need repositioning.
Record the deadbolt marks’ locations before making changes so you can re-test. You’ll use these results to decide whether to move the strike plate or reposition the door for proper alignment. The lipstick test is quick, inexpensive, and gives clear, actionable feedback when calibration fails.
Fix Alignment: Shim Hinges or Adjust the Door
How can you correct a sagging door so the deadbolt rides cleanly into the strike? First, identify the low side and remove the hinge screws. Cut a shim from aluminum flashing or use a premade plastic shim sized to the hinge mortise. Position the shim behind the bottom hinge leaf to raise the door slightly; trace hinge screw locations onto the shim and pre-drill holes to ensure secure mounting.
Reinstall the hinge with the shim in place, tightening screws snugly. After installing the shim, recheck lock operation and reverify door alignment with a lipstick test to confirm the deadbolt’s clearance. If binding or misalignment persists, consider additional hinge adjustments or minor frame tweaks to restore proper strike alignment.
Throughout, work incrementally: small shim thickness changes produce noticeable results. You’ll achieve consistent door alignment and smooth deadbolt travel without modifying the strike plate.
Fix Alignment: Move or Modify the Strike Plate
Want the deadbolt to enter the strike cleanly? Shift or modify the strike plate to correct misalignment and restore a straight bolt path. Use these focused steps:
- Inspect where the bolt hits. If it contacts the outer edge of the lower strike, loosen screws and reposition the strike plate horizontally or vertically.
- Use the strike plate’s lower tab to push the door forward to correct forward/backward misalignment without removing the door.
- If screw holes have stripped or new holes are too close, pack them with toothpicks dipped in wood glue, trim flush, then reattach the strike plate for a secure mount.
- Tighten screws and re-test the lock, confirming the deadbolt travels cleanly into the strike without binding.
Be methodical: make small adjustments, test repeatedly, and ensure the bolt path is centered. With precise repositioning and stabilized mounting, you’ll eliminate misalignment and get smooth, reliable deadbolt operation.
Frequently Asked Questions
Can Temperature Affect Calibration Accuracy Over Time?
Yes, temperature changes will affect calibration accuracy over time. You’ll see temperature drift cause sensor offsets and mechanical expansion. Humidity impact can alter friction or electronics performance. You should monitor readings, log environmental conditions, and recalibrate when drift exceeds tolerance.
Implement temperature-compensating algorithms, use stable materials, and schedule periodic checks. Doing this keeps accuracy predictable and prevents gradual misalignment from unnoticed environmental shifts.
How Do I Prevent Pets From Triggering Calibration Tests?
You’ll prevent pets from triggering calibration tests by restricting access and adjusting settings. Create physical barriers or close doors during tests. Set scheduled tests when pets are elsewhere. Enable motion or weight thresholds that ignore small pet interaction and increase calibration latency so brief movements don’t trigger runs.
Monitor logs to identify false triggers and refine thresholds. Test changes incrementally to confirm they block pet interaction without compromising legitimate calibration needs.
Can I Calibrate While the Door Is Locked Externally?
You can, but it depends on the lock model and external door status: some units allow calibration while locked; others require the bolt retracted. Check your manual first.
If allowed, secure the door so it won’t move, disable auto-lock or notifications, and keep pets away. Start the calibration routine and watch for error codes. If the lock reports obstruction or misalignment, unlock and repeat with the bolt free to move.
Does Smart Lock Calibration Affect Warranty Coverage?
Yes, calibration can affect warranty status if you void terms. You should follow manufacturer instructions exactly. Don’t use unauthorized parts or two word idea1 tweaks that alter hardware. Avoid two word idea2 hacks during setup.
Keep records of your steps and receipts. Contact support before making nonstandard adjustments. If you stick to approved procedures and document everything, you’ll protect warranty coverage and get confident support when issues arise.
Can Humidity or Swelling Cause Recurring Misalignment?
Yes, humidity effects can cause recurring misalignment. You’ll notice swelling concerns when moisture changes make the door or frame expand unevenly, shifting strike alignment and stressing the lock.
You should monitor seasonal humidity, check clearances, and adjust or plane the door if needed. If problems persist, install weatherstripping or a threshold to control moisture. Recalibrate the lock after any corrective adjustments to ensure reliable operation.
Conclusion
You’ve taken the right steps: updated firmware, app, and batteries; attempted calibration via app and keypad; and, when needed, used the lipstick test to pinpoint issues.
If the bolt won’t align, shim the hinges or tweak the door. If the strike’s the problem, move or modify it for smooth engagement. Re-test calibration after each adjustment.
Stay systematic and patient. Small, precise corrections will get your smart lock reliably aligned and operating as designed.
Related reading: Installing a Smart Lock on an Existing Deadbolt — a closer look at this topic.