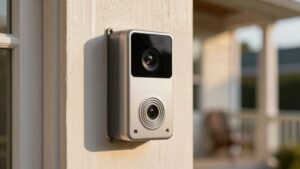
Installing a Wired Video Doorbell With an Existing Chime
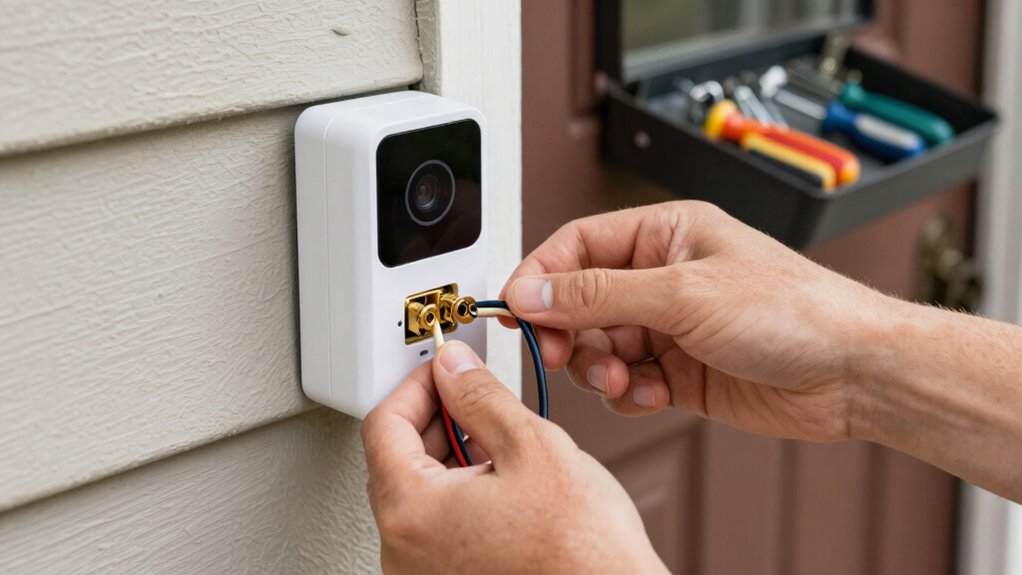
Shut off the breaker and confirm the circuit is dead. Then check the transformer voltage to match your doorbell’s requirements before you touch any wiring.
Identify your chime model and verify compatibility; digital chimes often need a diode.
Decide on hardwired or plug‑in adapter power. Remove the old button, mount the bracket level, and attach the front/trans screws correctly. Restore power and test the button and chime. If it’s not working, you’ll find step‑by‑step troubleshooting and safety tips next.
Installing a Wired Video Doorbell With an Existing Chime: Shut off the breaker and confirm the circuit is dead . Then check the transformer voltage to match your doorbell’s requirements before you touch any wiring. Identify your chime model and verify compatibility; digital chimes often need a diode. Decide on hardwired or plug‑in adapter power.
Quick Overview
- Turn off the breaker for the doorbell circuit and confirm it’s dead with a multimeter before touching any wires.
- Verify the transformer voltage matches your Ring model’s requirements; adjust or call an electrician if outside the acceptable range.
- Identify your chime type (mechanical or digital) and check compatibility. Add a diode for digital chimes if required.
- Remove the old button, mount the Ring bracket level, and route the existing front and trans wires through the new plate.
- Connect wires per chime type (front/trans for mechanical; diode per instructions for digital). Restore power and test doorbell and chime.
Cut Power & Check Transformer Voltage
Before you touch any wiring, shut off the breaker that controls your doorbell circuit to eliminate the risk of shock. Once you cut power, confirm the circuit is dead before proceeding. Use a multimeter at the transformer or doorbell terminals to check transformer voltage and verify it matches the specified range for your Ring model and existing chime.
If the reading falls outside the required range, don’t continue; either adjust the transformer or call a qualified electrician. Use the doorbell’s documentation to know the acceptable voltage window. Different models require different outputs. After you’ve confirmed correct voltage and secure connections, restore power and watch for the device’s indicator light.
Finally, press the doorbell to confirm the chime responds properly. Prioritizing these steps prevents damage to the new unit and avoids electrical hazards, so don’t skip the voltage check or attempt fixes beyond your skill level.
Confirm Chime Model and Compatibility
With power verified and the transformer confirmed, next identify your existing chime and check whether it’s supported by Ring. Look up Ring’s official compatibility list before you proceed: Ring Video Doorbell 4 and other models only work with chimes on that list. Note model numbers stamped on the chime or in its paperwork, and compare them precisely.
If your chime is digital, plan for a diode or other required component to prevent damage and ensure proper signaling. Some Ring models bypass the internal chime when hardwired. That’ll stop the built‑in doorbell sound and mean you’ll need an indoor notification device (Ring Chime or Chime Pro).
Don’t assume every chime will behave the same; mismatched wiring can harm the chime or doorbell.
These are practical safety reminders: confirm compatibility to avoid electrical issues and protect equipment. Avoid unrelated topic detours; focus on matching model, checking voltage compliance, and preparing for any bypass or diode requirements before continuing.
Choose Hardwired or Plug‑In Power
Which power route makes the most sense for you depends on your existing wiring, chime compatibility, and whether you want the doorbell tied into your home’s wiring or plugged into an outlet. You can use the home’s transformer and chime (hardwired) or a Plug‑In Adapter.
Check voltage and chime compatibility first; mismatched transformers can damage the unit or prevent the chime from working. Always shut off the breaker before changing connections.
If you opt for a Plug‑In Adapter, attach its wires to the doorbell’s back screws and secure the adapter to an outlet with cable clips. Note that plug‑in setups often bypass the internal mechanical chime; you’ll need an external notification like a Ring Chime.
- Confirm transformer voltage and compatibility
- Turn off power at the breaker before work
- Use Plug‑In Adapter per manufacturer instructions
- Expect external notification if chime is bypassed
- Restore power and verify indicator light and chime behavior
Prepare Mount and Remove Old Button
Now that you’ve chosen your power method and shut off the breaker, remove the old button to prepare the mount. You’ll avoid shock by confirming power is off. Then, unscrew and detach the button. Gently pull the wires through the bracket or wall; don’t yank.
Remove the faceplate to access the wiring terminals for inspection or reconnection. Keep the chime wiring accessible; it’s needed later. Use a level to verify the bracket aligns with your new Ring device so the camera and sensors sit straight.
| Step | Action |
|---|---|
| 1 | Confirm breaker off |
| 2 | Unscrew button |
| 3 | Pull wires gently |
| 4 | Remove faceplate |
| 5 | Check bracket level |
Stay focused on safety; this isn’t an irrelevant topic or an unrelated concept. If terminals show damage, stop and consult a pro. Tighten mounting hardware securely. Leave wires loose enough to work with in the next step.
Wire Your Ring Doorbell to Chime
How do you tie your Ring Video Doorbell into the existing chime safely and correctly? Start by confirming your chime model is on Ring’s compatibility list and that the transformer voltage matches Ring’s requirements. Turn power off at the breaker before touching wiring.
Determine whether you have a mechanical or digital chime; this dictates diode use.
- Verify transformer voltage and chime compatibility.
- For mechanical chimes, connect wires directly to the front and trans screws.
- For digital chimes, install the diode per Ring’s instructions to prevent backfeed.
- Use proper connectors, secure terminals, and keep contacts clean.
Restore power and test the push button and Ring indicator light.
Avoid off topic discussion about mounts or screws here; stay focused. If the chime behaves oddly after power restore, recheck diode orientation and compatibility rather than assuming an irrelevant topic caused the fault. Always follow Ring’s wiring diagrams and local electrical codes.
Mount the Ring Doorbell and Secure Screws
With the wiring confirmed and power restored, align the Ring doorbell on the mounting bracket so the level bubble stays centered. Then slide it down into the bracket slots and press firmly until it locks. Hold the unit steady and check that it sits flush against the wall. Uneven mounting can stress wires or produce poor video angles. If you’re mounting on masonry, make pilot holes and insert anchors before seating the bracket so screws bite securely.
Use the supplied 3/16″ security screws and the small screwdriver end to tighten the bottom screws. Turn until snug; don’t over-torque. Stripping the security head or cracking the housing creates safety hazards. Avoid distractions and treat this step as the functional finish, not an irrelevant topic or unrelated concept to skip. Once mechanically secured, keep tools and loose parts away from the doorway. You’ll verify electrical indicators next, but don’t attempt power checks while screws or anchors remain loose.
Restore Power, Test, and Troubleshoot
Ready to power up? Restore power at the breaker and wait for the doorbell’s indicator light to glow white; that tells you the device is ready. Test by pressing the button: it should trigger the existing chime and send any indoor notifications. If it doesn’t, don’t panic; troubleshooting is methodical.
- Confirm the breaker is on and the transformer is supplying voltage.
- Check the diodes’ orientation for digital chimes; a reversed diode can prevent ringing.
- Verify all wire connections are tight and free of corrosion.
Bypass irrelevant topic distractions; focus only on electrical and wiring checks. If the problem seems like an unrelated concept, stop and follow model-specific guidance.
Keep safety in mind: turn power off before reworking wiring. If issues persist after these checks, consult Ring support at ring.com/help for step-by-step, model-specific troubleshooting.
Frequently Asked Questions
Will the Doorbell Work With a Multi-Door or Multi-Chime System?
Yes, it can, but you’ll need to check compatibility. Multi door or multi chime setups often use shared transformers or specialized wiring. Some wired video doorbells won’t power all chimes or may trigger every chime. You should confirm transformer voltage/amperage and use a compatible chime connector or diode kit.
Additionally, follow manufacturer wiring diagrams. If unsure, turn off power and get a qualified electrician to avoid damage or safety risks.
Can I Hide Extra Wiring Inside Vinyl or Aluminum Siding?
Yes, you can often hide extra wiring inside vinyl or aluminum siding, but you should check for local security clearance or permit requirements first. You’ll route cables behind trim or into siding channels, using proper siding concealment techniques and weatherproof grommets at entry points.
Avoid crushing wires, maintain clearances from utilities, and secure connections in a dry, accessible junction box. If unsure, hire a licensed electrician for safe, code-compliant work.
Is a Professional Electrician Required for Historic or Knob‑And‑Tube Wiring?
Yes, you should hire a professional. Historic wiring and knob tube challenges create fire and code risks that you can’t safely assess or remediate alone. A licensed electrician will inspect and test loads; they will replace or isolate unsafe sections per code.
They’ll advise on grounding, proper transformers for your doorbell, and documentation for inspections or insurance. Don’t risk shock, hidden damage, or failing code compliance by DIY on outdated systems.
Will Extreme Cold or Heat Affect Battery Backup or Operation?
Yes, extreme temperatures can harm battery backup and operation. You’ll see reduced runtime and slower charging in cold; capacity loss or swelling in heat.
Protect the unit from direct sun and insulate or use rated enclosures in freezing conditions. Choose batteries and doorbell models specified for your climate. Monitor charge levels regularly, and replace degraded batteries promptly to maintain reliable operation and safety.
Can I Integrate the Doorbell With a Third‑Party Smart Home Hub?
Yes, you can often integrate your doorbell with third-party hubs, but check integration compatibility first. You’ll want to confirm supported protocols: Zigbee, Z-Wave, and Wi-Fi. Additionally, verify required hub firmware and any cloud account linking.
Follow manufacturer instructions to avoid wiring or power issues that could disable the chime or camera. If security matters, use strong passwords and enable two-factor authentication on linked accounts to keep access safe.
Conclusion
Before you finish, make sure power’s off, your transformer matches the Ring’s specs, and your chime is compatible. Mount the bracket, connect the wires to the supplied terminals, and reattach the faceplate. Then restore power.
Test the doorbell and chime; if the chime doesn’t ring or the doorbell won’t power, cut power and recheck wiring, transformer voltage, and connector tightness. If problems persist, call a licensed electrician. Don’t risk unsafe wiring.