Wired Video Doorbell Not Ringing Chime Troubleshooting
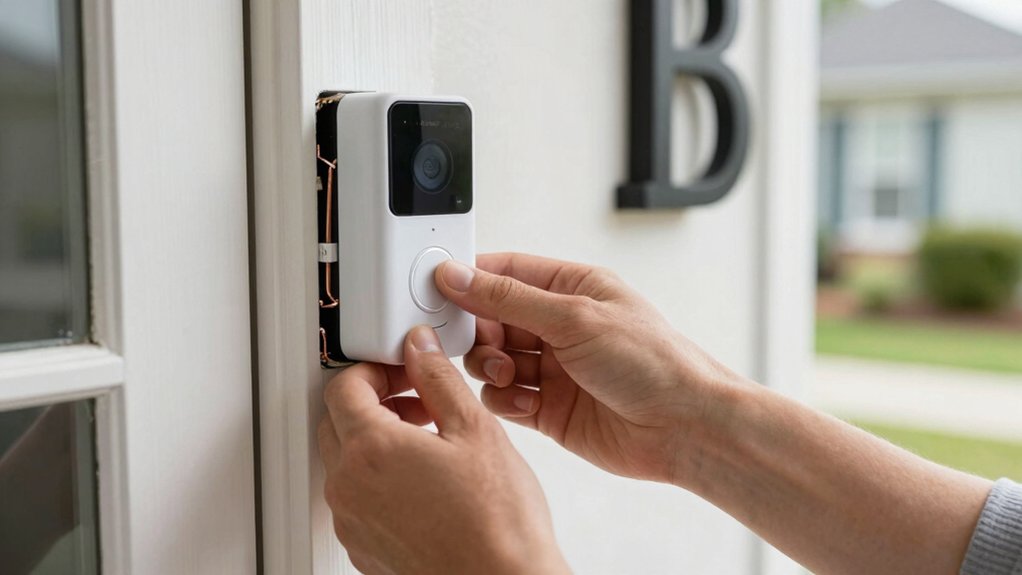
Turn the breaker off, grab a multimeter and insulated tools, then verify your doorbell wiring and transformer are intact. Expect 16–24 VAC and steady voltage under load. Inspect the button for loose, corroded, or painted contacts and clean or replace it.
Open the chime, confirm wiring terminals, and set the correct chime type in the app (mechanical, digital 1/2, or none). Retest afterwards. If voltage is low or fluctuates, upgrade the transformer VA.
Continue for step-by-step checks and reporting tips.
Wired video doorbell Not Ringing Chime Troubleshooting: Turn the breaker off, grab a multimeter and insulated tools, then verify your doorbell wiring and transformer are intact. Expect 16–24 VAC and steady voltage under load. Inspect the button for loose, corroded, or painted contacts and clean or replace it.
Quick Checklist: Safety, Tools, and First Fixes for a Wired Video Doorbell Not Ringing
Why start at the breaker? You eliminate shock risk before touching any doorbell wiring or chime components. That is the core safety step for this subject matter. Use a multimeter, insulated tools, and a ladder. Confirm power is off; then verify chime type (mechanical vs digital) and inspect wiring at the chime and transformer for loose or damaged connections.
Measure transformer output; it should read 16–24 volts. If voltage is low or fluctuating, replace with a higher VA transformer. Check the doorbell button wiring for tight terminals, clean contacts, and absence of paint or debris that can block the circuit. Tighten, clean, or reseat wires as needed.
After adjustments, restore power and test the button. Note whether the chime rings or if further steps are required. These methodical checks prevent common mistakes like skipping breaker shutoff, ignoring transformer voltage, or leaving contaminated contacts unaddressed.
Is Your Doorbell Compatible? Identify In‑Home Chime Type and Ring Compatibility
How do you know whether your existing chime will work with a Ring doorbell? You first identify your in home chime type (Mechanical, Digital Type 1, Digital Type 2, or None). Doorbell compatibility depends on that chime and the transformer; not only the doorbell model.
Use the Ring app and follow this methodical check:
- Open Device Settings → In‑home Chime Settings and confirm your doorbell model listed; note Automatic Chime Detection or Advanced Settings availability.
- If listed, run Automatic Chime Detection to verify your chime responds and the app recognizes the in home chime type.
- If not listed or detection fails, treat the chime as incompatible until you confirm transformer voltage and chime unit compatibility with Ring specs.
Don’t assume model alone guarantees compatibility. Verify via the app and the chime/transformer combination to prevent install issues and ensure reliable chime operation.
Inspect the Doorbell Button and Surface Wiring (Safe Step‑by‑Step)
Ready to start? Turn off power at the breaker before you touch anything to avoid electric shock. Begin button inspection by removing the doorbell button cover and verifying mounting screws are tight. A loose screw can break the electrical connection.
With power off, examine surface wiring at the button for loose, frayed, painted-over, or corroded conductors. Trace each conductor back a short distance to ensure insulation is intact and no strands are broken. Clean dirt, dust, and moisture from the button contacts and surrounding cavity using a dry brush or compressed air. Contaminated contacts cause intermittent or failed presses.
If you find damaged or corroded wires, replace the button and cut back to clean copper. Then re-strip and secure connections under the terminal screws. Re-tighten all screws and seat the cover. Restore power and re-test the doorbell circuit. If the chime still fails, proceed to the chime unit checks.
Check the Chime Unit and Set the Correct Chime Type in the Ring App
Want to confirm your chime matches the Ring settings? You’ll first identify whether the chime unit is mechanical or digital: that determines which app option you must select. Don’t confuse this with an irrelevant topic or any unrelated concept; focus on the chime hardware type.
- In the Ring app, navigate to the device > Device Settings > In‑home Chime Settings.
- Under Advanced Settings, set Chime Type to None, Mechanical, Digital Type 1, or Digital Type 2 matching the installed unit.
- Tap Ring my in‑home Chime and press the doorbell button to observe the response. If it fails, choose a different Chime Type and retest.
Be methodical: confirm physical chime morphology (solenoid striker vs. electronic speaker). Select the corresponding app option, then verify operation. Change types and retest until the app selection and hardware behavior are in agreement. This isolates chime‑type mismatch without addressing transformer testing or VA upgrade steps.
Test the Transformer: Multimeter Steps and VA Upgrade Guidance
Curious whether your transformer is the culprit? Power down at the breaker, open the transformer access, and visually inspect connections.
Re-energize the circuit before voltage testing. Set a multimeter to AC volts and measure across the transformer’s secondary terminals while the doorbell is idle and while the button is pressed or the bell is active. You should read a stable transformer voltage between 16–24 V. Readings below 16 V or fluctuating values indicate an undersized or failing unit that needs replacement.
If voltage is within range but the chime or smart doorbell underperforms during use, consider a VA upgrade. Smart units often require more current; moving from 10 VA to 30 VA supplies adequate headroom and prevents voltage sag under load.
Replace the transformer with the recommended VA rating, ensure secure wiring, then retest voltage under load to confirm stable 16–24 V operation and reliable chime behavior.
Top 6 Causes and One‑Line Fixes (Batteries, Wiring, Button, Transformer, Chime, Interference)
Which component is causing your wired video doorbell to stay silent? Diagnose six common causes and apply single-line fixes below.
- Batteries: Replace or recharge weak batteries in any wireless auxiliary modules. Consider a batteries upgrade for longer runtime.
- Wiring: Tighten or replace loose, frayed, or disconnected conductors to restore the circuit between button, transformer, and chime.
- Button: Clean or swap a worn, dirty, or corroded button that fails to complete the circuit.
- Transformer: Verify output; if voltage drops below 16V or current is insufficient, replace with an appropriate higher-VA unit.
- Chime: Inspect and clean the chime mechanism. Replace worn components that no longer produce sound.
- Interference: Move radios/routers, change channels, or adjust wireless doorbell settings for interference mitigation to prevent signal disruption.
Follow these targeted checks methodically. Test after each one and isolate the single change that restores consistent chime operation.
When to Call an Electrician or Replace Parts (What to Change First)
After you’ve methodically checked batteries, wiring, button, transformer, chime, and interference, and the doorbell still won’t ring reliably, it’s time to decide whether to replace parts yourself or call an electrician. Start with the simplest, safest swaps: tighten or replace corroded terminals, and short damaged wire sections to restore continuity.
Next, replace the transformer if your multimeter shows under 16–24 V or if the unit is old. Most smart doorbells require that range; a higher VA rating may be needed. If the chime mechanism binds or the solenoid/stiker behaves erratically, replace or service that chime.
Avoid wasting time on troubleshooting that’s an irrelevant topic to power or wiring. For example, cosmetic or network-only symptoms are unrelated issues here. Call a licensed electrician when you find unstable voltage, evidence of overheating, shared circuits, or when local code-compliant mounting or rewiring is required.
Prioritize safety: stop and hire pros for live-wire work beyond basic terminal swaps.
Quick Test Plan and What to Report to Support (Measurements, Photos, Ring Model)
Where do you start when the chime won’t ring reliably? Begin with a concise test plan and clear data for support. Verify the Ring model in the app; confirm in-home chime settings (Mechanical/Digital/None) and run Automatic Chime Detection if available. Measure transformer output with a multimeter; expect 16–24 VAC under load. Note chime voltage when the button is pressed. Photograph wiring at the button, chime unit terminals (power and signal sides), transformer location, and any damaged wires.
- Collect measurements: transformer VAC, chime VAC under press, transformer VA rating, and doorbell type (wired).
- Capture photos: button wiring, chime terminals, transformer, and loose/damaged wires.
- Document software/hardware: Ring model, app version, selected chime type, recent changes, and weather exposure.
When you contact support, attach those measurements and photos. Avoid unrelated discussion or irrelevant topic details; they slow diagnosis. Be exact and methodical in your report.
Frequently Asked Questions
Can a Doorbell App Notification Replace a Silenced Chime Temporarily?
Yes, your doorbell app notification can temporarily replace a silenced chime if the system sends push alerts for presses or motion. You’ll need to enable notifications, ensure the camera/bell and phone have power and network connectivity, and accept push permissions.
Expect limitations from Subtopic not relevant: Battery tech and App latency; they won’t directly affect notification function here. Test alerts after configuration to confirm reliable delivery and adjust sensitivity or schedules.
Will a Smart Doorbell Damage Existing Doorbell Wiring Long-Term?
Generally, no; you won’t damage doorbell wiring long-term if you install a compatible device correctly. Verify transformer compatibility and match voltage/amperage to the smart doorbell’s specs.
Use proper mounting, secure screw terminals, and wire connectors. Avoid forcing cables or exceeding transformer load. If you’re unsure, power down and test with a multimeter or hire an electrician.
Two word discussion ideas: “safety checklist,” “load testing.”
Do Weatherproofing or Sealants Block Chime Signals?
No, properly applied weatherproofing rarely blocks chime signals. You’ll avoid weatherproofing interference by using non-conductive, RF-transparent sealants and keeping coating thin around antenna or terminal areas.
Excessive metallic or conductive compounds can cause sealant attenuation of wireless signals or alter grounding paths. Inspect manufacturer guidelines, maintain clear antenna paths, and test chime operation after sealing. If issues appear, remove or replace suspect materials and retest.
Yes, you can, but you must verify load and capacity. You’ll calculate total VA draw from all devices and compare to transformer rating. Ensure wiring gauge and connections handle combined current and inrush.
Two word ideas1 and two word ideas2 should be documented in your schematic and load table. If the transformer is undersized, replace it with a higher VA unit or add a second transformer with proper isolation and separate circuits to avoid nuisance trips and overheating.
Is a Dimmer or GFCI Circuit Causing Chime Failures?
Yes, a dimmer or GFCI can cause chime failures. You’ll see dims for chime when a dimmer’s TRIAC chops low-voltage doorbell power, preventing the chime solenoid from actuating. GFCI interference can trip or add noise on the circuit; this interrupts transformer output.
Diagnose by temporarily swapping to a non-dimming switch and moving the doorbell transformer to a non-GFCI-protected circuit. Measure voltage under load to confirm the fault.
Conclusion
You’ve gone through the key checks: confirm compatibility and chime type, inspect the button and wiring safely, verify chime settings in the Ring app, and test the transformer with a multimeter (upgrade VA if underpowered).
If the chime still won’t ring, swap suspect parts in order: button, chime unit, transformer; or call an electrician. For support, record voltage, continuity, photos, and your Ring model. That info speeds diagnosis and fixes.
Related reading: Installing a Wired Video Doorbell With an Existing — a closer look at this topic.