Smart Lock Keypad Unresponsive Troubleshooting
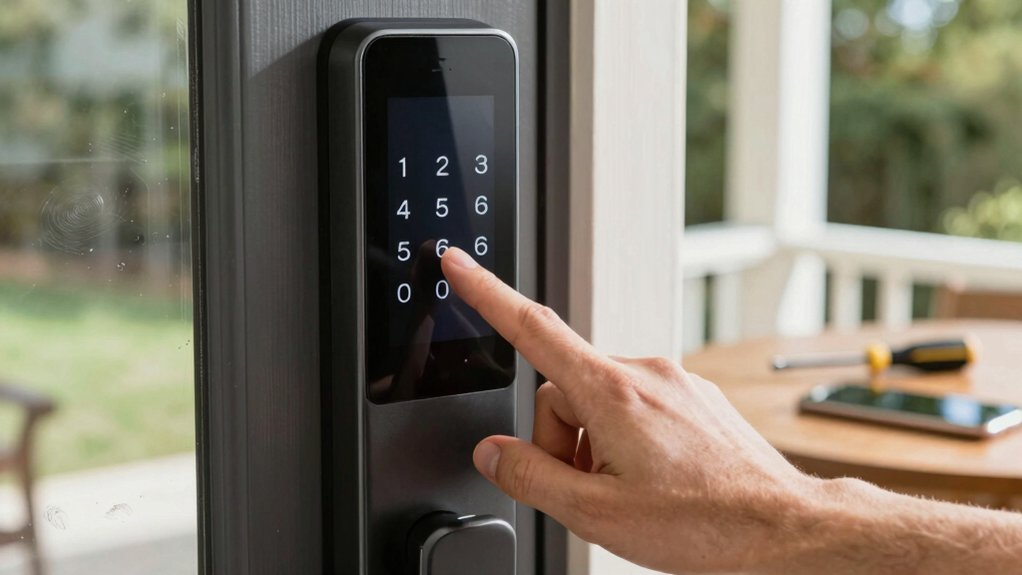
Start by replacing the batteries and power‑cycling the lock. A fresh pack and a quick reseat often restore keypad power and isolate issues. Power down per the manufacturer.
Unplug the battery pack for 10–15 seconds, then inspect and firmly reseat the keypad connector pins without forcing parts.
If the bolt still responds via app but the keypad stays dark, the keypad assembly is likely faulty. If both fail, suspect the control board or radio. Continue for step‑by‑step checks and when to contact support.
Smart Lock Keypad Unresponsive Troubleshooting: Start by replacing the batteries and power‑cycling the lock . A fresh pack and a quick reseat often restore keypad power and isolate issues. Power down per the manufacturer. Unplug the battery pack for 10–15 seconds, then inspect and firmly reseat the keypad connector pins without forcing parts.
Quick Fixes for an Unresponsive Keypad
Wondering where to start when your smart lock keypad stops responding? You’ll begin with methodical, low-risk steps: replace the batteries first, since fresh cells often restore function temporarily and isolate power failure from deeper faults. If that’s inconclusive, perform a reboot-like action by disconnecting and reconnecting the keypad’s battery pack; this can clear transient errors.
Next, verify the keypad connection pin is fully seated and inspect the keypad-to-unit interface for looseness. Secure any obvious misalignment without probing internal wiring. When you disassemble to check seating, realign or reseat connectors carefully. Some users report this restores operation until the next failure.
If resets, battery swaps, and reseating fail, plan for keypad replacement or contact manufacturer support for diagnostics. Keep notes: two word discussion ideas like “power fault” or “connector wear” help concise troubleshooting logs you can share during professional support calls.
Safely Check the Keypad Connector and Wiring
How should you approach checking the keypad connector and wiring so you don’t create more problems? Start methodically: Power down the lock and base station. Then confirm keypad stability by seeing that the keypad-to-unit connection pin is fully seated and not loose.
Visually inspect the seam where keypad halves meet for wear, fraying, or separation that could indicate internal wiring issues. If you’re comfortable and accept risk, disconnect and reconnect the keypad’s battery pack to reseat internal connectors; this can reboot the keypad and restore function.
Avoid forceful disassembly; realigning internal pins can void warranties and damage components. After reseating, perform wiring verification by checking for consistent pin seating and any obvious corrosion or damaged insulation.
If the keypad stays unresponsive despite correct connector seating and wiring verification, treat wiring-related faults as a likely cause. Proceed to professional service or manufacturer support rather than further invasive probing.
How to Tell if the Keypad, Control Board, or Radio Is Faulty
After you’ve checked connectors and wiring, you’ll need to isolate whether the problem lives in the keypad, the control board, or the radio module by comparing symptom patterns and simple functional tests. You’ll use observable behaviors to rule components in or out. This approach helps you avoid unrelated topics or irrelevant concepts.
- Keypad fault: The keypad/backlight is unresponsive while the bolt still operates via the app. Repeated temporary fixes from power cycling point to intermittent power or keypad-controller instability. You should suspect the keypad module or its internal wiring.
- Control board fault: Both the keypad and app fail to actuate the lock, but the app still shows status. That indicates the control board or radio interface isn’t commanding the actuator despite telemetry.
- Radio/module fault: If commands sent from the app don’t reach the lock, with no actuator attempt, and status updates stop, the radio or its interface is suspect.
Use targeted tests such as power cycling, observing status, and swapping batteries to confirm before replacing modules.
Reboot and Reseat Keypad Connector: Step‑by‑Step
Ready to rule out a loose connector or transient firmware glitch? You will perform a controlled reboot procedure that disconnects and reconnects the keypad battery pack to reset internal firmware and clear transient faults. Power down per manufacturer steps. Unplug the battery pack, wait 10–15 seconds, and then inspect the keypad connector pins for debris or bent pins. Fully reseat connector pins into their socket until you feel a positive click.
| Step | Expected result |
|---|---|
| Disconnect battery | Firmware resets; keypad dark |
| Inspect & reseat connector | Pins aligned; secure fit |
| Reconnect battery & test | Backlight on; keypad responsive |
After reassembly, re-test keypad input and verify backlight behavior. If the problem returns, repeat the reboot procedure and reseat connector to rule out intermittent seating. This is a hardware-side troubleshooting step. Persistent failures may indicate a defective keypad module or lock unit requiring further action.
When to Contact the Manufacturer or Request Replacement
When should you contact the manufacturer or request a replacement? If the keypad stays unresponsive after battery replacement and a reset, you should contact the manufacturer because this often indicates hardware failure; they’ll advise replacement options. If the deadbolt still responds via app while the keypad is dead, request an RMA. Recurring faults suggest the keypad assembly is at fault. If temporary fixes, such as battery pack reconnections or brief reboots, only restore function briefly, escalate to formal support for diagnostic or firmware/hardware assessment.
- Visualize a consistently dead keypad despite power and reset: document timestamps and symptom duration.
- Picture a working deadbolt controlled remotely while the physical keypad is inert: request a unit swap.
- Imagine intermittent recovery after reconnects; seek manufacturer testing for internal connector or keypad-to-lock faults.
Also ask about warranty and replacement options if your region lacks official support. Get instructions before disassembly.
Preventive Checks and Monitoring to Avoid Repeat Failures
How can you prevent the keypad from failing repeatedly? You’ll perform systematic checks and monitor behavior to isolate root causes. Regularly inspect and secure the keypad-to-unit connection pin to prevent intermittent unplugging that kills the keypad while the bolt still works. When troubleshooting, disconnect and reconnect the keypad battery pack as a reboot. Log whether the failure returns after days or weeks.
| Action | Frequency |
|---|---|
| Inspect connection pin & wiring | Monthly or during service |
| Battery reboot & monitor | After any failure |
| Track failure patterns | Continuous logging |
Schedule periodic physical checks of internal wiring and connectors during maintenance to catch loose or misaligned pins before inoperability. Track failure patterns after specific movements or battery swaps to separate hardware degradation from software/app issues. If multiple recalibrations or reseatings only provide temporary fixes, consider proactive replacement under warranty.
Maintain a security protocol for logs and protect user privacy when storing failure data.
Frequently Asked Questions
Can I Use Rechargeable Batteries in My Smart Lock Keypad?
Yes, you can often use rechargeable batteries in your smart lock keypad, but check compatibility first. Rechargeable batteries (NiMH) have lower nominal voltage than alkalines; therefore, some locks may misread charge. They handle cold weather better by maintaining capacity. Yet overall runtime can be shorter.
Use high-quality cells, ensure proper polarity, and monitor battery level regularly. If the manufacturer warns against rechargeables, follow their guidance to avoid malfunctions.
Will Cold Weather Permanently Damage the Keypad Electronics?
Cold weather rarely causes permanent damage to keypad electronics if the unit is rated for low temperatures. You will see temporary failures like slowed response or reduced battery output instead.
You should monitor keypad wear from repeated thermal contraction, moisture ingress, and brittle seals. Replace compromised gaskets or corroded contacts promptly. Use manufacturer-specified batteries and insulated covers. Test operation across temperature ranges to prevent progressive degradation and ensure reliable performance.
Does Keypad Water Exposure Void the Warranty?
Yes, water exposure can void the warranty if the manufacturer specifies moisture-related exclusions. You should check warranty implications and the fine print for environmental durability ratings (IP codes) and claimed protections.
Document any signs of ingress and note battery compatibility and corrosion risks, since leaked or incompatible batteries can worsen damage. Act methodically: photograph damage, contact support promptly, and follow prescribed diagnostic steps to preserve any remaining coverage.
Can Multiple Failed Codes Lock Me Out Permanently?
Yes, multiple failed codes can lock you out temporarily. In rare cases, they can create prolonged blocked access if the lock’s firmware enforces extended timeouts or admin lockout policies. You should treat repeated failures as a security risk: check lock logs, verify admin settings, and use backup entry methods (mechanical key, app, or authorized reset).
If needed, contact support to perform a controlled reset or firmware update to restore normal access.
Are Third‑Party Replacement Keypads Compatible With My Lock?
Yes, third‑party replacement keypads can work. However, you’ll need to verify electrical pinouts, signal protocols, and mechanical fit. For compatibility questions, compare wiring diagrams, firmware versions, and mounting dimensions.
Check battery replacement specs and rechargeable concerns. Confirm voltage, polarity, and charging circuits match the lock’s requirements. If documentation’s unclear, contact the lock manufacturer or test a unit on a bench with a fuse and current limiter before full installation.
Conclusion
In troubleshooting an unresponsive smart lock keypad, you’ve systematically ruled out simple fixes, inspected connectors and wiring safely, and isolated whether the keypad, control board, or radio is at fault. You’ve rebooted and reseated connectors step by step. You know when to escalate to the manufacturer or arrange replacement.
Continue regular preventive checks and monitor behavior so you catch intermittent failures early. This minimizes downtime and ensures reliable, secure entry control going forward.
Related reading: Smart Lock Calibration and Door Alignment Steps — a closer look at this topic.