Security Camera Condensation and Fogging Solutions
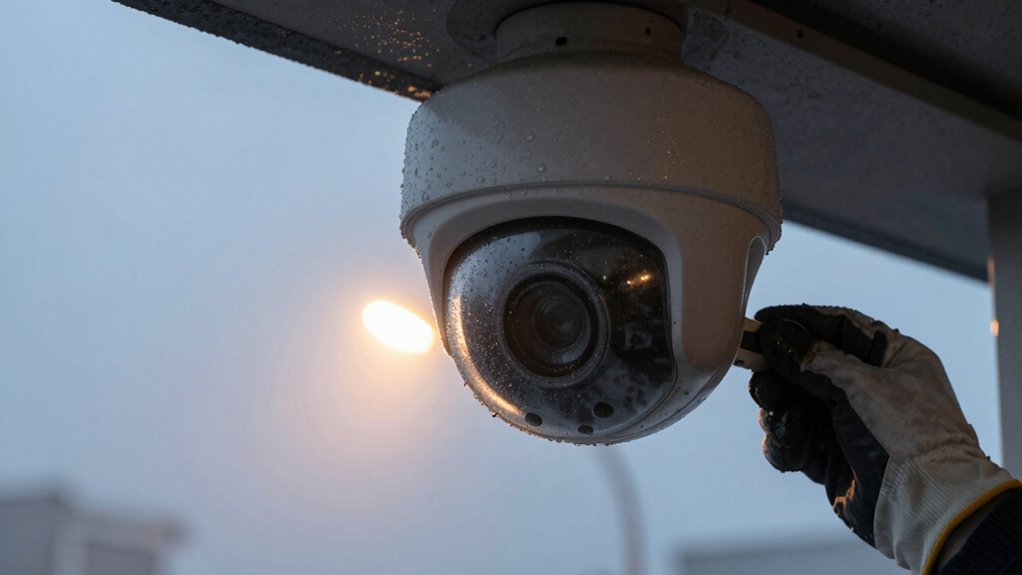
If your security camera is fogging, first determine whether the moisture is on the outside lens or inside the housing. Wipe outer condensation with a microfiber cloth, use anti‑fog wipes/sprays, or gently blow dry.
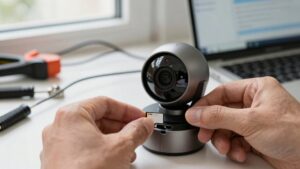
For internal fogging, open, dry, replace degraded foam/gaskets, and add silica gel packs.
For persistent problems, use a heated/ventilated IP‑rated housing and improve placement under eaves. Follow a troubleshooting checklist to verify seals and desiccant status; you’ll find targeted fixes and longer‑term options ahead.
Security Camera Condensation and Fogging Solutions: If your security camera is fogging , first determine whether the moisture is on the outside lens or inside the housing. Wipe outer condensation with a microfiber cloth, use anti‑fog wipes/sprays , or gently blow dry. For internal fogging, open, dry, replace degraded foam/gaskets, and add silica gel packs .
Quick Overview
- Wipe external condensation with a microfiber cloth or use a low-heat hair dryer for quick removal.
- Differentiate internal versus external fogging: internal indicates seal or gasket failure; external is ambient dew on the lens.
- Apply anti-fog coatings or sprays to lenses and follow manufacturer cure/cleaning steps for best effect.
- Place silica gel desiccants inside housings and monitor/replace them to control internal humidity.
- Use heated or ventilated IP-rated housings (heaters/blowers) and proper mounting under eaves for long-term prevention.
Quick Fixes to Clear Security Camera Condensation
When you spot lens fogging, act quickly to restore image clarity: start by wiping outer-surface condensation with a clean microfiber cloth. Then use a low-heat hair dryer on a gentle setting to evaporate residual moisture without overheating components. You’ll remove immediate obstruction and reduce the risk of irreversible fogging that can degrade optics.
After exterior drying, apply an anti-fog spray or wipe per manufacturer directions to create a temporary hydrophilic layer on the outer cover. If fogging recurs or you detect internal condensation in a dome, dry and clean the interior. Then reseal foam rings and gaskets to restore the enclosure’s IP integrity; failing to reseal can increase warranty impact if ingress is documented.
Place silica gel packs inside or adjacent to the housing to maintain low humidity and lower fog recurrence probability. These steps prioritize rapid image recovery and short-term prevention while you evaluate whether deeper repairs or replacement under warranty are required.
Causes of Security Camera Fogging : Internal vs External
Those quick fixes restore image clarity, but to stop recurrence you need to understand whether condensation forms inside the housing or on the exterior surface. You’ll diagnose two distinct mechanisms: internal fogging and external fogging.
Internal fogging stems from moisture trapped within the enclosure; bad seals, degraded foam rings in dome cameras, improper reassembly after cleaning, or deploying indoor-rated units outdoors can contribute to this issue. Moisture ingress or retained humidity condenses on cooler internal optics during temperature drops.
External fogging arises when ambient moisture—rain, dew, or high relative humidity—condenses on the outer lens, especially during rapid cooling of the lens surface. Large diurnal temperature swings exacerbate both modes by introducing warm moist air to cold surfaces.
You should inspect gasket integrity, IP rating compliance, and evidence of water entry to confirm internal fogging. For external fogging, check lens exposure, mounting orientation, and environmental exposure. Distinguishing the source focuses your corrective action on sealing and enclosure selection versus managing external exposure and thermal differentials.
Anti‑Fog Sprays, Wipes, and Desiccants (What Works)
Practical treatments—anti-fog coatings, sprays, wipes, and desiccant packs—give you targeted, low-cost options to reduce lens condensation when sealing and thermal control alone aren’t sufficient. You’ll find anti-fog coatings on optics provide persistent hydrophobic or hydrophilic surface properties that repel microdroplets and lower surface tension. This reduces fog under both humid and cold conditions.
For immediate maintenance, sprays and wipes work if you clean the lens first and follow manufacturer application and cure times; they’re economical but require reapplication based on exposure.
Internally, place silica gel desiccants inside housings or adjacent to mounting cavities to absorb residual moisture. Monitor desiccants’ effectiveness by weight or color-change indicators and replace packs periodically. Use desiccants with proper ventilation to avoid trapping humidity, which can worsen external fogging on outer domes.
Combined, coatings and moisture adsorbents form a practical mitigation strategy for short-to-medium term deployments where active thermal solutions aren’t used.
Heated and Ventilated Housings for Long‑Term Protection
Coatings and desiccants can manage short-term lens fogging, but for long deployments you’ll want housings that actively control temperature and airflow. You should specify a heated housing with integrated heaters and blowers to keep internal temperature above the dew point and prevent condensation, frost, or ice. Verify IP66+ ratings and model compatibility to ensure long-term reliability.
Combine controlled heating with targeted desiccant placement to capture residual moisture and extend service intervals. Use integrated blowers to maintain airflow without admitting water via covered ventilation ports. Place silica gel packs where they won’t obstruct optics or airflow; monitor and replace routinely. Select housings with thermostatic control to avoid overheating sensitive electronics. Choose corrosion-resistant materials and seals rated for your climate and UV exposure.
You’ll reduce false alarms and maintenance by designing for heat, ventilation, and moisture adsorption together. This approach balances internal humidity control against power consumption and thermal stress.
Camera Placement Tips to Reduce Recurring Fogging
Where should you site outdoor cameras to cut recurring fogging? Place cameras under soffits or eaves to block direct rain and solar radiation; this reduces moisture ingress and abrupt temperature shifts that drive condensation. For placement tips, avoid direct sunlight and nearby heat sources that create thermal differentials between lens and ambient air.
Site cameras in shaded, ventilated zones that permit passive air exchange. A steady airflow equalizes interior and exterior dew points and minimizes fog formation in humid conditions. Use protective covers or overhangs that shield precipitation while allowing ventilation; avoid fully enclosed, poorly ventilated housings.
Ensure mounted enclosures include vents or water‑resistant openings to promote moisture equalization without admitting water. Consider thermostat considerations when cameras sit near HVAC exhausts or heating elements: local temperature control can create microclimates that induce condensation. Maintain sensors and wiring clear of heat sources. These placement decisions reduce recurring fogging by limiting humidity differentials and enabling continuous air balance.
Troubleshooting Checklist: Seals, Warranty, When to Call Support
After you’ve optimized placement to reduce fogging, inspect the camera’s seals and internal condition before making further changes. Perform a methodical seals inspection: check the main housing seal, card slot gasket, and wire-entry feedthroughs for cracks, compression loss, or debris. Open the housing and examine the interior for water staining or dirt. Use a dry blower to remove moisture and particles, then replace aged silica gel packs.
- Verify all external and internal seals for continuity and correct seating.
- Clean and dry components; document any leakage paths and contamination.
- Replace desiccant and retest in the target environment for recurrence.
- Review warranty considerations before resealing, replacing parts, or altering housings.
If condensation persists after these steps, contact the manufacturer or a certified technician to diagnose enclosure integrity and potential manufacturing defects. Do not void coverage by unauthorized repairs; follow brand-specific guidance.
Frequently Asked Questions
Can Condensation Damage the Camera Sensor Permanently?
Yes, condensation can permanently damage the camera sensor if moisture reaches electronic components and causes corrosion or short circuits. You’ll see immediate failures or gradual degradation from corrosion, fungal growth on optics, or repeated thermal stress.
Mitigate condensation impact with proper sealing, desiccants, hydrophobic coatings, and active fogging prevention like heaters or ventilation. Regular inspection and maintenance reduce long-term risk and preserve sensor performance.
Is Condensation Covered Under Typical Camera Warranties?
Typically no. Manufacturers usually exclude condensation warranty claims unless caused by a defect or improper sealing. You’ll find standard warranties focus on manufacturing faults, not environmental moisture; therefore, fogging coverage is rare.
You should document conditions, serial numbers, and service logs if you suspect a defect. Then request an evaluation. For added protection, buy extended plans or IP-rated housings that explicitly state moisture or anti-fog provisions to improve coverage odds.
Can I Use Household Dehumidifiers for Outdoor Camera Housings?
Yes, you can use household dehumidifiers for outdoor camera housings. However, they’re often bulky and designed for rooms rather than small enclosures. You’ll get better performance with properly placed desiccants and careful dehumidifier placement if using a mini unit nearby.
Prioritize outdoor housing desiccants (silica gel, molecular sieves) inside the housing. Ensure airflow paths, monitor relative humidity, and avoid direct heat or moisture introduction that could degrade seals or electronics.
Will Condensation Affect Night Vision or IR Performance Differently?
Yes, condensation impact differs; it degrades night vision effects more severely. You’ll get scattering and absorption from water droplets on the lens or dome, causing bloom, reduced contrast, and IR backscatter that creates glare or bright spots.
Image signal-to-noise ratio falls, autofocus may hunt, and IR illumination becomes less effective at longer ranges. Mitigate with hydrophobic coatings, heaters, or IR-transparent desiccants to restore consistent nocturnal performance.
Are There Camera Models Specifically Rated Fog‑Proof?
Yes, you can buy fog proof cameras that are rated for fog and condensation. You’ll find models with IP/IK ratings plus anti fog coatings or heated housings and hydrophobic optics.
Evaluate specs: dew point tolerance, operating humidity, and built-in defog algorithms. Compare test data for IR performance under fog. For harsh environments, choose cameras with active heating, conformal seals, and verified anti fog coatings to ensure reliable imaging.
Conclusion
You’re now equipped to tackle camera condensation quickly and prevent it long term. Start with anti‑fog wipes or desiccants for immediate clearing. Then inspect seals and vents to determine if moisture is internal or external.
For persistent problems, upgrade to heated or ventilated housings and reposition cameras to minimize temperature differentials. Document findings, check warranty, and contact support if internal fogging persists. These steps reduce downtime and preserve image integrity and device lifespan.
Related reading: Outdoor Security Camera Weatherproofing Features to Consider — a closer look at this topic.