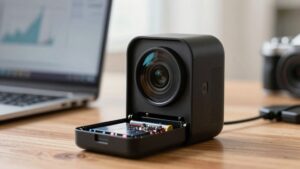
Formatting and Setting up Micro Sd Recording on Security Cameras
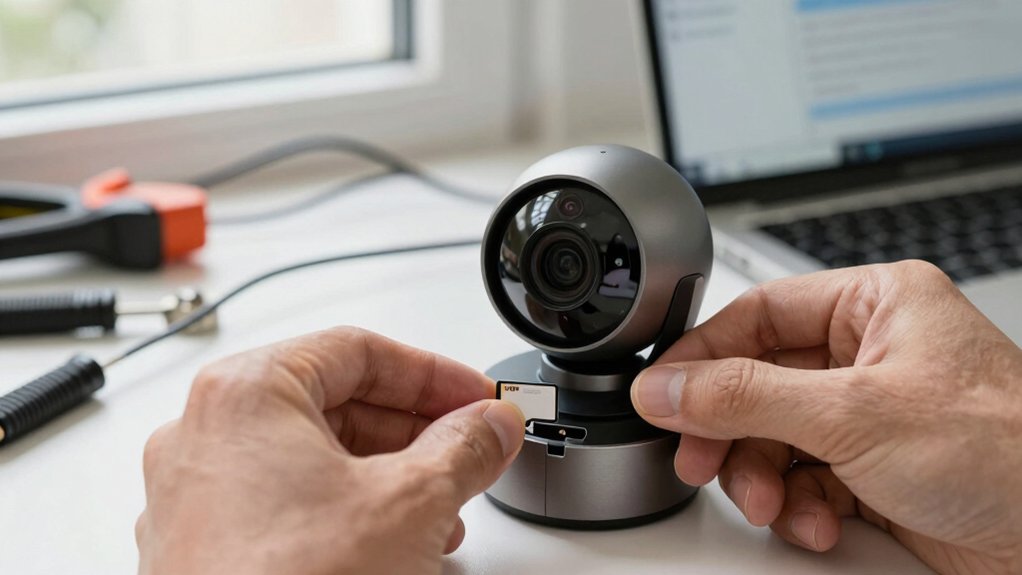
Insert a U1/V30 microSD (64 GB or smaller) with the chip facing down until it clicks, or format first on your PC. On a computer, full-format the card to FAT32, safely eject, then reinsert.
Power the camera by holding the motion button until the blue LED comes on. Press record once; the LED will blink then stay solid to begin. If recording fails, reseat the card, try a known-good 64 GB card, or reformat and retry. More setup and troubleshooting steps follow.
Formatting and Setting up Micro Sd Recording on Security Cameras: Insert a U1/V30 microSD (64 GB or smaller) with the chip facing down until it clicks, or format first on your PC. On a computer, full-format the card to FAT32 , safely eject , then reinsert. Power the camera by holding the motion button until the blue LED comes on.
Quick Overview
- Use a micro SD card 64 GB or smaller, inserted with the chip facing down until it clicks and sits flush.
- Format the card on a PC to FAT32 (full format) for reliable camera compatibility. Then safely eject.
- Choose a card with sustained write speed U1 or V30 (or higher) to avoid dropped frames during continuous recording.
- Power the camera on by holding the motion button; confirm the blue power LED. Then press the record button until the indicator stops blinking.
- If recording fails, reseat the card. Try a known-good ≤64 GB card, or reformat on PC before collecting logs for support.
Quick Start: Get Micro SD Recording in 2 Minutes
Want to start recording in under two minutes? You’ll insert a Micro Sd Card (up to 64 GB) with the chip facing the bottom, sliding it in until you hear a light click and it sits flush. If you’re unsure the card is usable, format it first on a PC, then reinsert.
After the card’s in place, power on the camera by holding the motion button for a few seconds and verify the blue power indicator illuminates.
Press the recording button once to begin; the indicator will blink for about two seconds, then remain solid while recording. If recording doesn’t start, recheck card orientation and format status.
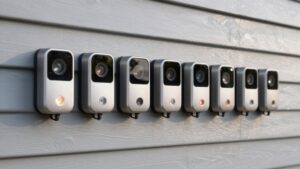
For deployment, confirm your wall placement avoids glare and matches your chosen color palette to minimize false triggers and ensure consistent exposure. These procedural steps get you functional micro SD recording quickly and reliably without navigating menus or advanced settings.
Choose the Right Micro SD Card (Capacity & Speed)
Now that your camera can record to a micro SD card, pick one that matches the device’s limits and performance needs: Use a micro SD card (not a larger SD adapter) of 64 GB or smaller. Choose a speed class that supports continuous video writes. You’ll use the smallest micro SD form factor. Capacity is critical because this camera won’t accept larger cards reliably. Stick to 64 GB or less to avoid incompatibility.
Select a card rated for sustained sequential writes: UHS Speed Class U1 or higher, or V30 for 1080p/continuous streams. Lower-class cards may drop frames or corrupt recordings under constant write loads. Don’t confuse this with an unrelated topic such as general smartphone storage needs; treat camera cards as dedicated streaming media. If you test cards from a different device, verify they maintain throughput under continuous writes.
Label capacity and speed clearly. Keep a spare 64 GB micro SD on hand for fast replacement when needed.
Format the Card on a PC for Camera Use
How should you prepare the micro SD card before inserting it into the camera? Start by connecting the card to a PC via an adapter or card reader. Use the PC’s disk management or a reliable formatting utility. Select the card, choose FAT32 (for ≤64 GB), and perform a full format to clear residual data and bad sectors. These formatting tips prioritize PC reliability and reduce incompatibility risks.
Confirm the card capacity is 64 GB or less. Larger cards may not work with the camera’s firmware. After formatting, safely eject the card to avoid filesystem corruption. Note that the camera may create timestamped file sets after you insert the formatted card. Plan to check and adjust camera time/date settings if timestamps are incorrect.
You can format with a phone or adapter, but relying on a PC minimizes errors. Keep a record of the card’s UID or label to track formatted media and lifecycle for routine replacements.
Insert the Micro SD Card Correctly and Power On to Record
Ready to install the micro SD card? You’ll insert the card with the memory chip facing the bottom side, align it with the slot, and push until a spring-loaded audible/tactile click confirms it’s seated flush. Use cards no larger than 64 GB; larger capacities may not be supported.
After insertion, power on the camera by holding the motion button for a few seconds. A blue light indicates the camera is active. Start recording by pressing the recording button once. The indicator will blink for about two seconds, then remain steady while recording.
If recording doesn’t start, remove the card and format the card on a PC. Then reinsert it, confirm the click, and repeat the power on sequence. For systematic troubleshooting, verify card capacity, seating orientation, and that the blue power LED illuminates.
Only proceed to other diagnostics after these steps to isolate whether the issue is media, seating, or power related.
Troubleshoot Micro SD Recording Issues
Where should you start when a camera stops recording? Begin by verifying the micro SD card is properly seated: chip facing the bottom and you hear the spring-loaded click so it sits flush. If seating is correct, confirm the camera has power. Check the blue power light and any required external power lead if the device lacks an internal battery.
Next, test card compatibility: use a micro SD up to 64 GB. If issues persist, remove the card and format it on a PC. Then reinsert, power on, and press the recording button once. The recording indicator should blink for approximately 2 seconds; then it should run continuously. If it doesn’t, swap in a known-good 64 GB or smaller card to isolate card versus camera faults.
Avoid unrelated topics or off-topic discussion during troubleshooting. Follow these steps methodically and record results. If problems remain, contact support with logs, power status, and card model for further diagnostics.
Frequently Asked Questions
Can I Use the Micro SD Card for Other Devices After Formatting for the Camera?
Yes, you can reuse the micro SD card after formatting, but you should check and manage micro SD durability first. Reformat in the new device’s preferred file system and run a quick health check (bad block scan, wear-leveling stats).
If the card previously stored critical footage, ensure you have cloud backup or local copies before erasing. After formatting and verification, the card will function normally in other devices; however, longevity may be reduced.
How Often Should I Replace the Micro SD Card to Avoid Failures?
You should replace the micro SD card every 1–3 years to avoid failures. Monitor disk longevity metrics, such as SMART-like wear indicators and total writes. Track the card lifecycle by logging rewrite cycles and error rates. Schedule proactive swaps when endurance approaches vendor-specified program/erase limits.
Use industrial or high-endurance cards for longer lifespans. Perform periodic integrity checks and keep spare cards ready to minimize downtime. Replace immediately on any read/write errors.
Does Encryption or Password Protect the Footage on the Card?
Yes, you can encrypt or password protect footage on many cameras. You’ll use encryption practices built into the device or the management software to scramble files and require credentials.
Password protection restricts access via user accounts, while full-disk or file-level encryption prevents offline viewing if the card is removed. Configure strong passwords, enable encryption, keep firmware updated, and store keys securely to maintain confidentiality and integrity.
Can I Schedule Automatic Overwrite Instead of Manual Deletion?
Yes, you can. You’ll enable auto overwrite in the camera or NVR settings so new footage replaces oldest files automatically. Set retention limits, overwrite intervals, or scheduled deletion windows (daily/weekly) depending on firmware.
Configure file type rules and motion/continuous priorities to preserve important clips before overwrite. Verify storage health and test the schedule to ensure automatic deletion behaves as expected. Keep backups for critical footage.
Will Recording to Micro SD Affect Camera Firmware Updates?
Yes, recording to micro sd can affect firmware update impact, but usually not if you follow compatibility. You’ll ensure micro sd compatibility (correct class, capacity, and format) so the camera won’t stall during updates.
Before updating, back up recordings and unmount the card if recommended. Some firmware changes may reformat or invalidate files; so check release notes and vendor instructions to avoid data loss and update failures.
Conclusion
You’ve now got the key steps to get micro SD recording working: pick a compatible card (capacity and speed), format it for the camera if needed, insert it correctly, and power the unit to start recording.
If something’s off, run the outlined troubleshooting checks: card seating, format type, firmware, and heat or power issues; before replacing hardware.
Follow this methodical sequence, and you’ll have reliable local recording in minutes, with predictable diagnostics when problems arise.
Related reading: 128GB MicroSD Cards — a closer look at this topic.