Setting Privacy Zones and Motion Masking on Security Cameras
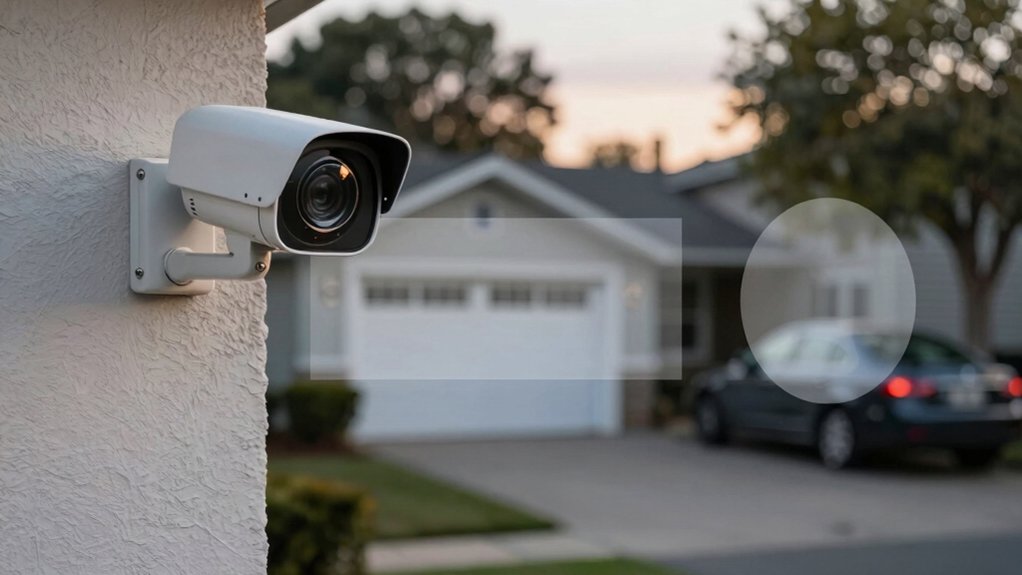
You’ll draw up to three privacy zones and motion masks on each camera (app or web) to block sensitive areas and cut false alarms. Tap to place 4–8 anchors, drag to resize, then Save. Doorbells use four anchors.
Keep masks small, aligned to edges, and away from key targets. Align them with Activity Zones and Tripwires to avoid conflicts. Zones appear black in Zones view and gray in recordings, but they disappear if the camera zooms or rotates. Continue for full setup and maintenance steps.
Setting Privacy Zones and Motion Masking on Security Cameras: You’ll draw up to three privacy zones and motion masks on each camera (app or web) to block sensitive areas and cut false alarms. Tap to place 4–8 anchors, drag to resize, then Save. Doorbells use four anchors. Keep masks small, aligned to edges, and away from key targets.
Add Privacy Zones and Motion Masks (Quick How‑To)
When you need to hide parts of the scene, add up to three Privacy Zones per camera by drawing 4- or 8-point polygons directly on the live image. Drag anchor points to size or move each zone, tap Done, then Save to apply.
To set privacy zones and motion masking quickly, select the camera, open Zones, and choose Privacy. Draw each polygon; models determine 4 or 8 anchors and adjust until areas align with static objects. Save to commit. Zones appear as black in Zones view and will blur or grey out in recordings and clips.
Live view omits masked areas when the camera moves; however, note zones vanish if the camera zooms or rotates. You can reset or delete individual zones anytime. As a best practice, configure privacy zones alongside Activity Zones and verify they do not overlap Ground Zones or Tripwires to prevent detection conflicts.
Use motion masking to suppress alerts from masked regions while preserving relevant motion detection elsewhere.
Step-by-Step: Draw, Resize, and Position Zones (App + Web)
Now that you’ve added privacy or motion masks, you’ll draw, resize, and position each zone precisely using either the app or web interface. In the app, tap and drag to create shapes (up to 3 zones per camera) using 4 or 8 anchor points depending on model. Adjust anchors to resize or reposition; tap Done then Save to apply changes and return to Home.
Privacy zones render black in Zones view; activity (motion masking) zones show grey. Use Update Photo to refresh the thumbnail. Remember, privacy zones can only be deleted or reset individually. You’ll re-create a zone to change it.
On the web, draw directly on the live image, close the shape to finish, then click Save. Test placement by viewing the Zones view and thumbnail. Follow a deliberate sequence: draw, verify anchor placement, finalize, save. This minimizes false detections and preserves intended privacy.
| Emotion | Purpose | Result |
|---|---|---|
| Relief | Protect privacy | Black zone hides view |
| Confidence | Reduce alerts | Grey masks focus motion |
| Control | Precise placement | Anchors define area |
Which Cameras Support Privacy Zones and Motion Masking
Which Arlo cameras support privacy zones and motion masking depends on model and firmware. Most current-generation Arlo cameras include support for up to three privacy zones per camera, using either 4 or 8 anchor points depending on model. Doorbell wireless units use 4 anchors. Camera-mounted zones only persist in the Home (non-zoomed, non-rotated) position.
Alarm.com users should note ADC-V515 supports privacy zones on firmware v0.0.5.450+ and can be configured via the Alarm.com app or website.
You should verify model specifics and firmware before configuring privacy zones or motion masking. Follow device release notes for anchor-point counts and persistence behavior. Use the app or web portal to enable zones, save settings, and test while the camera is in Home position.
- Confirm model and firmware: check anchor points (4 vs 8) and zone limits.
- Configure zones: draw up to three zones per camera; doorbells use 4 anchors.
- Test persistence: ensure zones remain when stationary; they won’t survive zoom/rotation.
Where to Place Privacy Zones and Masks Without Losing Coverage
Where should you place privacy zones and motion masks to keep alerts reliable while protecting privacy? Place them away from genuine areas of interest so you do not reduce coverage of important events. Use multiple smaller privacy zones rather than one large block to limit interference with analytics and support analytics preservation.
Align masks to frame edges and corners; draw zones along sides to limit width and avoid occluding key targets in the center field. Calibrate video analytics before you configure zones. Map critical activity areas; then draw masks to suppress only non-threat regions.
Avoid placing masks over moving subjects. If routine movement occurs in a peripheral region, exclude it from masking or use smaller, intermittent masks. After adjustments, test detection and alerts to confirm analytics preservation and reliable alerts.
Iterate: adjust shape, size, and placement until privacy implementation eliminates sensitive views without creating blind spots or false negatives.
How Privacy Zones Interact With Activity Zones and Tripwires
While privacy zones hide sensitive regions in recordings, activity zones and tripwires control what triggers motion events and alerts. Therefore, you should configure them together to avoid conflicts. You’ll set privacy zones to mask areas while using activity zones and tripwires to define detection boundaries. Privacy integration prevents sensitive pixels from appearing in saved footage even when motion within them triggers events.
- Define activity zones for areas you want monitored and set tripwires for directional events. Mark privacy zones over any adjacent private areas that shouldn’t be viewable.
- Perform alert tuning by testing motion across boundaries. Verify events fire when movement enters activity zones or crosses tripwires. Confirm masked regions are greyed out in recordings.
- Iterate: adjust zone shapes, priorities, and sensitivity so detection logic ignores masked regions for nuisance reduction. However, still record and contextualize relevant activity outside them.
Follow this procedural cycle to balance detection accuracy with privacy protection.
Limitations: Zoom, Rotation, Live View, and Storage Effects
After you’ve balanced activity zones and privacy masks, check how camera movement and system limits affect their behavior. Verify that privacy limitations include disappearance during zoom or rotation: when the camera moves, the zones won’t track and will be hidden until movement stops. Expect zones to be absent from live view during pan/tilt/zoom to reduce on-screen clutter; this is normal and prevents false alignment. Note that recordings still show greyed‑out areas to indicate concealed regions, so motion masking persists in storage even if live view omits masks.
Confirm model limits: most cameras support up to three privacy zones, each defined with either four or eight anchor points depending on model. On some systems, you can reset or delete privacy zones individually without altering activity zones; test administrative controls for that behavior. Document these constraints in your deployment plan so operators understand privacy limitations and how motion masking interacts with movement and recorded evidence.
Test and Troubleshoot Privacy Zones and Motion Masks
How do you verify that privacy zones and motion masks are working as intended? Start by drawing up to three privacy zones per camera, tapping Done then Save, and check the Home screen to confirm the update. Use the Update Photo feature on the Privacy Zones screen to refresh the thumbnail. Verify the grid matches the concealed areas and that zones display black in the Zones view; this indicates proper application and aligns with privacy ethics and data retention policies.
- Test: Perform live scene checks and confirm blacked-out regions on the refreshed thumbnail and live feed.
- Troubleshoot: If zones are unresponsive, delete and recreate them. Direct editing isn’t supported; save and re-verify.
- Mask tuning: If motion masking seems ineffective, recalibrate video analytics or reposition masks away from areas of interest to reduce false alerts.
Document each change to support audits and demonstrate compliance with privacy ethics and data retention rules.
Configure Motion Masking to Reduce False Alarms
Configuring motion masking lets you exclude specific scene areas from triggering recordings and alerts, so you can reduce false alarms from predictable non-threat movement like trees, fences, or road traffic. Begin by identifying irrelevant motion sources and map them as motion masking polygons in the camera UI. Apply masks to fences, trees, roadways, and other non-security areas.
Ensure privacy zones remain configured separately for permanently obscured regions. Motion masking should not replace privacy zones where visibility must be blocked. Limit masked areas to the minimum necessary so analytics focus on regions of interest: entrances, pathways, and perimeters. Save and activate masks, then run a timed observation to confirm the camera ignores masked motion while still recording unmasked activity.
If false positives persist, refine mask edges, add or remove polygons, or adjust sensitivity for adjacent zones. Review masks periodically after seasonal or layout changes to maintain detection reliability and keep false alarms low.
Best-Practice Maintenance and Compliance Checklist
Now that your motion masks are in place and verified, keep them effective through a regular maintenance and compliance checklist. You’ll create a preventive maintenance schedule to review all Privacy and Motion Masks quarterly and after any camera relocation or firmware update.
Calibrate video analytics before reconfiguring zones. Remove masks during recalibration to avoid false positives. Document each change, compare against privacy compliance rules and site policy, and ensure masked areas don’t cover legitimate security interest.
- Review: verify Privacy Zones meet masking limits (≤3 zones/camera, correct anchor points) and don’t obstruct critical view.
- Calibrate & Test: run analytics calibration, reapply masks, then confirm masks appear greyed in recordings and are absent from live view.
- Record & Audit: log changes, timestamps, rationale, and regulatory references; perform periodic audits for ongoing compliance.
Follow this procedural checklist to maintain function, reduce false alarms, and demonstrate adherence to policy and legal requirements.
Frequently Asked Questions
Can Privacy Zones Be Scheduled to Turn on and off Automatically?
Yes, you can schedule privacy zones to enable and disable automatically. You’ll use privacy scheduling in your camera or NVR settings to define active periods. Then apply motion masking to maintain areas excluded from detection while zones are active.
Configure start/end times, recurrence, and link masks to specific profiles. Test schedules and masking behavior during different modes (armed/disarmed) and adjust overlap or priority to ensure consistent privacy and detection.
Do Privacy Zones Affect Cloud Recording or Only Local Storage?
Privacy zones can affect both cloud recording and local storage depending on your camera and service. Some systems redact or block footage before upload; thus, cloud recording omits masked areas. Other systems upload full video and apply masking only on local playback or app view.
You should check device settings and cloud provider policies. Additionally, enable server-side masking if available and test recordings to confirm whether privacy zones are enforced before upload or only during viewing.
Can Guests or Contractors Temporarily Disable Privacy Zones Remotely?
Usually, you won’t let guests or contractors disable privacy zones remotely unless you grant temporary access via the camera system. To allow this, you create a temporary access profile with limited permissions, set an expiration, and log activities.
The guest then authenticates and can toggle privacy zones only within those permissions. Revoke access immediately after use and review audit logs to confirm no unauthorized changes occurred.
Are Privacy Zones Encrypted or Logged for Compliance Audits?
Yes, you should verify both features. You’ll confirm privacy encryption for stored zone definitions and any associated metadata by checking device specs and TLS/at-rest encryption settings.
You’ll also enable audit logging to record changes, timestamps, user IDs, and source IPs. Configure centralized log collection, retention policies, and integrity checks. During audits, you’ll export logs, validate cryptographic protections, and demonstrate chain-of-custody for privacy zone modifications.
Will Privacy Zones Prevent Law Enforcement From Accessing Footage?
No, privacy zones and motion masking won’t reliably stop law enforcement from accessing recorded footage if the camera or recorder retains unmasked video. You should verify your system: check where privacy zones are applied (edge vs. recorder) and whether masking is enforced in stored files.
Also, check whether logs indicate masked segments. If you need to restrict access, implement encryption, strict access controls, and documented retention policies so masked areas stay protected during audits and legal requests.
Conclusion
You’ve now learned how to add and adjust privacy zones and motion masks. You have also learned how to verify camera compatibility and place masks without losing critical coverage. Use activity zones and tripwires for targeted detection.
Remember limitations like digital zoom, rotation, and live-view exclusions. Test settings and refine motion masks to cut false alarms. Keep a regular maintenance and compliance checklist. Apply procedural checks after changes to ensure detection and recordings behave as intended.
Related reading: Security Camera Privacy Guidelines — a closer look at this topic.