Running Ethernet Cable for Outdoor Security Cameras
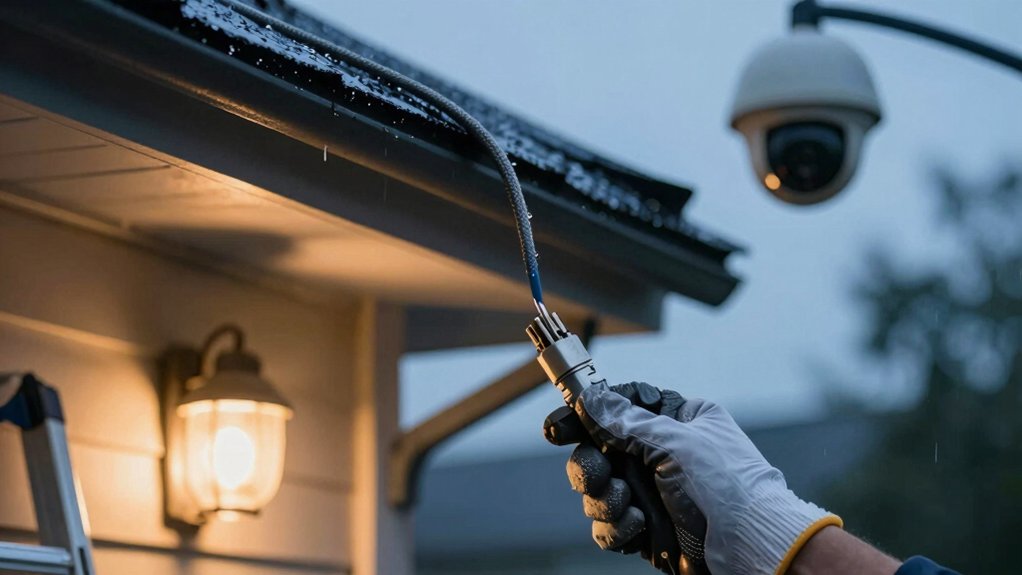
You should run outdoor‑rated Cat5e/Cat6/Cat6a on conduit or direct‑burial cable and use PoE to provide power and data over a single run. Keep runs within 250–328 ft; leave service loops at both ends, and seal terminations with weatherproof connectors and silicone.
Bury direct‑burial cable 18″ or use conduit in high‑wear areas. Add surge protection and grounding for shielded cable, and test voltage/current at the camera before finalizing. More practical steps and troubleshooting follow.
Running Ethernet Cable for Outdoor Security Cameras: You should run outdoor‑rated Cat5e/Cat6/Cat6a on conduit or direct‑burial cable and use PoE to provide power and data over a single run. Keep runs within 250–328 ft; leave service loops at both ends, and seal terminations with weatherproof connectors and silicone.
Quick Overview
- Use outdoor-rated Cat5e/Cat6/Cat6a (UV-resistant, direct-burial or conduit-rated) and match cable to required bandwidth and EMI environment.
- Keep PoE cable runs within practical limits (≈250 ft for UTP); stage injectors or use fiber if longer and calculate voltage drop.
- Route in conduit or direct-bury at recommended depth (≈18 in for burial) and include a pull string for future replacement.
- Terminate with weatherproof connectors or junction boxes; seal entries with silicone. Leave service slack loops for maintenance.
- Label both ends with camera ID and run length; document routes in a diagram. Test PoE voltage and data connectivity after installation.
Quick Wiring Summary: Run Ethernet to an Outdoor Camera
Want a reliable outdoor Poe Camera feed? You’ll run one outdoor-rated CAT5e/CAT6 cable per camera from the camera to a PoE switch or NVR. Keep individual runs within typical limits (≈250–328 ft depending on gear). Plan the route, choose conduit or outdoor enclosures, and use direct-burial cable buried ~18 inches or conduit with pull string.
Keep runs as short as practical to reduce signal loss; add slack at both ends for termination and future reorganization. Protect terminations with weatherproof connectors sealed with silicone. Use wall plates, fish tape, and cable guards where needed. Employ PVC or metal conduit through high-wear zones.
If a run must exceed practical Ethernet limits, segment with intermediate PoE switches or transition to fiber. Avoid pursuing irrelevant subtopic options that don’t improve signal integrity. For design meetings, limit notes to two word discussion ideas to stay focused and technical.
Why Use Outdoor Cat6/Cat6a and PoE for Cameras
Why choose outdoor Cat6/Cat6a and PoE for your cameras? You get higher bandwidth, improved EMI immunity, and longer reliable PoE runs than Cat5e. This helps meet security standards and supports future upgrades without re-cabling.
Single-cable power and data: PoE delivers both over Cat6/Cat6a, simplifying outdoor installs and eliminating separate power drops.
Bandwidth headroom: Cat6a supports higher data rates for high-res video, analytics, and future upgrades to multi-stream cameras.
Run-length reliability: Unshielded Cat6 is practical to about 250 ft; shielded to about 275 ft. Beyond that, use intermediate PoE switches or fiber.
Outdoor durability: Choose UV-resistant LLDPE/HDPE jackets, water-resistant cores, and direct-burial ratings to withstand soil and moisture.
Protection practices: Plan conduit (about 18 in PVC) or direct-burial with gel or fill to prevent moisture, UV damage, and mechanical stress.
Use outdoor-rated Cat6/Cat6a and PoE to align with installation best practices, compliance, and scalable camera system design.
Tools and Materials for PoE, Plug-In, and Analog Outdoor Cameras
Which tools and materials do you need for reliable outdoor camera runs? You’ll need outdoor-rated CAT5e/CAT6 (or CAT6a) cable sized to your run (<250–328 ft). Choose direct-burial variants with petroleum gel or dry water-block tape for buried cables. Bring shielded cable only if you’ll run near high-voltage or EMI sources.
Use PVC or metal conduit and plan conduit placement to protect exposed runs and simplify servicing; install a pull string. For PoE cameras, use a PoE switch or injector rated for your camera power draw. For plug-in cameras, include weatherproof outdoor power supplies and GFCI-protected circuits. For analog, bring RG59 coax plus baluns.
Tools: cable tester, crimper, RJ45/RJ11 connectors, splice kits, fish tape, chokers, conduit benders, trenching shovel or trencher.
Materials: weatherproof junction boxes, silicone sealant, stainless hardware, pea gravel for drainage, and depth markers. Seal all connections and mountings to prevent moisture ingress.
Step-By-Step: Run Ethernet From Nvr/Router to an Outdoor Camera
Now that you’ve gathered the outdoor-rated cable, conduit, power options and tools, start by mapping the physical route from the NVR/router to the camera. Choose either a buried conduit path or an above-ground run along eaves or walls. Measure cable length plus service slack and note any high-voltage or EMI sources where you may need shielded cable or increased separation. Then follow these steps precisely:
- Select outdoor-rated CAT5e/6 (UV-resistant, direct-burial or in conduit) and determine shielded vs. unshielded based on EMI and privacy concerns.
- Lay conduit: bury PVC ≥18″ (metal per code) or mount above-ground along eaves. Secure with rubber-coated staples.
- Pull cable using fish tape; maintain maximum run lengths (≈250′ unshielded, ≈275′ shielded). Stage intermediate PoE switches if needed.
- Terminate with weatherproof connectors; seal entry with silicone. Mount camera in gasketed enclosure.
- Document run; clip slack in service loop. Plan wireless backups only as auxiliary redundancy, not primary data path.
Test and Verify Cable, PoE, and Camera Power Before Finalizing
How will you confirm the run is reliable before sealing everything up? First, test continuity with a cable tester at the camera end to detect opens, shorts, miswires, or split pairs. Resolve any faults before proceeding. Measure run length to ensure you’re within recommended limits (≈250 ft unshielded, ≈275 ft shielded) to avoid signal degradation.
Next, verify PoE power by measuring voltage and current at the camera connector while the camera draws idle and active power; confirm readings sit within the camera’s specified input range. Check the PoE switch or injector capacity so total camera load on that segment stays below its rating. Ensure surge protection is installed on the supply.
Inspect outdoor terminations for proper weatherproofing: verify seals, connector gaskets, and junction box integrity for moisture ingress. Power the camera, confirm network link, and video output, then document test results. Only after all tests pass should you finalize and seal the installation.
Physical Protection: Conduit, Drip Loops, Enclosures, and Burying Depths
After you’ve verified continuity, PoE, and weatherproofing at the connections, protect the cable run itself with appropriate physical measures. You’ll use conduit protection and planned routing to prevent mechanical and moisture damage. Drill properly sized exterior entry holes, pull cable with fish tape or through conduit, and seal entry points. Install drip loops at every outdoor entry to force water to fall away from junction boxes and enclosures. Choose burial depth per material: PVC conduit ≥18 inches; metal pipe ≥6 inches per NEC. Secure exposed runs with clamps, guards, or camouflage to avoid impact.
Use PVC or metal conduit for exposed and buried runs; select burial depth by conduit type. Create drip loops at each entry and anchor to prevent tension and water migration. Use weatherproof connectors, sealed junction boxes, and silicone or gasket seals at penetrations. Route conduits to minimize physical exposure; add guards where impact risk exists.
Pull cables with fish tape. Maintain bend radius and secure every 3–4 feet on exposed sections.
Troubleshooting Long Runs: Voltage Drop, Shielding, and When to Use Fiber
Facing long outdoor runs, what should you check first to keep PoE and data reliable? Measure total cable length and calculate expected voltage drop for your PoE class. Unshielded CAT5e/CAT6 is practical to ~250 ft; shielded ~275 ft before you need an intermediate PoE injector or switch. Check link loss budgets and plan obstacle avoidance to prevent sharp bends or long detours that add length.
If you exceed those distances, deploy a remote PoE switch or transition to fiber (OM4 MMF) to preserve bandwidth and eliminate voltage-drop concerns. Use shielding only where EMI, nearby high-voltage lines, motors, or transmitters create risk. Shielding complicates installation and grounding.
Apply grounding best practices when using shielded cable to avoid ground loops and ESD/lighting vulnerability. For outdoor routes, coordinate conduit or direct burial (18–24 in) and weatherproofing. Fiber terminates electrical risk and is preferred for long runs or high-EMI environments.
Labeling, Concealment, and Future-Proofing Your Camera Cabling
Want your installation to stay serviceable and tamper-resistant years from now? Use strict labeling practices, concealment strategies, and deliberate slack to simplify maintenance and enable upgrades. Label cable ends immediately with durable tags or heat-shrink labels that show camera ID and run length; document in a diagram and digital file.
Route cables along gutters, downspouts, or inside PVC/metal conduit to reduce exposure and deter tampering. Follow burial depth: PVC conduit ≥18 inches; metal conduit ≥6 inches per NEC. Leave service loops at both ends for termination, bends, and repositioning. Use weatherproof connectors, wall plates, and cable guards to maintain signal integrity and waterproofing.
- Label cable ends with camera ID, location, and date.
- Run cables in conduit or discrete architectural channels.
- Bury conduit to NEC-specified depths for permanent runs.
- Provide slack loops at mounts and patch panels.
- Install weatherproof terminations and modular wall plates.
These steps keep the system organized, durable, and ready for additional cameras or higher-bandwidth upgrades.
Frequently Asked Questions
Can I Use Poe Over Existing Outdoor Coax With Adapters?
Yes, you can use PoE over existing outdoor coax with active adapters, but it’s conditional. You’ll need high-quality balun adapters. Confirm impedance matching and test gigabit capability; coax limits distance and bandwidth.
Factor inverter sizing and battery backup if powering multiple cameras remotely to handle startup currents and outages. Grounding and weatherproofing are mandatory. Verify adapter specs, cable condition, and PoE class compatibility before deployment to ensure reliable operation.
Do I Need Surge Protection for Cameras on the Same Circuit?
Yes, you should use surge protection for cameras on the same circuit. You’re exposing multiple devices to a single transient event. Without surge protection, a lightning strike or switching surge can damage all cameras and the PoE injector/switch.
Install inline surge protectors at the service entrance and local surge protectors or lightning arrestors at camera runs. Grounding and properly rated protectors for Ethernet and power conductors are essential for reliable protection.
How Do I Run Cable Across a Driveway Without Digging?
You can run cable across a driveway without digging by using rated conduit or aerial drops and protective fasteners. For outdoor cable routing, mount PVC or metal conduit to posts or curbside bollards. You can also install a low-profile steel protection plate across the surface where traffic crosses.
Use shielded, outdoor-rated cable and watertight connectors. Secure conduit to prevent movement, and consider warning markers for driveway obstacles to prevent vehicle damage and ensure code compliance.
Can I Power Cameras With Solar Instead of Poe?
Yes, you can power cameras with solar instead of PoE, but you’ll need proper design. You’ll size panels and batteries for camera power draw; ensure a charge controller and voltage regulation; and pick cameras that support DC input or use a compatible solar power kit.
Consider wireless alternatives for data (Wi-Fi, cellular) if you avoid Ethernet. Plan for cloudy days, surge protection, and secure mounts to maintain uptime and reliability.
Are Inline Weatherproof Connectors Reliable Long-Term?
Yes, inline weatherproof connectors can offer long term reliability if you pick quality parts and install them correctly. You’ll use UV-resistant housings, gold-plated contacts, and gel-filled or O-ring seals to prevent corrosion and moisture ingress.
Tighten strain relief; avoid sharp bends; and mount connectors away from standing water. Periodically inspect seals and replace degraded components. Cheap connectors degrade quickly; spec to IP67/IP68 and reputable manufacturers for durable performance.
Conclusion
Run Cat6/Cat6a and PoE to each outdoor camera using rated materials. Maintain proper bend radii and protect runs with conduit, drip loops, and weatherproof enclosures. Test continuity, PoE voltage, and camera feed before burying or sealing.
For long runs, consider higher-gauge cable, PoE extenders, or fiber with media converters to avoid voltage drop and interference. Label and document each run for maintenance and future upgrades. Follow local codes for burial depth and outdoor installations.