Home Security Hub Placement for Better Sensor Range
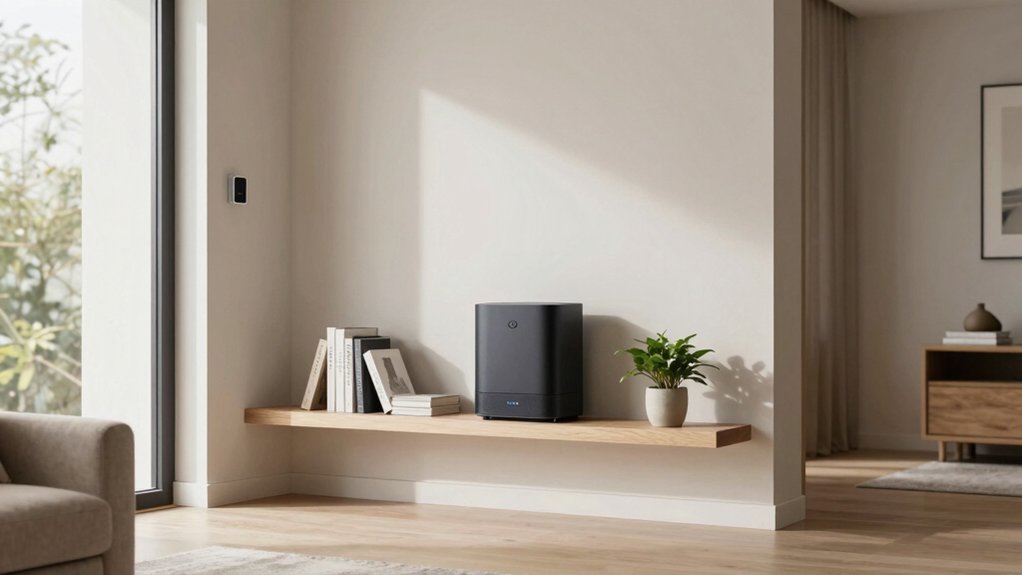
Place your security hub centrally in a main living area, about 4–5 feet from an always-on outlet and at least 4 feet away from large metal appliances to reduce interference. Keep the hub within roughly 100 feet line-of-sight of each sensor. Avoid straight paths through ovens or HVAC; prefer higher stable mounting rather than hidden behind furniture.
Use an unswitched outlet or UPS for power backup. Test signal strength at each sensor and continue for troubleshooting tips and placement tactics.
Home Security Hub Placement for Better Sensor Range: Place your security hub centrally in a main living area, about 4–5 feet from an always-on outlet and at least 4 feet away from large metal appliances to reduce interference. Keep the hub within roughly 100 feet line-of-sight of each sensor.
Quick Overview
- Place the hub centrally in the home within 4–5 feet of a powered, unswitched outlet to maximize sensor reach.
- Keep the hub at least 4–5 feet away from large metal appliances and HVAC units to reduce RF interference.
- Maintain hub-to-sensor distances under ~100 feet; account for walls, floors, and structural obstructions.
- Test sensor placement live after installation. Adjust hub height or location until signals register consistently.
- Use a dedicated outlet or UPS for continuous power. Avoid switched receptacles or extension strips that may cut power.
Quick Hub Placement Checklist (Immediate Steps)
Where should you put the hub? Place it centrally in the home, within 4–5 feet of an outlet that stays powered, and away from large metal appliances to minimize interference. You’ll keep the hub plugged in at all times; don’t rely on battery reliance as your primary stability strategy. Position the hub so it’s within 100 feet of all sensors. Avoid straight-line paths that cross ovens, refrigerators, or HVAC units, which can block RF or Wi‑Fi signals.
Test sensor reach by installing each sensor where you intend to use it. Verify monitoring visibility, especially if you’re using an HMS hub. If communication issues appear, raise the hub height or move it closer to a window to improve cellular or network connectivity. Check power and signal LEDs after relocation.
For privacy considerations, avoid placing the hub in bedrooms or bathrooms where its microphone or network presence could capture sensitive activity. Keep it in shared utility or living areas with stable power and signal.
Place the Hub: Best Locations for Coverage
Looking for the best spot for your hub? Place the Hub centrally, near a permanent outlet, and keep it 4–5 feet from large metal appliances to minimize interference. Aim for a Hub-to-sensor distance up to 100 feet. Map expected sensor positions so you can test actual reach. Use test sensors at intended locations; if signals fail to register consistently, relocate the hub or specific sensors to restore clear line-of-sight and reduce cross-talk.
Prioritize permanent power over battery reliance so communication stays stable; do not treat batteries as primary power. While positioning, balance technical needs with aesthetic integration. Mount or hide the hub so it’s unobtrusive but still central and unobstructed. Be mindful of privacy risks: avoid placing the hub in bedrooms or bathrooms where microphones or cameras could capture sensitive audio/video.
Document final locations and retest after furniture changes or appliance moves to maintain reliable coverage.
Check Power: Avoid Switched Outlets and Use Backup
Why risk an unexpected outage? You should plug the Hub into a stable, unswitched outlet so the system doesn’t enter Low Power Mode when someone flips a wall switch. Prioritize outlet choices that provide continuous mains power; switched receptacles and extension strips controlled by a wall switch are common failure points.
Power stability is essential because the Hub must maintain constant communication with all sensors. Don’t design around battery operation. Install the Hub near a dedicated, unswitched circuit or a consistently live outlet. Verify wiring with a multimeter if needed.
Keep the Hub connected to a reliable backup: a UPS or integrated battery that provides enough runtime to notify you and gracefully shut down nonessential functions. Treat the internal battery backup as emergency-only; it’s for short outages, not sustained operation. Test transfer times and battery runtime periodically so you know how long sensors remain reachable during an outage.
Avoid Interference: Keep the Hub Away From Metal and Appliances
Once you’ve confirmed a stable power source and backup, focus on physical interference: Metal and large appliances can dramatically attenuate wireless signals. Place the Hub at least 4–5 feet away from refrigerators, ovens, HVAC units, water heaters, and other bulky metallic objects. You’ll reduce primary interference sources by prioritizing metal avoidance and keeping the Hub off metallic surfaces or cabinetry. Maintain a clear line of sight to sensors where possible; Metal creates reflective and absorptive obstacles that cause packet loss and retries.
- Inspect: Map nearby metal appliances and structural elements. Then measure 4–5 ft clearances to establish a low-interference zone.
- Test: After relocating the Hub, arm the system via the mobile app to verify sensor communication. If issues persist, shift the Hub or individual sensors away from identified interference sources.
- Iterate: Document placements and test results. Repeat adjustments until you see consistent successful transmissions within the system’s operational range.
Maintain Range: Keep the Hub Within Effective Distance of Sensors
How close should your Hub sit to sensors to keep signals reliable? Keep the hub within 100 feet of every sensor as a baseline; that distance preserves typical wireless range and reduces retries.
Don’t make inaccurate assumptions about coverage. Walls, doors, and metal can shrink effective range well inside that limit. Position the hub where its radio path to sensors isn’t blocked by large appliances or metal objects. Avoid placement that creates non-line-of-sight corridors through dense materials.
Use methodical placement: map straight-line distances, note intervening obstructions, and prioritize central locations serving multiple sensors.
If you see inconsistent terminology in documentation (range vs. line-of-sight), adopt a single operational definition; for example, “100 ft unobstructed” — and apply it when planning. When weak links appear, move the hub or the affected sensor to restore continuous coverage. Iterative relocation often resolves marginal connections faster than adding repeaters.
Test Signal Strength: 3 Quick Checks for Hub-to-Sensor Links
Want a quick, practical check that your hub and sensors are talking reliably? Use these three focused diagnostics to validate links, inform tightening placement, and verify behavior matches your firmware cadence.
- Arm-and-trigger: Arm the system and activate a sensor at its intended location. Confirm the hub posts the event to the mobile app within a few seconds. Note delays; consistent lag indicates range or interference issues.
- Max-distance run: Move a sensor to the farthest plausible location (near the expected 100-foot limit). Trigger it repeatedly and log missed detections or increased latency. This gives you a practical dead-zone map for tightening placement decisions.
- Obstruction and load test: Place a sensor behind typical walls or furniture and trigger it while other sensors are active. Watch for dropped packets or delayed alerts. If responsiveness degrades, adjust placement. Confirm behavior persists across your normal firmware cadence.
When to Add Ethernet or Repeaters : And How to Troubleshoot
Need more reliable links? If wireless range falters, add an Ethernet-connected hub to provide a stable Ethernet backhaul: this is critical when you relocate hubs away from interference. For wired mesh setups, run Ethernet to additional access points or a secondary hub to reduce wireless contention and preserve consistent sensor communication.
Use a Repeater strategy only when you can create a clear line-of-sight between the main hub and distant sensors. Avoid metal obstructions that degrade RF. Place repeaters or a second hub roughly mid-point to cut registration and panel response times under one minute.
Troubleshoot methodically: test cellular or RF signal strength in the app, confirm the hub is within ~100 feet of sensors, and move the hub higher or closer to windows to improve reception. If registration or response delays persist, add an Ethernet-fed mid-point hub or reposition repeaters to eliminate dead zones.
Record changes and retest after each adjustment.
Frequently Asked Questions
Can the Hub’s Placement Affect Wireless Cameras Differently Than Motion Sensors?
Yes, hub placement affects wireless cameras differently than motion sensors. You’ll need to balance cabling aesthetics with signal strength. Cameras often sit farther from the hub and rely on stable throughput for video; therefore, align camera placement and antenna orientation for best camera alignment and reduce obstructions.
Motion sensors use low-bandwidth, intermittent signals and tolerate weaker links. You’ll want strategic hub height, clear RF paths, and selective extenders to optimize both.
Will a Heavy Door or Wall Material Block the Hub’s Signal Unexpectedly?
Yes, heavy door materials and dense wall construction can unexpectedly block your hub’s signal. You’ll see attenuation with metal cores, steel reinforcements, concrete, brick, or stone. This includes even thick fiberglass doors with metal mesh. Signal loss increases with material mass and embedded metal.
To mitigate this, place the hub centrally; keep line-of-sight where possible. Use mesh-capable devices or repeaters, and test RSSI at sensor locations before final installation.
Can Pets Trigger Sensor Interference That Impacts Hub Communication?
Yes, pets can cause pet interference that affects sensor range and hub communication. You’ll see false triggers from motion sensors when animals move within detection zones. Dense fur or water on pets can attenuate RF signals in rare cases.
To mitigate this, adjust sensor sensitivity; use pet-immune PIRs; reposition sensors and hub to optimize line-of-sight; and test signal strength across rooms. Log and recalibrate periodically for consistent performance.
Should I Relocate the Hub Seasonally Due to Temperature Changes?
You don’t generally need seasonal relocation; modern hubs tolerate typical temperature fluctuations. Instead, monitor the hub’s operating temperature range and place it where ambient shifts are minimal. Avoid attics, garages, or direct sun.
If your climate causes extremes beyond specs, implement seasonal relocation or add passive insulation, a small climate-controlled enclosure, or active ventilation. Log signal strength and battery drain before and after moves to verify improvements. This will help you avoid unnecessary relocations.
Does Hub Placement Affect Battery Life of Wireless Sensors?
Yes, hub placement affects battery life of wireless sensors. You’ll preserve battery by minimizing distance and wireless interference between hub and sensors. Increased range forces sensors to use higher transmit power and more retries; this drains cells faster.
Place the hub centrally, elevated, and away from metal, concrete, Wi‑Fi routers or cordless phones. Use repeaters only if needed. Monitor link quality to optimize battery preservation and consistent sensor range.
Conclusion
Place your hub centrally, off the floor, and away from metal, appliances, and dimmer-switched outlets to maximize line-of-sight and signal integrity. Use a dedicated, always-on power source and enable battery backup where available.
Keep sensors within the manufacturer’s rated distance. Add wired Ethernet or mesh repeaters for dead zones, and run the three quick signal checks regularly. Document placement and changes so you can troubleshoot range issues quickly and precisely.
Related reading: Placing Motion Sensors to Reduce False Alarms — a closer look at this topic.