Nvr Hard Drive Not Recording Troubleshooting
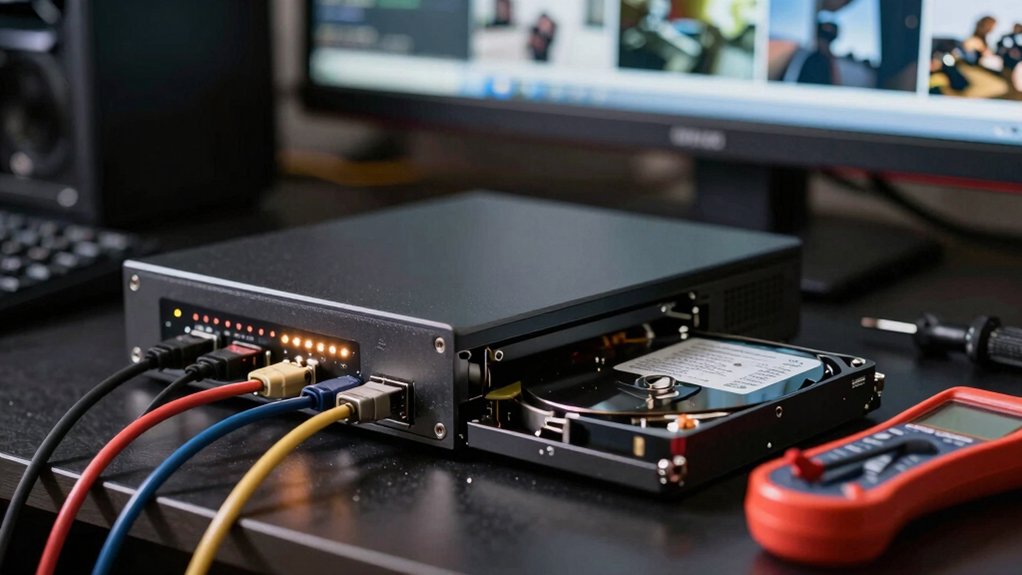
First, power-cycle the NVR and firmly reseat power/SATA and PoE cables. Loose connectors often stop recording. Confirm the drive is surveillance-grade; initialize it in Disk Management and inspect SMART for reallocated or pending sectors.
Verify NVR and camera clocks; enable NTP and save settings to prevent timestamp gaps. Check PoE budget, cable integrity, and recording schedules (continuous/motion). Set motion zones and sensitivity; then test live. Continue for step-by-step checks and fixes.
Nvr Hard Drive Not Recording Troubleshooting: First, power-cycle the NVR and firmly reseat power/SATA and PoE cables. Loose connectors often stop recording. Confirm the drive is surveillance-grade ; initialize it in Disk Management and inspect SMART for reallocated or pending sectors. Verify NVR and camera clocks; enable NTP and save settings to prevent timestamp gaps.
Quick Fixes for NVR Not Recording (Power, Cables, HDD Seating)
WONDERING WHY YOUR NVR STOPPED RECORDING? START BY CONFIRMING THE UNIT HAS STABLE POWER AND ALL CABLES ARE SECURED. INTERMITTENT POWER OR LOOSE CONNECTORS IS A FREQUENT CAUSE OF LOST RECORDINGS. POWER-CYCLE VIA AN AGREED REBOOT PROCEDURE: SHUT DOWN THE NVR, WAIT 30 SECONDS, THEN RESTORE POWER TO CLEAR TRANSIENT FAULTS BEFORE FURTHER DIAGNOSTICS.
INSPECT SATA DATA AND POWER LEADS AT THE NVR AND HDD, AND AT PoE OR CAMERA ENDPOINTS, ENSURING NO FRAYED WIRES OR LOOSE PINS. SEAT THE HDD FIRMLY IN ITS BAY AND VERIFY THE DRIVE RECEIVES POWER; SOME MODELS REQUIRE A SEPARATE POWER CONNECTOR. USE SURVEILLANCE-GRADE DRIVES (SEAGATE SKYHAWK, WD PURPLE) RATHER THAN PC DRIVES TO REDUCE WEAR AND COMPATIBILITY ISSUES.
AFTER RESEATING, ACCESS STORAGE SETTINGS TO CONFIRM THE NVR RECOGNIZES THE DRIVE. IF NOT, CONSIDER INITIALIZING A NEW DRIVE PER THE NVR’S INTERFACE. KEEP THE SYSTEM CURRENT WITH FIRMWARE UPDATE IMAGES RECOMMENDED BY THE VENDOR TO RESOLVE KNOWN STORAGE-RELATED BUGS.
Verify the HDD: Model, Initialize, and Check SMART
How can you quickly confirm the HDD is fit for surveillance duty? First, verify HDD model: check the label or NVR disk info to confirm surveillance/enterprise-grade (e.g., SkyHawk, WD Purple) rather than a desktop drive. If the model mismatches, plan replacement.
Next, initialize drive in the NVR’s disk management area following on-screen prompts. Initializing prepares partitions and file system for continuous write patterns. Do not skip this step on new disks. After initialization, inspect SMART data via the NVR interface: review reallocated sectors, pending sectors, read/write error rates, and overall health status. Note any warnings or increasing error counts.
Also, observe NVR disk status: undetected, degraded, or write/read error flags indicate connection, power, or drive failure. Confirm SATA/power cables and seating before concluding the drive is faulty. If SMART shows issues or initialization fails, replace the HDD and reinitialize drive to restore reliable recording.
Check NVR Date/Time and Critical System Settings
When did you last confirm the NVR’s system clock and related settings? Verify the NVR’s date/time values are current and saved; incorrect or unsaved changes often stop recording or disrupt scheduled tasks. Check that you clicked Apply/Save after adjustments so motion and schedule recording resume and playback timestamps align with real events.
Confirm date/time synchronization with an NTP server or authoritative source to prevent drift. Repeated resets, such as battery replacement or factory reset, can revert the clock and halt recordings until corrected. Validate system clock consistency across the NVR, each camera, and all channels to avoid gaps or mislabeling in recorded files.
After correcting the clock, test recording and playback for accurate timestamps. Monitor the clock for drift over 24 to 72 hours. If it drifts, investigate CMOS battery health and NTP configuration. Document changes and recheck after firmware updates or system resets to maintain continuous recording.
Inspect Camera Power, PoE, and Recording Schedules
If PoE cameras lose steady power or their cables aren’t fully seated, they can drop off and stop recording even though the NVR drive is fine. You’ll verify power reliability first: inspect PoE switch/NVR power supply, confirm the PoE budget meets camera wattage, and replace suspect adapters.
Check cabling integrity by reseating RJ45 connectors, testing with a cable tester, and replacing damaged runs. Next, confirm recording schedules in the NVR: verify each camera is assigned the correct mode (continuous, motion, event, alarm) and active times. Ensure NVR and cameras share correct timezone, date, and time to avoid schedule misalignment.
| Item checked | Action |
|---|---|
| PoE budget | Compare to aggregate camera draw |
| Power supply | Measure voltage under load |
| Cabling integrity | Test continuity and shield |
| Recording schedule | Validate mode and active windows |
Log findings, correct mismatches, and re-test recordings for at least one full scheduled interval.
Configure and Test Motion Detection (Zones & Sensitivity)
With power, cabling, and schedules verified, focus next on configuring motion detection so the NVR actually records movement you care about. Enable motion detection for the target camera in Camera Management, set sensitivity to approximately 80, and save. Confirm the recording schedule uses motion-detection-based recording during expected activity windows. Ensure that the correct camera is assigned to that schedule.
Open zone configuration and draw detection regions over high-activity areas. Exclude static zones that cause false positives. Apply and save zone settings to the camera. Test by simulating movement inside a configured zone while observing live view: the system should flag motion and trigger recording. If motion events don’t trigger, recheck date/time sync. Verify the motion and recording options are applied to that specific camera, and repeat the test.
Use the presence of both “motion” and “recording” indicators during live monitoring to confirm motion detection and zone configuration are functioning as intended.
Playback Checks and How to Confirm Recordings
How do you confirm an NVR actually recorded the events you expected? Open Playback and inspect the timeline: blue/green/red lines map continuous, motion, and event recordings. Match the playback date/time to the incident time; incorrect timestamps will make recordings appear missing. Verify that all configured modes (for example, night motion and day continuous) are present on the timeline. Absence indicates schedule or mode misconfiguration rather than a hard drive fault.
Remember, motion-based playback shows footage only when motion was detected; gaps are normal unless continuous or event recording was also enabled. If expected footage is missing, confirm the camera’s motion detection is enabled. The schedule includes the desired mode, and system time is correct. Avoid pursuing irrelevant topics or engaging in off-topic discussions when troubleshooting: focus on timeline indicators, detection settings, and schedule entries.
Use playback export or snapshot for evidence once recordings are confirmed.
Frequently Asked Questions
Can an SSD Reliably Replace a Surveillance HDD in My NVR?
Yes, you can use an SSD replacement in many NVRs, but weigh endurance, thermal, and cost trade-offs. You’ll confirm the NVR supports SSD interface and capacity. Then, choose a surveillance-graded or high-endurance SSD.
If you run RAID configuration for redundancy, ensure the controller handles SSDs and implements TRIM or write-optimization. Monitor wear-leveling and SMART metrics. Also, plan periodic backups to avoid data loss from unexpected SSD failures.
How Does RAID Configuration Affect NVR Recording and Drive Failure Tolerance?
RAID configuration directly determines how your NVR writes data and its drive failure tolerance. RAID considerations include the following: RAID0 boosts throughput but offers no redundancy; RAID1 mirrors for simple redundancy; RAID5/6 stripes with parity, balancing performance and redundancy. RAID6 tolerates two failures.
Choose RAID based on capacity, rebuild time, and write patterns. You will monitor SMART, stagger drives, and plan backups because RAID isn’t a substitute for backups.
Will a Firmware Update on the NVR or Cameras Fix Recording Issues?
Yes, updating NVR or camera firmware can fix recording issues, but you’ve got to be methodical. Firmware updates often resolve firmware conflicts or compatibility bugs that prevent writes.
Before you update, verify current versions, back up configs, and check release notes for fixes and known issues. Apply updates to one device at a time; watch for camera reboot loops and test recording stability.
If problems persist, roll back and contact vendor support.
Can Network Storage (NAS) Be Used Instead of the Internal HDD?
Yes, you can use NAS usage instead of the internal HDD if your NVR supports network recording (ONVIF/RTSP or vendor-specific). You’ll configure SMB/NFS or iSCSI on the NAS, map storage on the NVR, and verify bandwidth and latency.
Consider SSD replacement only if you need local high IOPS or endurance. SSD replacement improves write performance; however, it won’t help if the NVR firmware or network config blocks NAS recording.
Do Cloud Backups Work Automatically With My NVR Recordings?
Yes, cloud backups can work automatically with your NVR recordings if the NVR or connected system supports cloud services and automatic syncing. Configure the NVR to upload footage, set retention, bandwidth limits, and authentication: API keys or account credentials.
Verify event-driven versus continuous upload, encryption in transit, and storage quotas. Test uploads, monitor logs, and schedule integrity checks so your recordings are consistently and reliably synchronized to the cloud backup.
Conclusion
You’ve methodically worked through power, cabling, and HDD seating. You’ve verified drive compatibility and SMART status. You’ve confirmed the NVR’s date/time and critical settings.
You’ve inspected camera power/PoE, recording schedules, and motion detection zones and sensitivity. Then, you have validated recordings via playback. If issues persist, swap cables, test cameras directly, or temporarily install a known-good HDD.
Document each change and its result so you can escalate with precise diagnostics if needed.
Related reading: Dvr No Video Signal Troubleshooting — a closer look at this topic.