Security Camera Mount Compatibility With Junction Boxes and
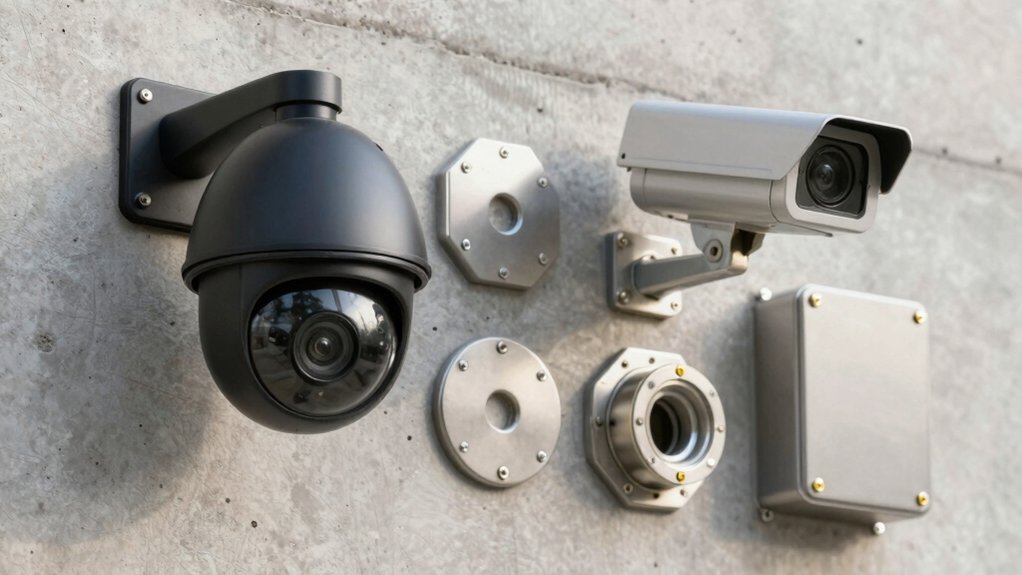
You’ll match your camera’s thread, base diameter and hole pattern to the junction box type (octagon/round) and specified adapter (e.g., ST‑GJB03‑E, ST‑GJB04‑D). Confirm box internal diameter/depth (Ø4.28″, Ø4.96″, Ø5.70″+) for connector clearance. Use M4×10mm stainless pan‑head screws and 3/4″ conduit entries.
Choose metal for tamper/weather resistance or plastic for corrosion resistance. Fit gaskets and sealant, and ensure NDAA‑compliant hardware. More detailed fitment examples and installation checks follow.
Security Camera Mount Compatibility With Junction Boxes and Adapters: You’ll match your camera’s thread, base diameter and hole pattern to the junction box type (octagon/round) and specified adapter (e.g., ST‑GJB03‑E , ST‑GJB04‑D). Confirm box internal diameter/depth (Ø4.28″, Ø4.96″, Ø5.70″+) for connector clearance. Use M4×10mm stainless pan‑head screws and 3/4″ conduit entries.
Quick Checklist to Match Camera to Junction Box
Want to ensure your camera and junction box pair correctly? Start by confirming mounting compatibility: match camera model threads and adapter plate hole patterns to the junction box (octagon or round) and specified adapters (e.g., ST-GJB03-E, ST-GJB04-D).
Verify listed camera-to-box pairings such as ST-GIP4FD-2.8, ST-GIP8FD-2.8, ST-GIP4VFTD-MZ, ST-GIP8VFTD-MZ, and ST-GIP4PTZMINI-16X with their compatible boxes and mounts. Check internal volume: select Ø4.28″, Ø4.96″, or Ø5.70″ boxes or larger models like ST-GJB04-G/ST-GJB07-C for 12MP fisheye or bullet cameras to allow cable routing and connector clearance.
Include pole, pendant, or wall adapters (ST-GWM03-A, ST-GJB05-A, ST-GPTZ-PMA) for PTZ/dome installations and NDAA-compliant hardware. Complete the process with weatherproofing steps: confirm gaskets seal conduit and adapter interfaces, torque fasteners to spec, and test ingress protection after installation.
Which Measurements Matter: Diameter, Depth, Screw Pattern
Which measurements matter most when matching a camera to a junction box? You need precise dimension compatibility: verify plate diameter (example 80mm) and entire box diameter (Ø4.28″ or Ø5.70″) so the camera base sits flush and the adapter covers cutouts. Measure total height — camera plus base — against box depth (1.42″ or 1.57″) to ensure internal clearance and avoid strain on cables.
Confirm base hole spacing and the mounting footprint; many cameras use a 70mm (2.75″) hole pattern that must align with plate drilling patterns. Check screw specifics: M4 x 10mm stainless pan head screws are standard for securing the camera to the junction box. For outdoor surface-mounts, ensure conduit entry size (3/4″ threaded) aligns with your conduit fittings.
Use calipers for accuracy, document tolerances, and compare manufacturer drawings to prevent misalignment or the need for secondary adapters.
Metal vs. Plastic Junction Boxes: Pros, Cons, Weatherproof Steps
After you’ve verified diameter, depth, and screw patterns, choose between metal and plastic junction boxes based on site demands and installation standards. You’ll favor metal when metal durability, enhanced weather sealing, and physical security matter: all-metal construction with gaskets and a 3/4″ threaded conduit connection accommodates surface-mounted conduits (e.g., AC-820WM, AC-320WM) and resists tampering and cable exposure.
Plastic boxes weigh less and resist corrosion; however, they typically offer lower impact resistance and reduced long-term weather sealing under UV and temperature cycling.
For either material, follow weatherproof steps: drill base holes to match camera screws, install adapter plates per compatibility lists, thread conduit and torque to spec, fit gaskets, and apply weatherproof caulk at contact points. Verify grounding for metal boxes and confirm screw patterns align with camera bases. Test enclosure ingress protection after installation to meet on-site environmental and code requirements.
Common Junction Box Pairings and Model-Fit Examples
How do you pick the right junction box for a given camera model and mounting scenario? You match physical dimensions, mounting bolt patterns, and compliance: Ø4.28, Ø4.96Ø4.96 and Ø5.70 dome boxes each specify compatible camera models and fit ranges. For example, ST-GJB03-E is sized for ST-GIP4FD-2.8 and ST-GIP8FD-2.8. Meanwhile, ST-GJB04-D (Ø4.96) accommodates larger domes such as ST-GIP4VFTD-MZ and ST-GIP8VFTD-MZ.
Use the 12MP Fisheye Dome Junction Box for ST-GIP12FE; don’t substitute standard domes. Bullet-specific boxes (ST-GJB05-A, ST-GJB07-C) follow different anchor patterns and internal clearances. If pole mounting is required, pair NDAA junction boxes or wall mounts with the Pole Mount Adapter suited to the ST-GJB series.
PTZ and pendant scenarios require PTZ recessed ceiling mounts, PTZ pendant mounts, or pendant mount plate adapters rated for ST-GIP4PTZMINI-16X and NDAA compliance. Avoid unrelated topic considerations like camera aesthetics when specifying mechanical fit and compliance.
Installation Checklist and Cable-Management Troubleshooting
Want a checklist that prevents weather, mounting, or cable failures before you finish the install? Start by confirming installation compatibility: verify adapter plates fit standard octagon or round electrical boxes. Confirm junction box model (ST-GJB03-E, ST-GJB04-D) matches M4 x 10mm stainless screws. Ensure conduit threads are 3/4 inch compatible with AC-820WM or AC-320WM. Use outdoor-rated silicone caulk at the box-to-wall interface for weatherproofing.
- Verify adapter plate fit and screw size; confirm junction box depth to store cables and connectors.
- Confirm conduit and camera mount threads (3/4″ where specified); test mechanical torque limits before final seal.
- Plan cable routing through the junction box to avoid sharp bends, secure strain relief, and separate power and data where standards require.
If you hit signal loss or water ingress, re-check seals. Re-route cables to reduce bend radius, and confirm internal space in the junction box for proper cable slack and strain relief.
Frequently Asked Questions
Are There Ndaa-Compliant Junction Boxes and Adapters Available?
Yes, you can source NDAA-compliant junction boxes and adapters. You’ll verify NDAA compliance by checking manufacturer documentation, part numbers, and supply-chain transparency.
For junction compatibility, confirm mounting patterns, thread types (NPT, M20), gasket ratings, and material (aluminum vs stainless) meet project specs. Also, validate firmware/hardware provenance, third-party test reports, and contract clauses. Keep records for audits and ensure procurement aligns with applicable federal standards and clauses.
Can I Use a Junction Box for Multiple Camera Brands?
Yes, you can use a junction box for multiple camera brands if the mounting pattern, conduit entry, and wiring access match. You’ll check multi brand compatibility by verifying VESA/industry hole patterns, adapter plate availability, and gasket/seal standards.
Use junction box adapters to convert hole patterns and align cable paths. Confirm load ratings and IP/IK ratings; ensure grounding and tamper requirements meet each camera’s installation spec sheet.
How Do Camera Mounting Accessories Affect Warranty Coverage?
Using non-approved mounts or adapters can void parts of your warranty, so you should verify Mount Compatibility and prescribed installation standards before fitting accessories. You’ll need to document compatibility tests, torque specs, and materials to show compliance.
Manufacturers typically specify Warranty Implications in installation guides; deviations, improper load ratings, or electrical modifications usually shift liability to you. Always obtain written approval for third-party junction boxes or adapters to preserve coverage.
Are Special Tools Required for Recessed or Pendant Adapters?
Generally, you won’t need specialty tools for recessed adapters or pendant adapters; you’ll use common electrical and mechanical tools. You’ll need screwdrivers, hex keys, and torque drivers for fastener spec compliance. Additionally, wire crimpers or ratchets for conduit connections are required.
For recessed adapters, drywall saws and flush-mounting templates help. For pendant adapters, adjustable wrenches and alignment jigs ensure load-rated installation. Always follow manufacturer torque specs and local electrical/code standards.
Can Vibration or Wind Fatigue Affect Adapter Longevity?
Yes, vibration fatigue and wind fatigue can shorten adapter life. You’ll see microcrack initiation at stress concentrators where fasteners, welds, or material transition exist. Cyclic loading from vibration accelerates fatigue. Sustained wind-induced oscillation amplifies stress ranges.
You should specify fatigue-rated materials, use proper torque, anti-vibration mounts, and periodic inspections per relevant standards (e.g., ISO 19902/ASTM fatigue guidelines) to ensure long-term structural integrity.
Conclusion
You’ve got the right idea: match diameter, depth, and screw pattern before buying a mount or adapter. Pick metal for strength or plastic for corrosion resistance depending on the environment. Follow NEMA/EN standards for outdoor sealing; use proper gaskets and silicone, and confirm cable-entry and strain relief.
Test fit with the camera and junction box models listed. Then route and secure cables to prevent pull or water ingress. Document torque and sealant specs.
Related reading: Weatherproofing Camera Junction Box and Cable Connections — a closer look at this topic.