Night Vision Blurry or Washed Out Fixes
If your night vision looks blurry or washed out, start by cleaning the lens and housing, removing dust, spiderwebs and condensation; repeat after tests. Confirm the camera is in night mode. IR LEDs are active and supply voltage matches spec to avoid dimming or flicker.
Reduce IR glare by angling the camera 15–20° downward; avoid windows and reflective surfaces. Adjust exposure, gain and WDR in firmware. Continue for targeted diagnostics and advanced fixes.
Night Vision Blurry or Washed Out Fixes: If your night vision looks blurry or washed out, start by cleaning the lens and housing, removing dust, spiderwebs and condensation; repeat after tests. Confirm the camera is in night mode . IR LEDs are active and supply voltage matches spec to avoid dimming or flicker.
Quick Overview
- Clean the lens and housing with a microfiber cloth and remove spiders, dust, and debris to eliminate smudges and obstructions.
- Verify that night mode and IR LEDs are active; ensure the supply voltage matches camera specifications to prevent IR flicker or dimming.
- Angle the camera 15–20° downward. Avoid windows or reflective surfaces to reduce IR glare and secondary reflections.
- Update firmware and adjust exposure, gain, and WDR together. This will help balance brightness, reduce noise, and improve IR consistency.
- Prevent condensation with weatherproof gaskets, desiccants, and micro-vents. Log maintenance and retest after any cleaning or replacement.
Quick Night-Vision Checks: Clean Lens, Remove Obstructions, Check Power
Where should you start when night vision looks soft or washed out? Begin with a systematic inspection: clean lens using a microfiber cloth to remove smudges and oils that scatter low-light photons and reduce contrast. Next, remove spiders, dust, and debris from the housing and verify there are no physical obstructions in the lens path that create diffraction or uneven IR reflection.
Then verify night mode is active and that IR LEDs are enabled; confirm the camera has switched from day to night under controlled low-light conditions. Measure the power supply voltage at the camera; ensure it matches specification to prevent IR flicker or dimming caused by undervoltage. Run a short test sequence across different ambient levels to confirm consistent IR illumination and proper day/night switching.
If any check fails, document the symptom, replace or clean the affected component, and re-test to isolate whether optical, electronic, or firmware factors are responsible.
Stop IR Glare and Reflections: Angle, Placement, and Enclosures
Want to eliminate IR glare and reflections quickly? Angle the camera 15–20 degrees downward to deflect IR off walls or glass and reduce backscatter. You will gain a predictable incidence geometry that minimizes direct IR return into the lens.
For placement, keep the unit away from direct contact with windows or reflective housings; internal reflections form when IR bounces between glass and the camera surface. Avoid mounting near bright light sources in the field of view, since hotspots can wash out IR footage and reduce contrast.
Survey nearby surfaces for secondary IR reflections and adjust placement or add simple shielding to interrupt unwanted paths. When viewing through glass, position the camera outside the glazing where possible, or use gallery enclosures with anti-reflective interiors to absorb stray IR.
These measures, controlled angle placement, distancing from reflective planes, and appropriate gallery enclosures, systematically eliminate glare and restore usable night-vision imaging.
Fix Camera Settings and Firmware for Better Low-Light Images
After you’ve addressed glare and reflection through angle and placement, check the camera’s internal settings and firmware to optimize low-light performance. You’ll start by verifying night firmware is current; updates often improve noise reduction and IR timing.
Next, adjust exposure time and gain together: increase exposure for brightness but limit gain to reduce noise. Tune WDR so highlights and shadows balance without amplifying grain. Check IR cut filter sensitivity to ensure seamless day and night switching and avoid color flicker during transitions.
Enable and test IR LEDs under various ambient levels, confirming consistent illumination and no intermittent cycling. Run a maintenance cycle: clean the lens, remove debris or webs, and confirm stable power to prevent flicker or IR dropout.
For systematic troubleshooting, create two word discussion ideas like “exposure matrix” and “IR consistency” to log parameter changes and results. This approach will let you quantify improvements and revert settings reliably.
Prevent Condensation and Fog: Mounting, Seals, and Ventilation
How can you stop internal fogging from degrading night images? You’ll manage condensation prevention by controlling mounting, seals, and airflow so internal optics remain dry and stable.
Mount externally with thermal buffering to minimize rapid temperature swings that trigger fogging. Use weatherproof gaskets and silica gel desiccants to absorb residual humidity and prevent micro-droplet formation on lenses and IR emitters. Implement ventilation design that permits slow pressure equalization via micro-vents while retaining ingress protection.
- Choose mounts with thermal isolation and drip shields to reduce heat transfer.
- Install high-quality O-rings and replace compromised gaskets after inspections.
- Deploy calculated desiccant capacity sized for enclosure volume and humidity.
- Add pressure-equalization or micro-vent ports positioned away from direct precipitation.
- Perform routine inspections and clean lens surfaces with a lint-free microfiber cloth.
You’ll prolong clear night imaging by combining proper mounting, tested seals, controlled ventilation, and regular maintenance to eliminate internal condensation sources.
When Simple Fixes Fail: Diagnose IR LEDs, Power, and Hardware
Even with seals, desiccants, and proper mounting keeping internal optics dry, blurry or washed-out night images can still stem from electrical and hardware faults. So next, you should systematically verify the IR illumination and power chain.
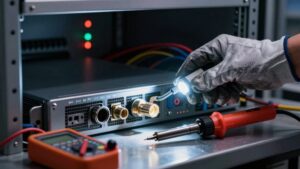
Begin night vision troubleshooting by confirming the camera is in night mode and that IR LEDs are enabled in firmware; misconfiguration can produce no IR output. Measure supply voltage at the camera under load: voltage sag or a marginal PSU will reduce IR LED drive and cause dim, washed images.
Physically inspect LEDs through the housing for dark or uneven output. Non-functioning diodes indicate assembly or drive failure. Check for internal reflections: verify lens-to-window spacing and angle, and reposition the enclosure to eliminate glow from nearby IR sources.
For IR illumination troubleshooting, log LED current and compare to spec; repeat tests at night to confirm behavior. If built-in range is inadequate, note results for planned hardware or external-illuminator upgrades.
Upgrade Options: Choosing Better Sensors, IR, or Supplemental Lighting
Want better night performance? You should evaluate upgrade sensors, IR illumination, and supplemental lighting as a coordinated system rather than isolated parts. Choose larger sensors (1/2″ or bigger) and higher resolution (4K) to capture more photons, reduce motion blur, and improve low-light detail.
Starlight or similar low-light technologies increase sensitivity when ambient light is minimal. Add external IR illuminators to eliminate hotspots and extend range beyond built-in LEDs.
AI-powered image processing and night-vision algorithms will denoise and enhance contrast; however, they rely on proper exposure and illumination.
- Upgrade sensors to larger formats and 4K resolution for better photon capture and detail.
- Use external IR illumination to provide uniform, long-range coverage without hot spots.
- Select cameras with starlight or low-light optimizations for minimal ambient scenarios.
- Incorporate AI-based processing for adaptive noise reduction and clarity.
- Hire a professional installer to position, calibrate, and synchronize sensor, IR, and lighting.
Frequently Asked Questions
How to Fix Blurry Night Vision?
Clean the lens and housing to Fix nighttime blur: you’ll remove dust, condensation, spider webs, and debris that degrade IR images.
Verify IR illumination and stable power to Restore vision and prevent flicker.
Reposition the camera 8–10 ft high, 2–3 ft from reflective surfaces, angled 15–20° down to reduce glare.
Enable WDR, update firmware, or upgrade to a higher-resolution sensor for improved low-light performance.
How to Treat Blurry Vision at Night?
Treat blurry vision at night by optimizing lighting and optics: Check your glasses prescription and update lenses if needed, since incorrect correction worsens acuity in dim environments. Reduce glare from oncoming lights and use anti-reflective coatings.
Improve night lighting contrast and avoid high-beam glare. If symptoms persist, have a comprehensive eye exam to assess cataracts, retinal issues, or rod dysfunction; adjust corrective strategy based on objective measurements.
Can You Restore Your Night Vision?
Yes, you can often restore your night vision partially or improve it considerably. You’ll optimize night vision by removing obstructions, cleaning optics, correcting focus and exposure, and aligning IR illumination.
You should update firmware, enable WDR, or upgrade sensors and add external IR illuminators. For biological vision restoration, consult an eye specialist. For cameras, these technical adjustments and hardware upgrades typically restore usable low-light performance and reduce noise.
Can Night Vision Be Corrected?
Yes, you can correct night vision. You’ll perform blurry correction and vision restoration by upgrading sensors, using AI-based image processing, and optimizing IR illumination to match camera sensitivity.
You’ll adjust mount height and angle; tweak exposure, gain, and WDR; and add external IR where needed. You’ll maintain lenses, seals, and firmware to prevent degradation. Additionally, you’ll minimize reflections and obstructions to preserve consistent, high-quality night vision.
Conclusion
You’ve run quick checks, adjusted angles to stop IR glare, tuned settings and updated firmware, addressed condensation with proper mounting and seals, and diagnosed LEDs, power, or hardware failures. If issues persist, upgrade to higher-sensitivity sensors, better IR emitters, or add supplemental lighting matched to the camera’s spectral response.
Follow systematic troubleshooting: isolate variables, measure voltages and IR output, and document changes so you can converge on a repeatable, reliable night-vision solution.
Related reading: Security Camera Condensation and Fogging Solutions — a closer look at this topic.