Network Readiness Checklist for Multiple Cameras

You’ll inventory every camera with location, model, MAC, serial and power draw. Then map ports and PoE budgets. Calculate per‑camera uplink (~3 Mbps) and downlink (~50 Mbps); reserve headroom, and set QoS to prioritize video with <75 ms latency and <1% packet loss goals.
Segment cameras on a dedicated VLAN/subnet with fixed IPs or DHCP reservations. Enforce ACLs, change defaults, and plan firmware/monitoring. Continue for step‑by‑step design, power sizing and testing guidance.
Network Readiness Checklist for Multiple Cameras: You’ll inventory every camera with location, model, MAC, serial and power draw. Then map ports and PoE budgets . Calculate per‑camera uplink (~3 Mbps) and downlink (~50 Mbps); reserve headroom, and set QoS to prioritize video with <75 ms latency and <1% packet loss goals.
Camera Network Readiness: Quick Checklist
Want to avoid dropped frames and network contention? You’ll assign each camera a dedicated bandwidth segment: plan roughly 3 Mbps uplink and 50 Mbps downlink per device. Avoid treating camera traffic as an irrelevant topic or inviting unrelated discussion that dilutes priorities.
Create a separate VLAN or network segment to isolate streams from core production traffic. Verify PoE capability and power budgets (5–30W per device) on switches; prefer long-reach PoE where needed to reuse existing cabling. Map camera placements, IP addressing, and projected growth so you don’t overload segments or run out of addresses.
Apply QoS policies to prioritize video, and monitor latency and packet loss continuously: target under 75 ms one-way latency and under 1% packet loss on the LAN. Test end-to-end stream quality before deployment and revalidate after adding devices to ensure sustained performance and to prevent contention from creeping back in.
Inventory Devices, Locations, and Power Needs
Having isolated camera traffic and validated QoS and bandwidth targets, start by creating a single, searchable inventory that lists every IP device (cameras, speakers, phones, edges), its exact physical location, and the port or switch it will attach to. You’ll record serials, MACs, model numbers, and any existing coax runs that could be reused with long-reach PoE/PoC switches. Map devices to rack, room, wall mount, or GPS point so inventory locations are unambiguous.
For each device, estimate power demands within the 5W–30W range and document PoE class or external supply needs. Use these figures for power budgeting at the switch, PDUs, and UPS levels. Flag ports requiring midspan injectors or long-reach PoE converters. Keep the inventory on a shared platform with change history and exportable reports.
Maintain a separate, physically segmented LAN for these IP devices to reduce interference and simplify troubleshooting.
Calculate Bandwidth and Codec Requirements
How much bandwidth will each camera and associated device actually need? Use point-to-point bandwidth estimation: Allocate ~3 Mbps uplink and 50 Mbps downlink per IP camera as a baseline; scale uplink for multi-camera streams. Apply a dedicated per-device approach so camera traffic stays isolated from other loads.
| Item | Typical Rate | Notes |
|---|---|---|
| Camera uplink | 3 Mbps | Baseline; increase for multi-streams |
| Camera downlink | 50 Mbps | Baseline for management/preview |
| SIP/control | 5% of voice | Signaling overhead to include |
For codec selection, choose adaptive codecs (OPUS) when supported to tolerate variable network conditions. Otherwise, provision fixed bandwidth per call (G.711, G.729, G.722). Account separately for screen sharing and additional monitors; they add substantial bandwidth beyond camera streams.
Sum per-device video, fixed-call allocations, and SIP overhead to derive peak and average requirements. Document assumptions and reserve headroom for bursts.
Design Network Segments, IP Addressing, and VLANs
Why segment camera traffic onto its own VLAN and subnet? You’ll reduce broadcast domains, contain faults, and simplify QoS and security policies by design segmentation. For example, place cameras on 192.168.120.0/24. Allocate fixed IPs or DHCP reservations per camera so streams stay stable and predictable.
- Plan VLAN tagging and a dedicated subnet: assign a camera VLAN ID and document vlan tagging rules for edge and trunk ports.
- Apply bandwidth budgeting per link: use your switch topology figures (e.g., 3 Mbps uplink per camera, 50 Mbps downlink) to prevent uplink saturation.
- Map ports to devices: record PoE-capable switch ports, port-to-camera mappings, IP, VLAN, and naming conventions in a central registry.
- Maintain address discipline: use consistent hostnames, IP ranges, and DHCP reservations to avoid conflicts and simplify troubleshooting.
Follow this methodical approach to keep camera traffic isolated, measurable, and easy to manage.
Plan PoE, Switch Selection, and Long‑Reach Options
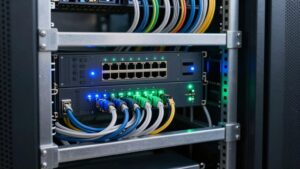
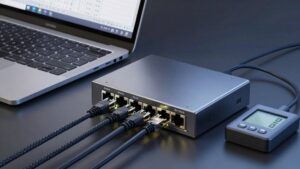
Ready to select switches and PoE options that match your cameras’ power and reach? Start by listing each camera’s power draw (within 5W–30W) and calculate total PoE budget plus margin. This planning compatibility prevents overloads as you expand. Choose switches that deliver required per-port power and aggregate budget. Specify dedicated bandwidth per device (for example 3 Mbps uplink, 50 Mbps downlink) to guarantee steady video under peak load.
Where running new Ethernet isn’t feasible, evaluate long-reach PoE/PoC switches to reuse existing coax in point-to-point links. Respect cabling constraints and avoid new IDF closets. Physically separate the IP device network from the production LAN to reduce interference and improve reliability.
Finally, prefer PoE/PoC capable switches that simplify rollout and future growth. Verify switch models support your power, reach, and bandwidth plans before procurement to ensure smooth deployment and predictable operation.
Harden Security: Access Controls, Firmware, and Secure Remote Access
Want your camera system to resist tampering and unauthorized viewing? Harden it with layered controls: separate camera VLANs, enforce ACLs to restrict which hosts can reach streams, and disable unnecessary services like UPnP and TELNET. Change default credentials to unique, strong passwords and document management accounts.
- Implement VLAN segmentation and strict ACLs to limit lateral movement and isolate camera traffic.
- Maintain a firmware inventory (version, date); verify and apply vendor updates promptly to remove known vulnerabilities.
- Enforce secure remote access via VPN or zero-trust with multi-factor authentication for all management interfaces.
- Log all camera events and access attempts to a SIEM to enable security auditing and feed incident response workflows.
You will keep a concise change log and test access controls after updates. Combine proactive patching, continuous logging, and controlled remote access so you can detect anomalies quickly and act decisively during an incident.
Test, Monitor, and Validate: Failover, QoS, and Ongoing Maintenance
Hardening access and firmware reduces attack surface, but you also need to prove the system keeps recording and delivering video under stress. You’ll run regular failover testing, targeting <1% packet loss and <300 ms RTT during switchover to backup edges. Schedule periodic drills (power loss, link failure, PoE disruption) and confirm restoration meets RTO/RPO targets.
Validate QoS configurations by measuring jitter <30 ms and ensuring video traffic is prioritized over best-effort data on all relevant VLANs and switches. Perform qos validation after any config change and document baseline metrics.
Establish end-to-end monitoring that correlates camera uptime with network latency and bandwidth. Trigger alerts when external access latency exceeds 150 ms. Coordinate proactive maintenance windows to apply firmware updates, security patches, and camera health checks without impacting coverage.
Log every test and maintenance event, review trends monthly, and iterate policies to close gaps promptly.
Frequently Asked Questions
How Do Warranties and RMA Processes Affect Long-Term Camera Network Costs?
Warranties and RMA processes lower your warranty economics risk by shifting repair and replacement costs to vendors. However, they add administrative overhead and downtime costs. You’ll optimize total cost by streamlining the RMA workflow, tracking failure rates, and enforcing SLAs to minimize replacements and service windows.
Proactive inventory of spares, clear documentation, and automated RMA ticketing cut labor costs and reduce network disruption. This improvement enhances long-term budget predictability.
Can Environmental Sensors (Temperature/Vibration) Integrate With Camera Monitoring?
Yes, you can integrate environmental sensors with camera monitoring. You’ll deploy temperature and vibration sensors, connect them via the same network or edge gateway, and map sensor data to camera events.
Configure thresholds, alerts, and correlated logging so sensor anomalies trigger camera recording or notifications. Use standardized protocols (SNMP, MQTT, REST) and ensure time synchronization, secure channels, and scalable data storage to maintain reliable, actionable camera integration.
What Licensing or Subscription Fees Apply for Nvr/Vms Features?
You’ll face subscription pricing for cloud features (storage, analytics, remote access) and perpetual or term-based licensing models for on-prem NVR/VMS. Licensing models include per-channel, per-device, feature packs, and enterprise bundles. Subscriptions often add monthly or annual costs per camera or user.
Calculate total cost of ownership by combining upfront licenses, support/maintenance fees, and recurring subscription charges. Confirm upgrade, scalability, and cancellation terms before committing.
How Do Privacy Laws Influence Camera Placement and Recording Retention?
Privacy laws limit where you place cameras and how long you keep footage. You must avoid private spaces and post notices where required. You’ll align placement with purpose, minimize capture of bystanders, and implement access controls.
For data retention, you’ll define, document, and enforce retention periods. You’ll securely delete expired footage and keep audit logs. You’ll also comply with local regulations and be ready to respond to subject access or deletion requests.
Are There Standardized Labeling and Documentation Practices for Large Camera Deployments?
Yes, you should use standardized labeling and documentation practices for large camera deployments. You’ll assign unique IDs, include location, orientation, owner, and retention policy on each label, and store those details in a centralized inventory.
You’ll track installation date, firmware, network ports, and privacy notes in versioned documentation. You’ll enforce naming conventions, regular audits, and access controls so records stay accurate, searchable, and compliant.
Conclusion
You’ve prepared a camera network that’s reliable, secure, and scalable. With inventories, power plans, bandwidth calculations, and segmented IP/VLAN designs in place, you’ll avoid common deployment pitfalls. Choose PoE-capable switches, plan long-reach links where needed, and enforce firmware, access-control, and secure remote-access policies.
Validate with QoS, failover, and monitoring tests. Schedule ongoing maintenance. Follow this checklist, and you’ll keep video availability high while minimizing disruptions and security risks.
Related: Choosing Nvr Channel Count