Outdoor Security Camera Placement for Driveway Coverage
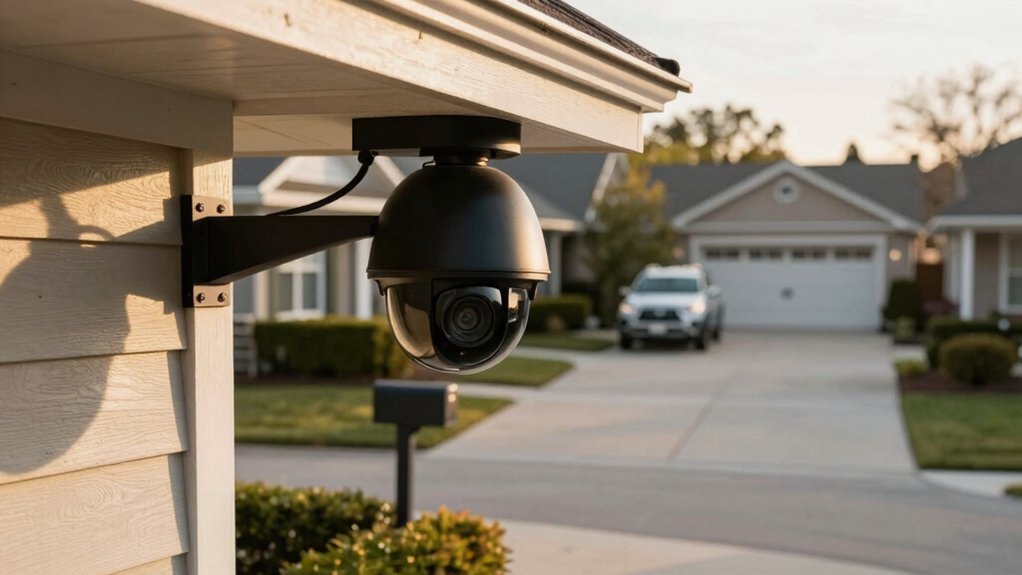
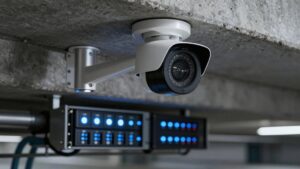
Mount your weatherproof cameras 8–10 ft high with a slight downward tilt so faces and plates stay readable while deterring tamper attempts. Use a 2.8–3.6 mm wide lens for broad situational coverage and add a narrow or PTZ unit for ID at gates or doors.
Place units at corners or along the driveway with overlapping fields of view to eliminate blind spots. Prefer PoE or stable wireless with surge protection and test signal and alignment; more setup and maintenance tips follow.
Outdoor Security Camera Placement for Driveway Coverage: Mount your weatherproof cameras 8–10 ft high with a slight downward tilt so faces and plates stay readable while deterring tamper attempts. Use a 2.8–3.6 mm wide lens for broad situational coverage and add a narrow or PTZ unit for ID at gates or doors.
Quick Overview
- Mount cameras 8–10 feet high with a slight downward tilt to capture faces and deter tampering.
- Use overlapping fields of view from corner and driveway-edge placements to eliminate blind spots.
- Choose a 2.8–3.6 mm wide-angle for situational awareness; plus a narrow/zoom or PTZ for plate/ID detail.
- Prefer wired PoE power and weatherproof (IP66+) housings; use battery/solar only if wiring isn’t feasible.
- Angle cameras to focus on drive and entry points. Avoid neighbor property and document positions for compliance.
Quick Driveway Camera Placement Checklist
Wondering where to start? Use this checklist to secure your driveway efficiently. Mount cameras 8–10 feet high to reduce tampering while keeping license plates and vehicle details readable at entry angles. Tilt cameras downward to capture approaching faces and plates; adjust angle during tests to eliminate glare and distortion.
Place units at driveway corners or along edges so views overlap. This removes blind spots and enables tracking from multiple directions. Choose a wide-angle lens (2.8–3.6mm) for broad coverage or a motorized PTZ if you need adjustable zoom for incidents. Verify outdoor weatherproof ratings, add weather-shielded mounts, and protect cabling with conduit or sealed connectors. If wireless, confirm strong, reliable links and backup power.
Balance coverage and driveway privacy by avoiding needless capture of neighbors’ property. Prioritize vandalism deterrence with visible, elevated cameras and secure mounts. Then run a final live-test walk to confirm field of view and recording quality.
Best Driveway Camera Positions
Where should you place driveway cameras to get reliable ID and full coverage? You’ll mount cameras 8 to 10 feet high to deter tampering while keeping plate and vehicle detail visible with night vision. Position units to cover the driveway approach and the street intersection with overlapping fields to eliminate blind spots. Use a wide-angle 2.8 to 3.6 mm lens for broad coverage; add a narrower lens or PTZ for targeted ID.
Angle cameras slightly downward from shaded eaves or overhangs to avoid glare and reduce direct sunlight exposure. Account for driveway lighting and minimize bright reflections. Also, plan placement to limit false triggers from wildlife interference by avoiding obvious animal paths and using detection settings.
| Position | Purpose |
|---|---|
| Overhead near garage | Broad approach coverage |
| Corner facing street | Intersection view |
| Mid-drive elevation | Mid-drive overlap |
| Side-mounted PTZ | Close-up ID option |
| Under eave, shaded | Glare control and protection |
Mounting Height & Angle for Faces and Plates
How high and at what tilt should you mount driveway cameras to reliably capture faces and license plates? Mount cameras at 8–10 feet to deter tampering while preserving facial detail at entry points. Tilt them slightly downward so the field of view covers ground near vehicles and pedestrian approaches without creating steep-angle distortion that flattens facial features or obscures plates.
Use a 2.8–3.6mm wide-angle lens for broad coverage; then fine-tune angle and position to minimize lens distortion and distance loss for plates. Place units at corners or along the driveway edge to create cross-view angles that reduce blind spots around vehicle sides and license-plate zones.
Avoid pointing into direct sunlight; select WDR-capable models or add lighting to maintain clear captures across lighting extremes. Include discussion ideas about balancing identification needs with privacy concerns: aim lenses at access paths and vehicle zones, not private windows. Document mounting choices to demonstrate responsible placement.
How Many Cameras Do You Need and Where to Place Them
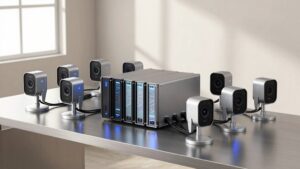
Which camera count fits your driveway depends on layout and goals: for most straight driveways, two fixed cameras—one near the entrance aimed inward and one at the far end aimed back—give continuous, overlapping coverage that eliminates blind spots and captures plates and faces at 8–10 ft.
While corner-to-corner or back-to-back arrays and an added PTZ or motorized zoom handle wider, curved, or multi-access driveways, they let you zoom in for identification when needed. You should mount cameras 8–10 ft high on corners or above entries to deter tampering and maximize plate detail.
Use overlapping fields to avoid blind spots and choose systems that scale (2, 4, 8+ cameras). Consider weatherproof housings, lens focal length, and a PTZ for targeted inspection. Also, plan network security (driveway encryption) and confirm camera warranties for long-term reliability and replacement.
Balance fixed wide-angle units for continuous coverage with one motorized head for investigative zooms when incidents occur.
- Prioritize overlapping coverage and tamper resistance.
- Select expandable NVR/DVR systems and encrypted links.
- Verify weatherproof ratings and camera warranties.
Best Camera Types for Driveways
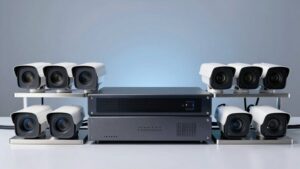
Want a driveway camera that actually captures plates and faces instead of noisy blobs? Choose cameras that balance resolution, lens choice, and mounting. Use fixed wide-angle lenses around 2.8–3.6mm to cover the approach without excessive lens distortion; they give a broad field of view yet preserve identification at moderate distances.
Mount wall units 8–10 feet high with a slight downward tilt near garage or door openings to reduce glare and deter tampering. Add a PTZ or motorized zoom as a complementary unit to acquire close-ups of plates on demand while keeping perimeter coverage steady. Position multiple cameras at entrances and staggered angles so views overlap and eliminate blind spots during approach and parking.
Prefer models with good low-light performance and reliable IR or adaptive lighting for night plate capture. Finally, plan installation with privacy considerations in mind: aim sensors to avoid neighbors’ windows and comply with local recording laws.
Weatherproofing, Power & Connectivity
Thinking about long-term reliability? You’ll pick weatherproofing-grade cameras (IP66+) and mount them under eaves or shelters to minimize direct exposure to rain, snow, and UV. That reduces maintenance and extends sensor life. For power connectivity, prioritize wired options: PoE or hardwired 12/24V runs give stable power and data over one cable. If wiring isn’t feasible, choose high-capacity battery units and add a solar panel (e.g., 10,000 mAh) for sustained, wire-free operation.
Route and conceal cables with PVC or metal conduit, or bury weatherproof-rated cable to prevent damage and tampering. Position cameras close enough to your HomeBase or hub to guarantee low-latency remote viewing; test Wi‑Fi RSSI at the mount point. Use surge protectors and grommets at entry points to preserve seals and prevent moisture ingress.
You’ll balance installation complexity against reliability. Wired PoE with protected mounts is optimal; batteries plus solar work when trenching or conduit isn’t possible.
Respecting Neighbor Privacy While Keeping Visibility
How can you keep your driveway fully monitored without capturing your neighbor’s private areas? Place cameras to cover entry points and travel paths while angling lenses away from windows and yards to mitigate privacy concerns. Mount units 8–10 feet high and orient them toward your property line; that reduces the field of view spilling onto adjacent lots.
Use multiple, focused cameras for perimeter coverage so each device monitors a specific sector rather than broad, overlapping vistas that increase neighbor impact. Install visible cameras and clear signage to deter trespassers without recording private neighbor activity. Regularly test and adjust sightlines after seasonal foliage changes, repairs, or repositioning to maintain driveway visibility and legal compliance.
Prioritize narrow-angle lenses or adjustable masks where available to crop out neighboring spaces. Document your camera orientations and adjustments; that helps address any neighbor complaints and demonstrates good-faith measures taken to balance security needs with minimization of neighbor impact and ongoing privacy concerns.
Driveway Lens & FOV: Patterns and Practical Picks
Which lens and field-of-view you choose will determine whether your driveway coverage is complete or full of blind spots. You’ll follow driveway protocols that prioritize overlap, elevation diversity, and minimal lens limitations. Use back-to-back or corner-to-corner patterns to create overlapping FOVs so every approach and sidestep path has at least two views.
Select a 2.8mm wide-angle lens for broad situational awareness; swap to a narrower, higher-resolution lens for gate or door detail. Mount cameras 8–10 feet high with a slight downward tilt to reduce glare and improve license-plate and facial readability.
Position cameras on multiple elevations and angles to deter tampering while maintaining ID-level detail.
- Overlap FOVs to eliminate blind spots and allow cross-verification of events.
- Combine wide-angle and narrow lenses where distance and detail requirements differ.
- Implement down-tilt and height standards (8–10 ft) to balance visibility and security.
DIY vs Pro Installation and Testing/Maintenance
Now that you’ve planned lens types, FOV overlap, and mounting heights, decide whether you’ll install the system yourself or hire a pro. Both paths can yield reliable driveway coverage but require different preparations. DIY installation is feasible for many homeowners; wireless options like the Botslab W510 reduce drilling and cabling. However, you still must plan locations, mount at 8–10 feet, and confirm strong Wi‑Fi for remote viewing. Use tamper‑resistant hardware and weatherproof cameras to resist vandalism and elements.
Whether DIY or pro, apply clear testing methods: verify alignment, confirm signal and live video via the HomeBase/app, and adjust IP settings before finalizing. For maintenance, schedule cleaning, inspect weather seals, update the Botslab app, and reassess camera positions after landscaping changes. If you lack time or networking confidence, hire a pro to ensure optimum placement, secure mounting, and thorough testing. Otherwise, follow the checklist and you’ll achieve dependable driveway coverage.
Frequently Asked Questions
Do Driveway Camera Recordings Count as Legal Evidence in Court?
Yes, your driveway camera recordings can serve as legal evidence. However, legal admissibility depends on factors like chain of custody, timestamp integrity, audio consent laws, and whether footage was altered.
You should preserve original files, document transfer, avoid editing, and note device settings. Courts will assess relevance, authenticity, and potential privacy violations.
Consult local law or an attorney to confirm compliance with jurisdictional rules before relying on footage as driveway evidence.
Do Cameras Increase Homeowner Insurance Discounts?
Yes, cameras can lower premiums, but savings vary. You’ll typically qualify for insurance discounts when you install monitored or professionally linked systems that reduce theft or vandalism risk.
Check policy specifics because insurers weigh camera type, monitoring, and documentation. Also, consider legal considerations: you’ll need to avoid privacy violations and preserve footage integrity for claims. Keep records, timestamping, and secure storage to maximize discount eligibility and claim reliability.
Yes, you can securely share motion alerts with neighbors. Use camera systems that support encrypted notification links, granular access controls, and temporary sharing tokens.
Configure event-based sharing so only motion alerts are forwarded; not continuous streams. Enable two-factor authentication and audit shared accesses. Prefer platforms offering end-to-end encryption and per-event permissions. That way, you’ll maintain privacy, limit exposure, and keep neighbor sharing strictly controlled and revocable.
How Do Solar-Powered Cameras Perform in Winter?
Solar-powered cameras perform more slowly in winter: reduced sunlight and cold temps cut solar winter performance, and you’ll face battery charging limitations.
You should expect shorter run times, more frequent brownouts, and slower recharge during overcast days. Mitigate issues by tilting panels toward lower sun angles, using larger panels or higher-capacity batteries rated for cold, enabling low-power modes, and positioning units where reflected light and midday sun maximize charging.
Are There Vandal-Resistant Housings or Cages Available?
Yes, you can buy vandal resistant housings and cages that protect cameras from impact, tampering, and theft. You’ll choose metal or polycarbonate housings rated IK10 and IP66/IP67 weatherproof enclosures to resist blows and water ingress. Mounts include tamper-proof screws, locking domes, and pole or wall brackets with concealed wiring.
Install at reachable heights for service, but out of easy grab range. Test camera angles after fitting.
Conclusion
Use this checklist to make purposeful choices: Place a primary camera low on a garage or post (4–6 ft) angled for license plates. Add an overhead or side camera for approach and facial ID. Cover blind spots with a wide-FoV unit.
Prioritize weatherproofing, wired power or reliable solar/PoE, and secure network settings. Respect neighbors’ privacy by angling cameras away from adjacent properties. Test and adjust angles; schedule seasonal maintenance for consistent, legal coverage.
Related: Camera Coverage Planner Calculator Field of View Distance